
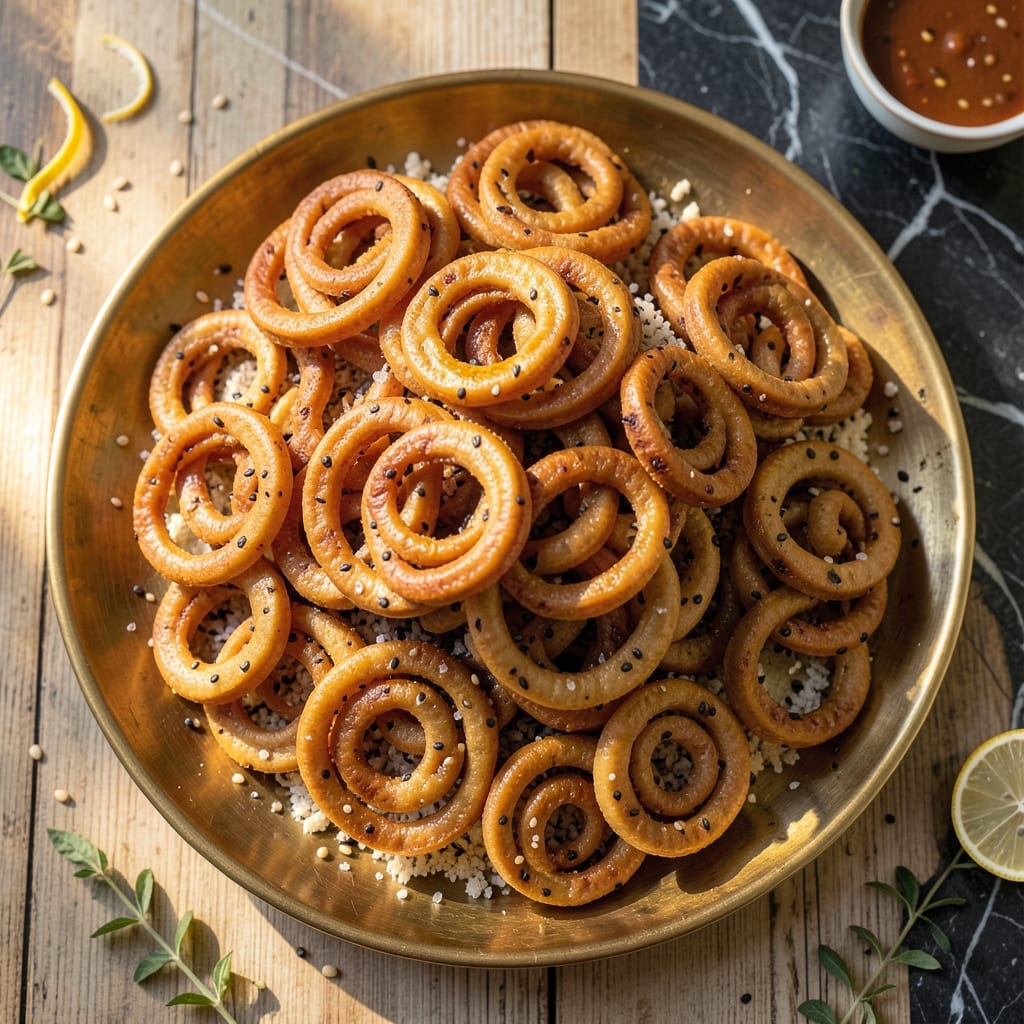
This traditional South Indian snack brings the perfect crunch to any occasion. The combination of rice flour and urad flour creates a base that fries up crispy and golden, with just the right amount of density to hold its spiral shape.
I’ve refined this method to ensure consistent results every time—proper dough hydration is key. The batter should be smooth and pliable, firm enough to hold its form when piped through a murukku press. Don’t rush the resting step; it relaxes the gluten for easier shaping.
Frying at the right temperature ensures even cooking without excessive oil absorption. The murukku should sizzle gently as it enters the oil, turning a light golden brown in under 3 minutes per batch. Drain on paper towels to preserve that satisfying snap.
Serve as a tea-time treat or festive offering. This recipe stays true to tradition while being accessible for home kitchens.
Ingredients for Murukku Recipe with Rice Flour and Urad Flour
Traditional flours and spices come together for this authentic spiral snack with perfect crunch.
| Ingredient | Amount | Notes |
|---|---|---|
| Rice Flour 🌾 | 2 cups | Fine, store-bought or homemade |
| Urad Flour 🌾 | ½ cup | Black gram dal flour |
| Water 💧 | 1 ¼ cups | Room temperature for dough |
| Salt 🧂 | 1 tsp | Adjust to taste preference |
| Cumin Seeds 🌿 | 1 tsp | Lightly crushed for flavor |
| Sesame Seeds 🌻 | 1 tsp | White or black variety |
| Asafoetida 🌶️ | ¼ tsp | Optional, for authentic taste |
| Red Chili Powder 🌶️ | ½ tsp | Adjust for heat level |
| Vegetable Oil 🫒 | 4 cups | For deep frying, neutral flavor |
| Curry Leaves 🍃 | 10 pieces | Fresh or dried, chopped |
| Butter 🧈 | 1 tbsp | Vegan butter for dough softness |
The rice flour base is non-negotiable for authentic texture. Indian grocery stores like Patel Brothers carry both rice and urad flour in bulk—look for fine, fresh batches. Urad flour (black gram dal flour) adds the signature density; don’t substitute with regular lentil flour. Asafoetida, available at specialty spice shops, brings that unmistakable South Indian aroma. The cumin and sesame seeds should be fresh—old spices lose their punch fast.
No urad flour? Split black gram dal soaked and ground fine works in a pinch (use half the amount of dried dal). For heat, swap red chili powder with cayenne at half the quantity. Skip the curry leaves if unavailable, but they add depth. The oil must be neutral—sunflower or peanut oil are great alternatives to vegetable oil. Butter can be replaced with coconut oil for a dairy-free version.
Store flours in airtight containers in a cool, dark place—they keep for 3-6 months. The dough can rest in the fridge for up to 24 hours before shaping. Fried murukku stays crisp in airtight containers for 2 weeks at room temperature. Reheat briefly in a dry pan if they lose their snap.
Why You’ll Love This Recipe
- One Bowl Wonder: I just mix rice flour, urad flour, water, and a pinch of salt—no fancy steps, no fuss.
- Crunchy Perfection: The cumin seeds add this warm, earthy kick that makes every bite irresistibly crispy.
- Festival Ready: Honestly, it’s my go-to for Diwali, birthdays, or even just a regular snack craving.
- Budget Friendly: A handful of pantry staples, and I’ve got a big batch of murukku that lasts for days.
Step-by-Step Instructions for Murukku With Rice Flour and Urad Flour
Here is the method to achieve perfectly crispy spirals with traditional technique and timing.
Step 1: Prepare the Spiced Dough
In a large mixing bowl, combine the 2 cups Rice Flour and 0.5 cup Urad Flour with the 1 tsp Salt, 1 tsp Cumin Seeds, 1 tsp Sesame Seeds, 0.25 tsp Asafoetida, and 0.5 tsp Red Chili Powder. Stir until all dry ingredients are evenly distributed.
Gradually add the 1.25 cups Water and 1 tbsp Butter, mixing with your fingers to form a smooth, pliable dough. The dough should be firm but not sticky—if it feels too dry, add water 1 teaspoon at a time. Cover and let rest for 15 minutes to allow the flours to hydrate fully.
Step 2: Heat the Oil to the Right Temperature
Pour the 4 cups Vegetable Oil into a deep, heavy-bottomed pan and heat over medium heat until it reaches 350-375°F. To test without a thermometer, drop a small piece of dough into the oil—it should rise immediately and sizzle vigorously.
Maintain this temperature throughout frying. If the oil smokes or the dough browns too quickly, reduce the heat slightly. Consistent temperature ensures even cooking and that signature crisp texture. Add the 10 pieces Curry Leaves to the hot oil just before frying for added aroma.
Step 3: Shape and Fry the Murukku Spirals
Divide the dough into small lemon-sized portions. Using a murukku press fitted with a star disk, press the dough directly into the hot oil in a circular motion to form spirals. Alternatively, roll portions into ropes and shape spirals by hand.
Fry 3-4 spirals at a time to avoid overcrowding, which lowers oil temperature. Cook for 2-3 minutes per side until golden brown and crisp throughout. Use a slotted spoon to turn them gently, ensuring even browning on both sides.
Step 4: Drain and Cool for Maximum Crispiness
Once the murukku turn a deep golden brown and the sizzling subsides, remove them from the oil with a slotted spoon. Transfer to a wire rack or paper towel-lined plate to drain excess oil. This step prevents sogginess.
Allow the murukku to cool completely for 10-15 minutes before storing. They will crisp up further as they cool. Store in an airtight container once fully cooled to maintain freshness and crunch for up to 2 weeks. The curry leaves in the oil will infuse additional flavor during frying.
Pro Tips For Making Murukku Recipe With Rice Flour And Urad Flour
- Roast the flours: Dry roast the rice and urad flour separately on medium-low heat until lightly golden and aromatic—I learned this the hard way after my first batch tasted raw. About 3-4 minutes per flour does the trick.
- Warm the water: Use warm water (not hot) to mix the dough. Sounds weird, but it works: the flours absorb it more evenly, and your murukku will hold its shape better when piping.
- Rest the dough: After mixing, let the dough sit covered for at least 15 minutes. My grandmother swore by this, and she was right: it makes the dough smoother and easier to press through the murukku mold.
- Maintain oil temp: Keep the oil at medium heat—if it’s too hot, the murukku will brown too fast and stay raw inside. After burning three batches, I finally figured out that a small piece of dough dropped in should rise slowly, not immediately.
Best Sauces and Condiments for This Dish
Coconut Chutney
This classic South Indian dip is my top pick for balancing murukku’s crispiness. Blend 1 cup fresh coconut, ½ cup yogurt, 2 green chilies, and 1-inch ginger with salt. Temper with mustard seeds and curry leaves in hot oil for extra depth. The cool creaminess contrasts the crunch perfectly. 💛
Tomato Onion Chutney
A tangy-sweet chutney made with 3 ripe tomatoes, 1 onion, and 1 tsp tamarind paste complements the savory notes. Sauté until caramelized, then blend with ½ tsp red chili powder and a pinch of salt. I love the vibrant color it adds to the table.
Mint Coriander Dip
For a fresh twist, blend 1 cup mint leaves, ½ cup cilantro, 1 tbsp lemon juice, and 1 green chili with ¼ cup yogurt. The bright, herbaceous flavor cuts through the richness. Serve chilled for maximum refreshment.
Spicy Tamarind Chutney
This sweet-spicy chutney elevates the snack. Simmer ½ cup tamarind pulp with ¼ cup jaggery, ½ tsp cumin powder, and ½ tsp red chili powder until thick. The tangy-sweet glaze clings beautifully to each spiral.
Yogurt Raita
Beat 1 cup thick yogurt with ½ tsp roasted cumin powder, salt, and 2 tbsp grated cucumber. The mild, creamy dip balances the heat from any chili in your murukku. I often add a pinch of chaat masala for extra zing.
Nutrition Facts
Frequently Asked Questions
Can I make this without a murukku press?
Yes, you can shape the dough by hand. Roll small portions into ropes and form spirals manually. The press makes it easier, but hand-shaped murukku still turns out crispy and delicious!
Why did my murukku turn out hard?
This usually happens if the dough is too dry or overworked. Ensure you add water gradually to achieve a smooth, pliable consistency. Resting the dough for 15 minutes also helps relax the flours.
How do I store leftover murukku?
Once completely cooled, store in an airtight container at room temperature. They stay crisp for up to 2 weeks. If they soften, briefly reheat in a dry pan to restore crunch.
Can I use roasted rice flour?
It’s best to use regular rice flour for authentic texture. Roasted flour can alter the taste and may make the dough too dry. Stick to fine, unroasted rice flour for the best results.

- Mujadara Rice and Lentils Recipe: Earthy Spiced Lentils With Caramelized Onions - November 1, 2026
- Naija Fried Rice Recipe: Street-Style Spice With Veggie Crunch - November 1, 2026
- Mushy Rice Recipe: Fluffy Grains Transformed in Minutes - November 1, 2026