
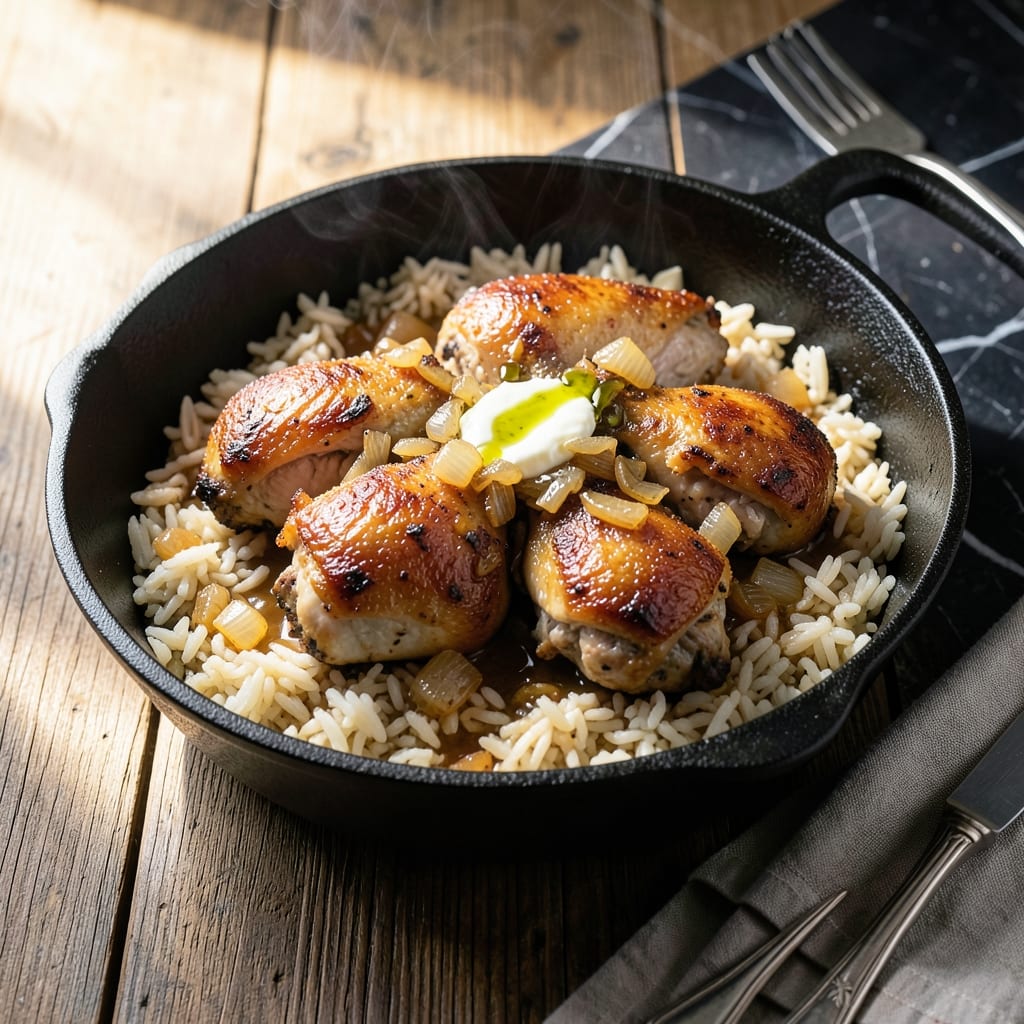
This one-pot method delivers crispy chicken with a golden crust and perfectly fluffy rice every time. I developed this technique after years of experimenting with stovetop cooking methods.
The key is searing the chicken first to create that shatteringly crispy skin, then using the rendered fat to toast the rice. This builds layers of flavor in the same pot without extra dishes.
What you get is tender chicken with a deep golden crust atop rice that’s light, separate, and infused with savory notes. The entire dish comes together in one vessel with minimal active cooking time.
After mastering the timing and temperature control, I found this method works with any cut of chicken. Here’s how to make it at home.
Ingredients for One Pot Crispy Chicken and Rice
Simple ingredients deliver that signature crispy chicken and perfectly fluffy rice in one pot.
| Ingredient | Amount | Notes |
|---|---|---|
| Chicken Thighs 🍗 | 2 lb | Bone-in, skin-on for crispiness |
| Long-Grain White Rice 🍚 | 1 ½ cups | Uncooked, rinsed before use |
| Chicken Broth 🍲 | 2 ½ cups | Low-sodium preferred for control |
| Olive Oil 🫒 | 2 tbsp | Extra-virgin for best flavor |
| Unsalted Butter 🧈 | 2 tbsp | For finishing rice |
| Yellow Onion 🧅 | 1 whole | Medium-sized, finely diced |
| Garlic Cloves 🧄 | 4 cloves | Minced for maximum flavor |
| Dried Thyme 🌿 | 1 tsp | Crushed between fingers |
| Dried Rosemary 🍃 | 1 tsp | Crushed for better release |
| Bay Leaf 🌿 | 1 whole | Removed before serving |
| Kosher Salt 🧂 | 1 ½ tsp | Divided for seasoning layers |
| Black Pepper 🌶️ | ½ tsp | Freshly ground preferred |
| Fresh Parsley 🌿 | ¼ cup | Chopped, for garnish |
| Lemon 🍋 | 1 whole | Zested and juiced for brightness |
The chicken thighs are non-negotiable for that crispy skin—bone-in, skin-on gives you the shatteringly crisp crust mentioned in the intro. Costco often has high-quality, air-chilled thighs that render fat beautifully. For the rice, jasmine or basmati work as well as long-grain white, but avoid instant rice. The broth should be low-sodium so you can control the seasoning precisely.
No fresh herbs? Dried at one-third the amount works fine—just add them earlier in the cooking process. If you’re missing thyme or rosemary, Italian seasoning can pinch-hit. For extra depth, a splash of white wine (about 1/4 cup) deglazes the pan beautifully. The lemon zest is optional but adds brightness that cuts through the richness (worth the extra minute).
Leftovers keep 3-4 days in the fridge, though the skin loses crispness. Reheat gently in a skillet to revive the crust. The rice actually tastes better the next day as it absorbs more flavor. Freezes well for up to 3 months if you remove the skin first (it gets chewy).
Why You’ll Love This Recipe
- One Pan Magic: I throw everything in, let it sizzle, and the butter and broth do all the work for me.
- Crispy Perfection: That golden crust on the chicken thighs with the creamy rice underneath? Ridiculously good.
- Weeknight Hero: Between us, this is my Tuesday night secret weapon when time’s tight but we still want real food.
- Budget Stretcher: Honestly, chicken thighs and pantry staples feed my family for two meals without breaking the bank.
Step-by-Step Instructions for One Pot Crispy Chicken and Rice
This method ensures golden chicken skin and perfectly fluffy rice with minimal cleanup.
Step 1: Sear the Chicken Thighs to Golden Perfection
Pat the 2 lb Chicken Thighs completely dry with paper towels—this is essential for achieving crispy skin. Season both sides generously with 1 tsp Kosher Salt and 0.5 tsp Black Pepper from your total amounts.
Heat the 2 tbsp Olive Oil in a large, deep skillet or Dutch oven over medium-high heat until shimmering. Add the chicken thighs skin-side down and cook undisturbed for 6-7 minutes until the skin is deep golden brown and crispy. The skin should release easily from the pan when ready to flip.
Flip the thighs and cook for another 4-5 minutes until the meat is nearly cooked through. Transfer to a plate and set aside, leaving all the rendered fat in the pan for maximum flavor.
Step 2: Sauté Aromatics and Toast the Rice
In the same pot, reduce heat to medium and add the diced 1 whole Yellow Onion. Cook for 3-4 minutes until softened and translucent, stirring occasionally to prevent burning.
Add the minced 4 cloves Garlic Cloves, 1 tsp Dried Thyme, and 1 tsp Dried Rosemary. Stir constantly for 30 seconds until the mixture becomes fragrant—be careful not to let the garlic burn.
Pour in the 1.5 cups Long-Grain White Rice and stir to coat every grain in the aromatic oil. Toast for 1-2 minutes until the rice turns slightly opaque and begins to smell nutty. This step ensures the grains stay separate and don’t turn mushy.
Step 3: Deglaze and Simmer with Chicken
Pour in the 2.5 cups Chicken Broth and add the 1 whole Bay Leaf. Use a wooden spoon to scrape up all the browned bits from the bottom of the pan—this builds incredible depth of flavor.
Nestle the chicken thighs skin-side up into the rice mixture. Add the zest from the 1 whole Lemon and 0.5 tsp Kosher Salt from your remaining amount. Bring to a gentle boil, then reduce heat to low, cover, and simmer for 20-25 minutes.
Resist the urge to peek during cooking—the trapped steam is what cooks the rice to fluffy perfection. The liquid should be fully absorbed and the chicken should reach 165°F internally when done.
Step 4: Finish with Butter and Fresh Elements
Remove the pot from heat and let it sit covered for 5 minutes. This resting period allows the rice to steam and absorb any remaining liquid. Remove and discard the bay leaf.
Stir in the 2 tbsp Unsalted Butter and juice from the 1 whole Lemon until the butter melts and the rice glistens. The butter adds richness while the lemon juice brightens all the flavors.
Garnish with the chopped 0.25 cup Fresh Parsley and serve immediately. The chicken skin should remain crispy, and the rice should be light and fluffy with each grain distinct. The lemon and parsley add freshness that balances the richness of the dish.
Pro Tips For Making One Pot Crispy Chicken And Rice
- Pat the Chicken Dry: Use paper towels to thoroughly dry the chicken thighs before seasoning—this guarantees crispy skin that actually stays crispy. I learned this the hard way after my first three attempts turned out soggy.
- Brown the Chicken First: Sear the thighs skin-side down in olive oil and butter for 6-7 minutes until deep golden. Sounds obvious, but skipping this step means bland rice and pale, flabby chicken.
- Use Room-Temp Broth: Pour in chicken broth straight from the fridge and the rice will take forever to cook. Let it sit out for 10 minutes—I know, I know, but it actually changes the outcome.
- Resist Stirring the Rice: Once the rice is in, leave it alone for at least 15 minutes. Stirring releases starch and turns the bottom into mush instead of that coveted crispy crust.
Serving Suggestions for Leftovers
Family-Style Presentation
Serve this directly from the pot at the table for a cozy, communal feel. The golden chicken thighs atop fluffy rice make a stunning centerpiece. I love using my vintage cast iron for this—the presentation is unbeatable. 💛
Garnish for Freshness
A sprinkle of chopped Fresh Parsley and a squeeze of lemon juice right before serving brightens every bite. The acid cuts through the richness beautifully. Add lemon zest for extra pop.
Side Pairings
A simple green salad with a light vinaigrette balances the dish perfectly. I often serve with roasted broccoli or sautéed green beans for color contrast. Keep sides simple to let the main dish shine.
Bread for Soaking
Crusty sourdough bread or warm dinner rolls are perfect for soaking up any extra juices. My Georgia grandmother always served hers with buttermilk biscuits—a Southern staple.
Plating for Guests
For individual servings, spoon rice onto plates and top with 1-2 chicken thighs. Drizzle pan juices over the top. Garnish with extra Fresh Parsley and a lemon wedge on the side. 🌟
Wine Pairing
A crisp Sauvignon Blanc or light Pinot Noir complements the dish beautifully. The acidity in white wine cuts through the richness, while Pinot Noir’s earthiness pairs well with the herbs.
Nutrition Facts
Frequently Asked Questions
Can I use chicken breasts instead of thighs?
Thighs are ideal for crispy skin, but breasts work if you prefer. Sear for 5-6 minutes per side to prevent drying out. The skin won’t crisp as well, so finish under the broiler for 2-3 minutes.
What if my rice turns out mushy?
Likely overcooked or not toasted enough. Toast rice until nutty and fragrant before adding liquid. Use exactly 2.5 cups broth for 1.5 cups rice, and resist peeking during simmering.
Can I make this ahead of time?
Cook and store separately in the fridge for up to 3 days. Reheat chicken in a skillet to restore crispiness, then combine with warmed rice. The skin may soften, but a quick sear revives it.

- Jollof Rice Sauce Recipe: West African Tomato and Spice Infusion - September 25, 2026
- Japanese Rice Soup Recipe: Umami-Rich Comfort in a Bowl - September 25, 2026
- Homemade Cream Of Rice Recipe: Silk-Smooth Breakfast in Minutes - September 25, 2026