
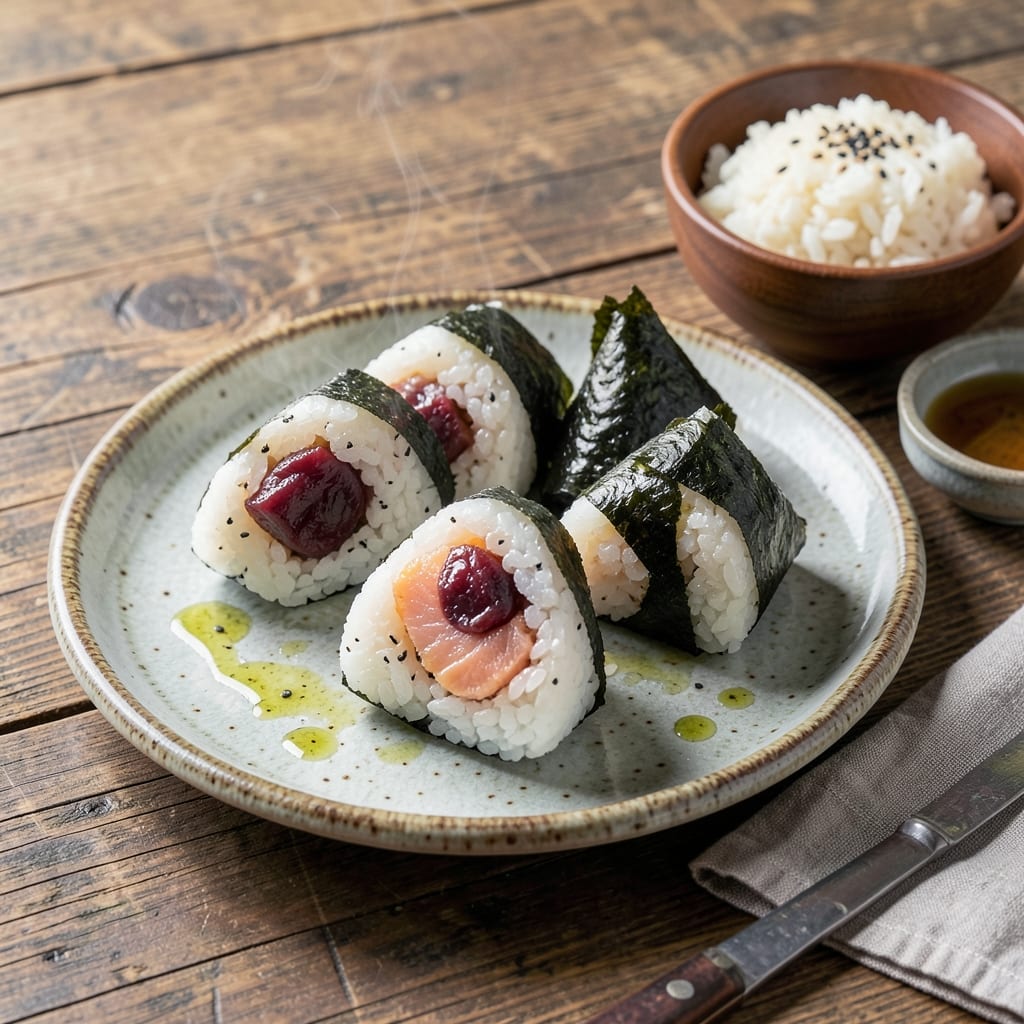
There’s a quiet joy in shaping warm rice into triangles, a ritual that turns simple ingredients into pure comfort food. This Japanese classic relies on perfect seasoning and texture—sticky enough to hold its shape yet tender inside.
I’ve refined the rice-to-water ratio and salting technique to ensure each bite delivers that signature balance. The fillings transform it: pickled plum for tang, salmon for richness, or tuna-mayo for creaminess.
Traditional nori strips wrap each piece, adding a subtle oceanic note. The beauty lies in its simplicity—no fancy tools, just your hands and a bowl of freshly cooked rice.
Serve warm or at room temperature. The process is meditative, the result deeply satisfying.
Ingredients for Onigiri Rice
Simple pantry staples plus a few specialty items create this comforting Japanese classic with endless filling options.
| Ingredient | Amount | Notes |
|---|---|---|
| Japanese Short-Grain Rice 🍚 | 2 cups | Sushi rice or calrose variety |
| Water 💧 | 2 ½ cups | For cooking rice |
| Sea Salt 🧂 | 1 tsp | Fine grain preferred |
| Rice Vinegar 🍯 | 1 tbsp | Seasoned or unseasoned |
| Pickled Plum 🟣 | 4 pieces | Pitted and chopped |
| Canned Salmon 🐟 | ½ cup | Drained and flaked |
| Mayonnaise 🥛 | 2 tbsp | For tuna-mayo filling |
| Canned Tuna 🐟 | ½ cup | Drained and flaked |
| Nori Seaweed Sheets 🌊 | 2 sheets | Cut into strips for wrapping |
| Sesame Seeds 🌰 | 1 tsp | Toasted for garnish |
| Soy Sauce 🫒 | 1 tsp | Optional for seasoning fillings |
The rice is non-negotiable—Japanese short-grain sushi rice is essential for that sticky texture that holds shape. Nishiki or Koshihikari brands are reliable and widely available at Asian markets or the international aisle. For the fillings, pickled plum (umeboshi) adds authentic tang, while canned salmon and tuna offer protein-rich alternatives. Look for wild-caught varieties for optimal flavor.
No pickled plum? Salted lemon zest offers a similar bright contrast. For a vegetarian option, swap salmon for toasted sesame seeds mixed with miso paste. The nori can be replaced with thin cucumber strips if unavailable. Mayonnaise is optional but adds creaminess—Kewpie or vegan mayo work equally well for binding.
Cooked rice stays fresh for 1-2 days at room temperature or 3 days refrigerated. Nori sheets lose crispness quickly, so store in an airtight container with a silica packet for up to 1 month. Assemble onigiri just before serving for best texture and flavor.
Why You’ll Love This Recipe
- One Hand Wonder: I shape these while my coffee brews—just rice, salt, and a little vinegar in the palm of my hand.
- Tangy Surprise: That pickled plum tucked inside? The salty-sour punch against the warm rice is ridiculous.
- Lunchbox Hero: Honestly, they’ve saved me at 7 a.m. more times than I can count—portable, neat, and kid-approved.
- Penny Wise: A two-dollar bag of short-grain rice makes a dozen, and leftovers taste just as good the next day.
Step-by-Step Instructions for Onigiri Rice
Master the technique to create perfectly shaped rice triangles with flavorful fillings.
Step 1: Cook and Season the Rice Base
Rinse the 2 cups Japanese Short-Grain Rice under cold water until the water runs clear. This removes excess starch and prevents gummy rice. Drain thoroughly, then combine with the 2.5 cups Water in a rice cooker or heavy pot.
Cook according to standard rice cooker instructions or simmer covered for 15-20 minutes until the water is absorbed. Once done, let it sit covered for 10 minutes. Transfer the hot rice to a wide bowl and gently fold in the 1 tsp Sea Salt and 1 tbsp Rice Vinegar using a rice paddle or silicone spatula. The rice should be sticky but not mushy, with each grain distinct. Allow it to cool slightly until warm to the touch but not hot.
Step 2: Prepare the Fillings
For the pickled plum filling, chop the 4 pieces Pickled Plum into small pieces, removing pits if necessary. For the salmon filling, flake the 0.5 cup Canned Salmon and mix with 1 tsp Soy Sauce for added depth. For the tuna-mayo filling, combine the 0.5 cup Canned Tuna with the 2 tbsp Mayonnaise until evenly incorporated. Each filling should be cohesive enough to hold its shape when placed in the rice.
Divide each filling into 4 equal portions to match your servings. Keep them separate until ready to assemble. The fillings should be flavorful but not overpowering, complementing the subtle taste of the seasoned rice.
Step 3: Shape the Onigiri
Wet your hands with water and rub a pinch of the 1 tsp Sea Salt between your palms to prevent sticking. Take about ½ cup of the warm rice in one hand and create a small well in the center. Place one portion of your chosen filling in the well, then cover it completely with more rice, pressing gently to enclose.
Shape the rice into a triangle by cupping it with both hands and applying even pressure. Rotate the onigiri as you shape to ensure all sides are uniform. The finished piece should hold its shape without cracking, with the filling completely enclosed. Repeat with the remaining rice and fillings to make 4 onigiri.
Step 4: Wrap and Finish
Cut the 2 sheets Nori Seaweed Sheets into thin strips, about ½ inch wide. Wrap one strip around the base of each onigiri, pressing gently to adhere. The nori should encircle the triangle neatly, leaving the top exposed.
Sprinkle the 1 tsp Sesame Seeds over the exposed rice or press them lightly onto the nori. The nori will soften slightly from the warmth of the rice, creating a pleasant contrast in texture. Serve the onigiri at room temperature, with the fillings peeking slightly from the bottom to hint at the flavors within.
Pro Tips For Making Onigiri Rice
- Rinse the Rice: Wash the short-grain rice under cold water until the water runs nearly clear—this removes excess starch so your onigiri holds its shape instead of turning mushy.
- Use Warm Water: Soak the rice in warm water for 20-30 minutes before cooking. I learned this the hard way—cold water soaking leads to uneven cooking and grainy texture.
- Salt Your Hands: Dampen your hands with water and rub a pinch of sea salt on them before shaping the rice; it prevents sticking and adds a subtle seasonal layer.
- Rest Before Shaping: Let the cooked rice sit covered for 10 minutes off the heat. After burning a few batches, I finally figured out this step keeps the grains firm enough to handle without falling apart.
Wine and Beer Pairings for onigiri rice
Japanese Beers
Light, crisp lagers like Sapporo or Asahi complement the subtle rice flavor without overwhelming the fillings. Their clean finish cleanses your palate between each bite. I love the effervescence cutting through the richness of salmon or tuna fillings. 🍺
Sake Pairings
A chilled junmai ginjo sake offers floral notes that enhance the umami in nori and pickled plum. For warmer weather, try a lightly sparkling nigori sake—its creamy texture mirrors the rice’s stickiness.
Green Tea
For a non-alcoholic option, sencha or matcha provides a refreshing contrast to the savory fillings. The slight bitterness balances the saltiness of the rice. I prefer gyokuro for its deeper, sweeter profile.
Wine Options
A dry Riesling with its crisp acidity pairs surprisingly well with the vinegared rice. For red wine lovers, a light Pinot Noir won’t overpower the delicate flavors. Serve both slightly chilled for best results. 🍷
Craft Alternatives
Try a yuzu-infused wheat beer for citrus notes that echo the pickled plum. A shochu highball with grapefruit offers a refreshing, low-alcohol option perfect for warm days.
Nutrition Facts
Frequently Asked Questions
Why do I need to use short-grain rice?
Short-grain rice has a higher starch content that makes it sticky when cooked. This stickiness is essential for holding the onigiri shape together. Long-grain varieties won’t work as they stay separate when cooked.
How do I keep the rice from sticking to my hands?
Wet your hands with water and rub a pinch of salt between your palms before handling. Re-wet as needed while shaping. This creates a barrier that prevents sticking without altering the rice flavor.
Can I make onigiri ahead of time?
Yes, but assemble them 1-2 hours before serving for best texture. Store unassembled rice at room temperature and fillings separately in the fridge. Shape and wrap just before eating to maintain freshness.

- Jollof Rice Sauce Recipe: West African Tomato and Spice Infusion - September 25, 2026
- Japanese Rice Soup Recipe: Umami-Rich Comfort in a Bowl - September 25, 2026
- Homemade Cream Of Rice Recipe: Silk-Smooth Breakfast in Minutes - September 25, 2026