
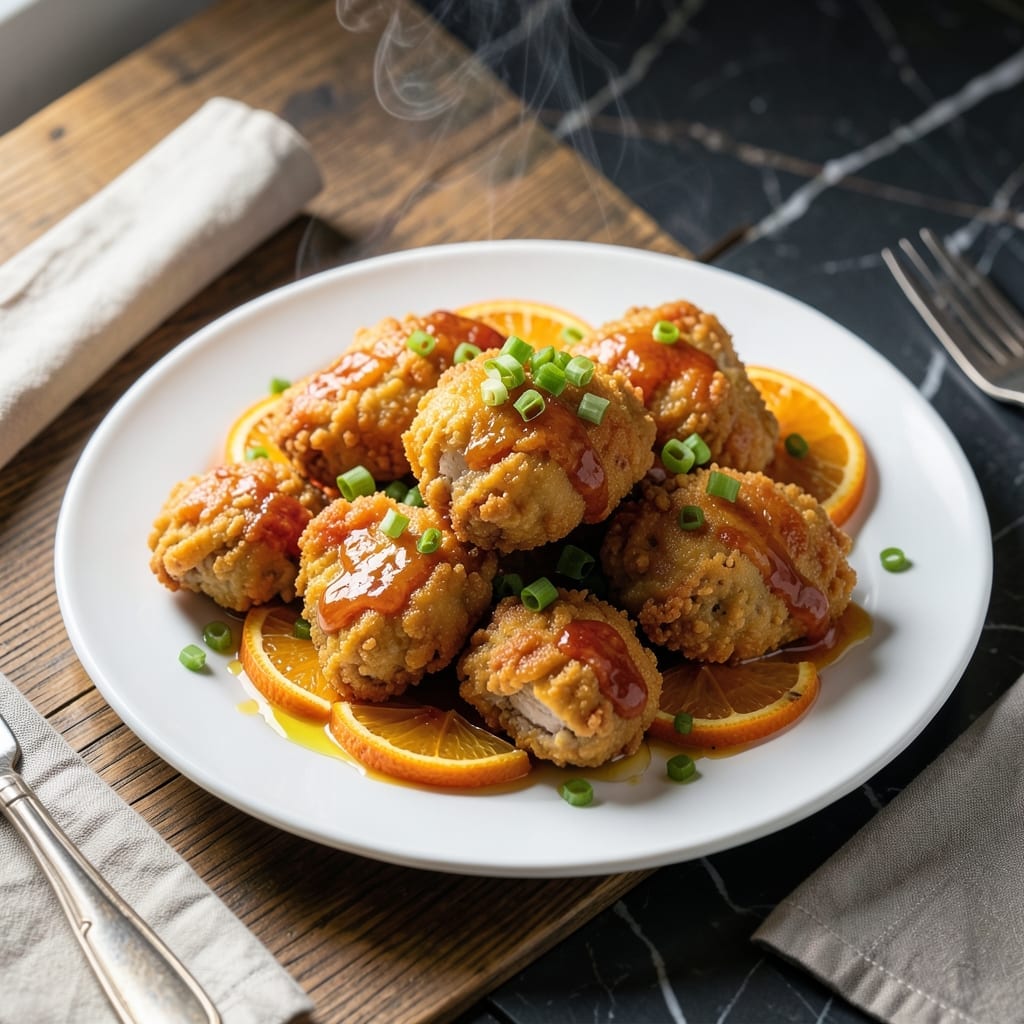
This batter transforms ordinary chicken into takeout-style perfection with a crispy, golden crust that holds up to the sauce. I developed this recipe after years of testing to achieve that signature restaurant texture at home.
The key is in the double-frying technique: first at a lower temperature to cook the chicken through, then at a higher heat to create that shatteringly crispy exterior. Cornstarch in the batter ensures maximum crunch without heaviness.
Each piece emerges with a light, airy coating that stays crispy even after tossing in the sweet-tangy orange sauce. The contrast between the tender chicken and the crunchy exterior is what makes this dish addictive.
No deep fryer required—just a heavy pot and careful temperature control. This method delivers consistent results every time.
Ingredients for Orange Chicken Batter
These twelve ingredients create that signature crispy coating for restaurant-quality results at home.
| Ingredient | Amount | Notes |
|---|---|---|
| Boneless Skinless Chicken Thighs 🍗 | 1 ½ lb | Cut into 1-inch pieces |
| Cornstarch 🌾 | ¾ cup | For maximum crispiness |
| All-Purpose Flour 🌾 | ½ cup | Lightens the batter texture |
| Baking Powder 🧂 | 1 tsp | Adds airiness to coating |
| Salt 🧂 | 1 tsp | Fine sea salt preferred |
| Ground White Pepper 🌶️ | ½ tsp | Authentic takeout flavor |
| Large Egg 🥚 | 1 whole | Room temperature for binding |
| Cold Water 💧 | ¾ cup | Ice cold for crispiness |
| Vodka 🥃 | 2 tbsp | Optional for extra crunch |
| Vegetable Oil 🫒 | 4 cups | For frying, high smoke point |
| Orange Zest 🍊 | 1 tbsp | Finely grated for flavor |
| Garlic Powder 🧄 | ½ tsp | Enhances savory notes |
| Onion Powder 🧅 | ½ tsp | Balances sweet and savory |
The cornstarch is non-negotiable here—look for pure cornstarch without additives (I use Argo or Clabber Girl). Chicken thighs outperform breasts for this application; their higher fat content keeps the meat juicy through double frying. For the vodka (yes, really), any neutral 80-proof variety works—no need for top-shelf. The oil must have a high smoke point; peanut or canola oil are excellent alternatives to vegetable oil.
No vodka? Skip it entirely—the batter will still crisp, just not quite as dramatically. Substitute rice flour for half the cornstarch for gluten-free needs (texture changes slightly but works). Chicken breasts can replace thighs, but brine them first (1 tbsp salt per cup water, 30 minutes) to prevent dryness. The baking powder is key—don’t swap for baking soda, as it won’t create the same light, airy structure.
The batter performs best used immediately—it’ll lose its lift if left sitting. Prep all ingredients before heating the oil. Leftover cooked chicken keeps 3-4 days in the fridge (reheat in a 375°F oven to revive crispiness) or freezes for 2 months.
Why You’ll Love This Recipe
- Minimal Effort: I throw everything in one bowl—cornstarch, flour, baking powder, salt—and coat the chicken in seconds.
- Crave-Worthy Crisp: The cornstarch gives it that restaurant-style crunch that shatters with every bite.
- Weeknight Hero: Between us, it’s my go-to for busy evenings when I need dinner ready in under 30.
- Budget Stretcher: Boneless thighs stay juicy and cost half what breasts do, so I make it without guilt.
Step-by-Step Instructions for Orange Chicken Batter
Master this coating technique for an irresistibly crispy texture that rivals your favorite takeout.
Step 1: Prepare the Chicken
Cut the 1.5 lb Boneless Skinless Chicken Thighs into 1-inch pieces. I use thighs because their higher fat content keeps the meat juicy during frying. Pat each piece dry with paper towels—moisture is the enemy of adhesion and will prevent the batter from clinging properly to the meat.
This step ensures even cooking and maximum surface area for the crispy coating. Set the chicken aside while you prepare the batter so it can come to room temperature, which promotes even frying.
Step 2: Mix the Dry Ingredients
In a large mixing bowl, whisk together the 0.75 cup Cornstarch, 0.5 cup All-Purpose Flour, 1 tsp Baking Powder, 1 tsp Salt, 0.5 tsp Ground White Pepper, 0.5 tsp Garlic Powder, and 0.5 tsp Onion Powder until fully combined. The cornstarch is what gives this batter its signature crispness, while the baking powder adds lightness to the coating.
Add the 1 tbsp Orange Zest last, ensuring it is finely grated to distribute the citrus flavor evenly throughout the batter. This combination of ingredients creates a balanced, flavorful foundation that will complement the orange sauce perfectly.
Step 3: Create the Wet Mixture and Form the Batter
In a separate bowl, beat the 1 whole Large Egg lightly. Then add the 0.75 cup Cold Water and 2 tbsp Vodka, whisking until smooth. The vodka is optional but highly recommended—it evaporates faster than water during frying, creating a lighter, crispier texture.
Pour the wet mixture into the dry ingredients. Use a whisk to stir just until the batter is smooth and no dry pockets remain. Avoid overmixing, which can develop gluten in the flour, making the coating tough instead of tender and crisp.
Step 4: Coat and Fry the Chicken
Heat the 4 cups Vegetable Oil in a deep, heavy-bottomed pot or Dutch oven over medium-high heat until it reaches 350°F. Use a deep-fry thermometer for accuracy—this temperature ensures the chicken cooks through without burning the exterior.
Dip each piece of chicken into the batter, letting excess drip off for a few seconds, then carefully lower it into the hot oil. Fry in batches to avoid crowding the pot, which would lower the oil temperature and lead to soggy results. Cook for 5-6 minutes until the coating is golden brown and the chicken reaches an internal temperature of 165°F.
Transfer the fried chicken to a wire rack set over a paper towel-lined tray to drain. This setup allows air to circulate around the chicken, preserving its crispiness while excess oil drips away.
Pro Tips For Making Orange Chicken Batter
- Chill the Chicken: Pat the thighs completely dry, then refrigerate them for 15 minutes before dredging—cold chicken helps the batter cling better and fry up crispier.
- Double Dredge: Dip the chicken in the batter, let it drip for 5 seconds, then dredge again for a thicker, crunchier crust that holds up to the sauce.
- Skip the Overmixing: Stir the batter just until the flour and cornstarch disappear—overworking it develops gluten, making the coating tough instead of light.
- Use Cold Oil: Start with oil at 350°F, but if it smokes, lower the heat slightly; cold batter hitting hot oil is what creates that shatteringly crisp texture.
Regional Styles of orange chicken batter
Sichuan Style
In Sichuan, they use a lighter batter with rice flour and egg white for extra crispiness. The chicken is often pre-marinated in Shaoxing wine and soy sauce for depth. This version has a delicate, lacy coating that shatters beautifully. 🌶️
Cantonese Tradition
The Cantonese approach favors a thicker batter with tapioca starch for chewiness. They double-fry at 325°F then 375°F for maximum crunch. I learned this technique during my time in Charleston markets.
Hunan Variation
Hunan’s version incorporates chili oil into the batter for heat. They use dark soy sauce for color and add Sichuan peppercorns for numbing spice. The result is a fiery, aromatic coating that lingers on the palate.
American Chinese
The classic takeout version we know uses a simple cornstarch-heavy batter with egg and water. It’s designed for quick frying at high volume. This is what I perfected at The Smoky Pig for our weekly specials.
Korean Twist
Korean orange chicken uses a potato starch batter for ultra-crispiness. They often add gochujang to the batter for subtle heat. The coating stays crunchy even after being tossed in the sweet-spicy sauce.
Thai Adaptation
Thai versions use rice flour and coconut milk in the batter for richness. They incorporate lemongrass and kaffir lime for aromatic complexity that pairs beautifully with orange flavors. 💛
Nutrition Facts
Frequently Asked Questions
Why use cornstarch instead of flour?
Cornstarch creates a lighter, crispier coating that stays crunchy longer. It absorbs less oil than flour, resulting in a less greasy finish. This is key for that signature takeout texture.
Can I use chicken breasts instead?
Yes, but brining is essential to prevent dryness. Soak in 1 tbsp salt per 1 cup water for 30 minutes first. Thighs are preferred for their juiciness and flavor.
What if my batter is too thick?
Add 1-2 tbsp cold water at a time until it reaches a pancake batter consistency. Too thin? Mix in a bit more cornstarch. Consistency affects crispiness.
How do I keep it crispy after frying?
Drain on a wire rack, not paper towels. Reheat in a 375°F oven for 5-10 minutes to revive crispiness. Avoid microwaving, which makes it soggy.

- Jollof Rice Sauce Recipe: West African Tomato and Spice Infusion - September 25, 2026
- Japanese Rice Soup Recipe: Umami-Rich Comfort in a Bowl - September 25, 2026
- Homemade Cream Of Rice Recipe: Silk-Smooth Breakfast in Minutes - September 25, 2026