
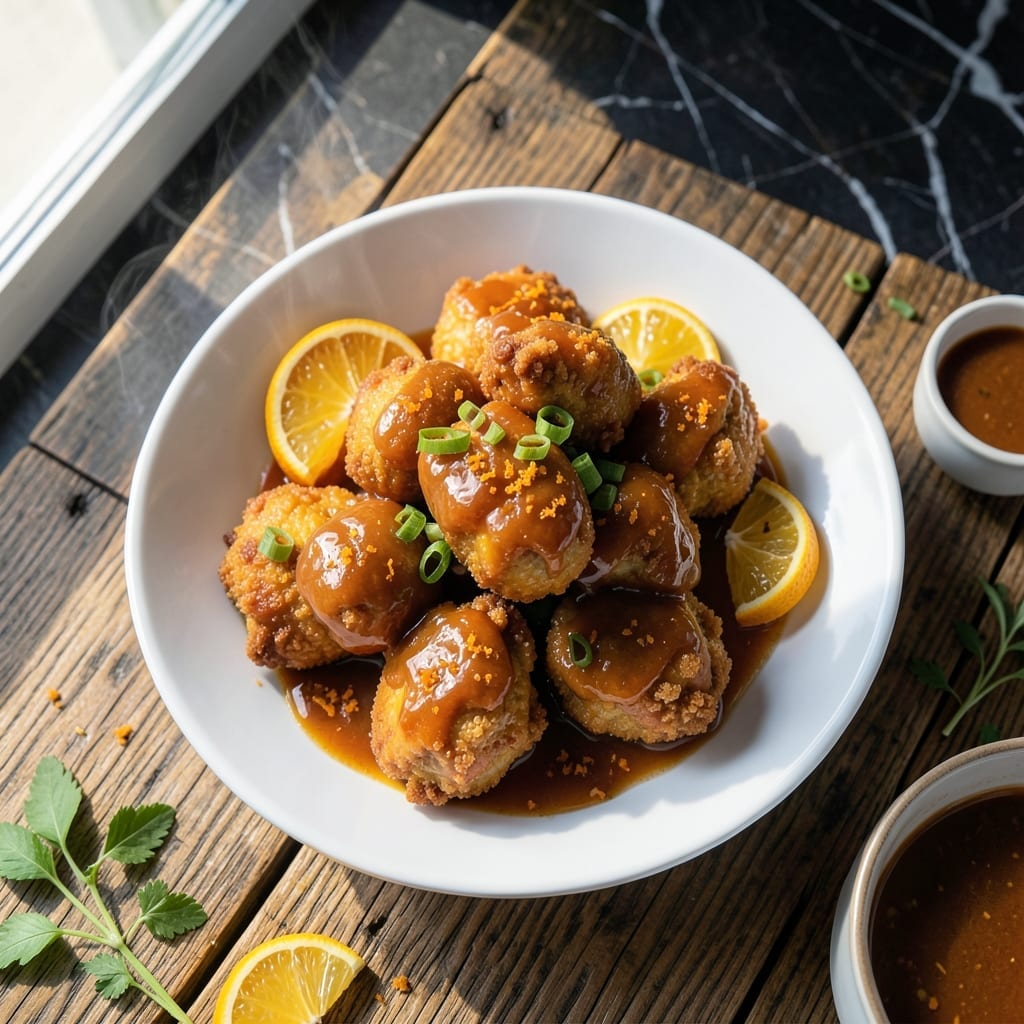
This orange chicken delivers the perfect balance of sweet and spicy that’s become a takeout favorite. The dish combines crispy chicken pieces with a glossy, tangy sauce that clings to every bite.
The secret lies in double-frying the chicken for maximum crunch and building layers of flavor in the sauce with fresh ginger, garlic, and a touch of heat. It’s a restaurant-quality result you can achieve in your own kitchen.
You’ll get golden, crispy chicken coated in a sticky orange glaze that’s both sweet and slightly spicy. The sauce reduces to a beautiful sheen that makes the dish as visually appealing as it is delicious.
Serve over steamed rice with steamed broccoli for a complete meal. Here’s how to make this classic at home.
Ingredients for Ornge Chicken
Crispy chicken meets a glossy, tangy sauce with just the right sweet-spicy kick.
| Ingredient | Amount | Notes |
|---|---|---|
| Boneless Chicken Thighs 🍗 | 1 ½ lb | Cut into 1-inch pieces |
| Cornstarch 🌾 | ½ cup | For coating chicken |
| Large Eggs 🥚 | 2 whole | Lightly beaten |
| Orange Juice 🍊 | ¾ cup | Freshly squeezed preferred |
| Orange Zest 🍊 | 1 tbsp | Freshly grated |
| Soy Sauce 🫒 | ¼ cup | Low-sodium preferred |
| Rice Vinegar 🍶 | 2 tbsp | For tangy balance |
| Brown Sugar 🍚 | ⅓ cup | Packed, for sweetness |
| Fresh Ginger 🌿 | 1 tbsp | Minced or grated |
| Garlic Cloves 🧄 | 4 cloves | Minced for sauce |
| Red Pepper Flakes 🌶️ | ½ tsp | Adjust for heat preference |
| Vegetable Oil 🫒 | 2 cups | For frying chicken |
| Green Onions 🧅 | 3 whole | Thinly sliced for garnish |
| Sesame Seeds 🌰 | 1 tbsp | Toasted, for garnish |
The chicken thighs are non-negotiable here—they stay juicy through double-frying. Costco has great pre-cut boneless thighs if you’re short on time. For the orange juice, navel oranges give the best balance of sweet and tart. Don’t skip the zest—it packs the most flavor (use a microplane if you’ve got one). The soy sauce is doing heavy lifting, so Kikkoman or San-J are solid choices.
No chicken thighs? Boneless breasts work but they dry out faster—brine them first if you can. Swap brown sugar for honey or maple syrup at 1:1 ratio. Fresh ginger is ideal, but ground ginger at half the amount gets you close in a pinch. If you’re watching sodium, coconut aminos can replace the soy. The red pepper flakes are flexible—add more if you like heat (or none at all).
This tastes even better the next day once the sauce soaks in. Keeps 3-4 days in the fridge, freezes for 2 months. Reheat in a skillet to crisp the chicken back up (microwave works but loses the crunch).
Why You’ll Love This Recipe
- One Pan Wonder: I mix the cornstarch and eggs right in the pan before cooking—the fewer dishes, the better.
- Zesty Kick: That orange zest and juice combo gives it a bright, tangy flavor that’s way more interesting than takeout.
- Feeds a Crowd: I’ve served this to picky kids and dinner guests alike, and everyone cleans their plate.
- Leftovers Rock: Honestly, it reheats even better the next day—crispy outside, juicy inside, every time.
Step-by-Step Instructions for Orange Chicken
This method delivers that restaurant-favorite crispy coating and glossy, tangy-sweet sauce every time.
Step 1: Coat and Fry the Chicken
Cut the 1.5 lb Boneless Chicken Thighs into 1-inch pieces and pat them completely dry. Toss the pieces in the 0.5 cup Cornstarch until every surface is evenly coated—this creates that signature crispy texture.
Heat the 2 cups Vegetable Oil in a deep skillet or wok over medium-high heat until it reaches 350°F. Working in batches to avoid crowding, carefully add the coated chicken. Fry for 3-4 minutes until golden brown and crisp, turning occasionally for even cooking.
Use a slotted spoon to transfer the fried chicken to a paper towel-lined plate to drain. The pieces should be deeply golden and crisp to the touch. Keep the oil hot between batches—if it cools, the chicken will absorb oil and become greasy instead of crisp.
Step 2: Prepare the Orange Sauce Base
In a separate bowl, whisk together the 2 whole Large Eggs with the 0.75 cup Orange Juice, 1 tbsp Orange Zest, 0.25 cup Soy Sauce, 2 tbsp Rice Vinegar, and 0.33 cup Brown Sugar until smooth. This tangy-sweet mixture forms the foundation of your sauce.
Mince the 1 tbsp Fresh Ginger and 4 cloves Garlic Cloves together—they’ll add aromatic depth. In a clean saucepan, combine these with the 0.5 tsp Red Pepper Flakes and cook over medium heat for 1-2 minutes until fragrant. Stir constantly to prevent burning.
Step 3: Thicken and Finish the Sauce
Pour the orange juice mixture into the saucepan with the ginger and garlic. Bring to a gentle simmer over medium heat and cook for 3-4 minutes, stirring occasionally, until the sauce thickens slightly and turns glossy. It should coat the back of a spoon but still be pourable.
Taste and adjust the balance if needed—add a pinch more brown sugar if you want it sweeter, or a splash of vinegar for more tang. The sauce should be vibrant with a perfect blend of sweet, citrusy, and umami flavors.
Step 4: Toss and Garnish
Add the crispy chicken to the saucepan with the sauce. Gently toss to coat every piece evenly, ensuring the chicken stays crisp while absorbing the bold flavors. Cook for 1-2 minutes just to heat everything through.
Transfer to a serving dish and garnish with the thinly sliced 3 whole Green Onions and toasted 1 tbsp Sesame Seeds. The green onions add a fresh crunch, while the sesame seeds provide a nutty finish. Serve immediately over steamed rice for the full experience.
Pro Tips For Making Ornge Chicken
- Fry in Batches: Crowding the pan steams the chicken instead of frying—use about 1/2 lb at a time in 2 inches of oil to get that crispy cornstarch crust.
- Zest Before Juicing: Always grate the orange zest before cutting and juicing the fruit—it’s impossible to do afterward, and fresh zest makes a real difference in flavor.
- Rest the Coated Chicken: After dipping in egg and cornstarch, let the pieces sit for 5-10 minutes before frying so the coating adheres properly and doesn’t slide off in the oil.
- Reduce the Sauce: Simmer the orange juice and zest for 3-4 minutes until it thickens slightly—this prevents a watery, sad sauce that soaks your crispy chicken.
Make-Ahead Tips for Leftovers
Prep Ahead Strategy
I always prep the chicken and sauce separately the night before. Cut the 1.5 lb Boneless Chicken Thighs into 1-inch pieces and store in an airtight container. The sauce can be whisked together and refrigerated too. This cuts active cooking time in half. 💡
Sauce Storage
Your sauce will keep beautifully in the fridge for up to 3 days. Store it in a glass jar for easy reheating. The flavors actually deepen overnight as the ginger and garlic meld together. Just give it a stir before using.
Chicken Coating Tip
For extra crispiness, toss your chicken in the 0.5 cup Cornstarch right before frying. If you coat it too early, the cornstarch absorbs moisture and loses its crisping power. I learned this the hard way!
Freezing Instructions
This dish freezes surprisingly well for up to 2 months. Cool completely, then store chicken and sauce separately in freezer bags. Reheat in a skillet to restore the crunch. ❄️
Day-Of Assembly
When ready to cook, fry the prepped chicken as directed, then warm your sauce in a pan. Combine at the end for that fresh restaurant-style finish. The whole process takes just 20 minutes this way.
Garnish Prep
Slice your 3 whole Green Onions and toast the 1 tbsp Sesame Seeds the day before. Store them in small containers so they’re ready to sprinkle on top when serving. This little prep makes a big difference.
Nutrition Facts
Frequently Asked Questions
Can I use chicken breast instead of thighs?
Yes, but thighs stay juicier. If using breast, brine first and fry for 2-3 minutes to prevent drying.
How do I make the sauce less sweet?
Reduce the brown sugar to 1/4 cup or add 1 tbsp rice vinegar for balance. Taste and adjust gradually.
Can I bake the chicken instead of frying?
Toss coated pieces with 1 tbsp oil and bake at 400°F for 20-25 minutes, flipping halfway. It won’t be as crispy but still delicious.
What if my sauce is too thin?
Simmer uncovered for 2-3 minutes longer. For quick fixing, mix 1 tsp cornstarch with water and stir in.

- Jollof Rice Sauce Recipe: West African Tomato and Spice Infusion - September 25, 2026
- Japanese Rice Soup Recipe: Umami-Rich Comfort in a Bowl - September 25, 2026
- Homemade Cream Of Rice Recipe: Silk-Smooth Breakfast in Minutes - September 25, 2026