
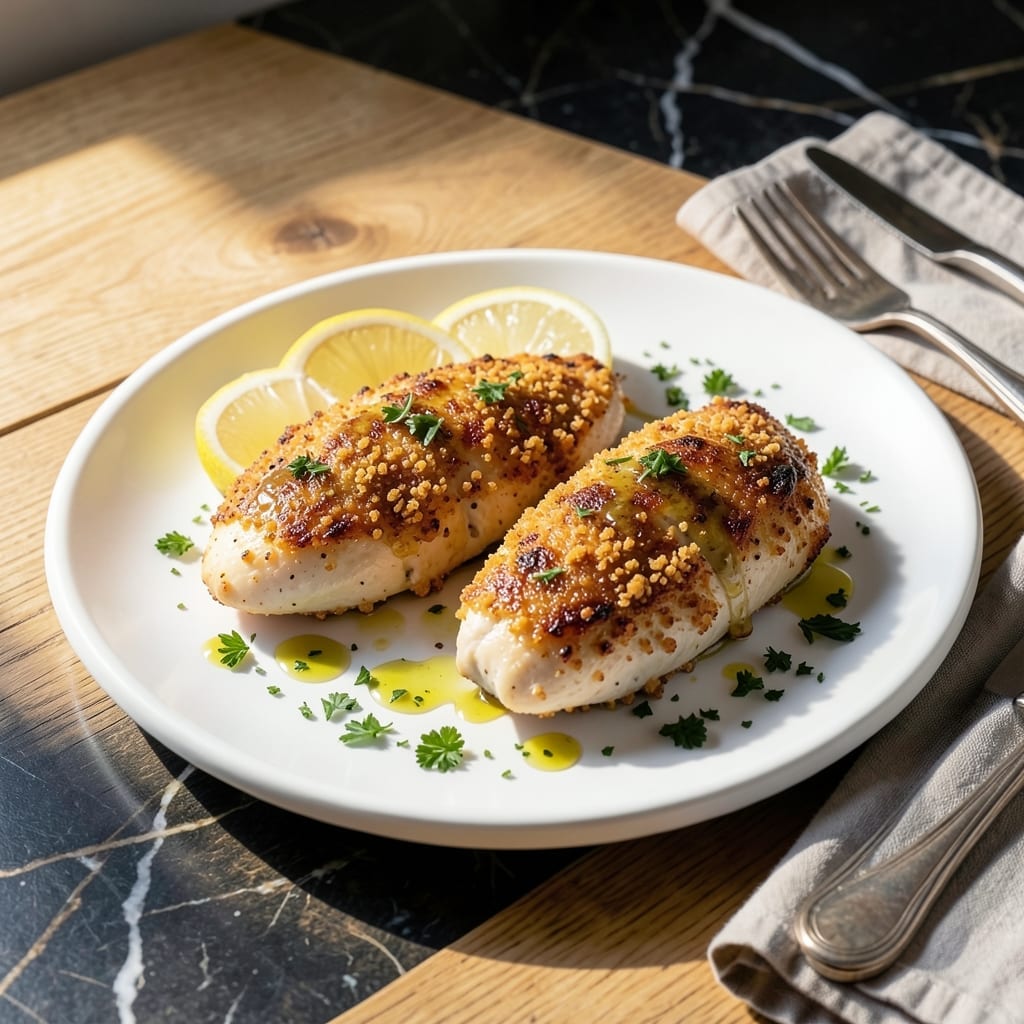
This recipe delivers crispy panko-crusted chicken with juicy centers every time—no frying required. The secret is a two-step breading process that ensures the coating stays put and bakes to golden perfection.
Panko breadcrumbs create a lighter, crunchier texture than regular breadcrumbs, while a quick dip in flour and egg helps the coating adhere. Baking at high heat guarantees that coveted crunch without drying out the meat.
The result is tender chicken with a shatteringly crispy exterior that stays crisp even after resting. This method works with both thin-cut and thicker pieces, making it versatile for any meal.
Serve with a simple side salad or roasted vegetables for a complete dinner that’s ready in under an hour.
Ingredients for Panko Baked Chicken
Simple ingredients create that golden, shatteringly crisp exterior with juicy chicken inside.
| Ingredient | Amount | Notes |
|---|---|---|
| Boneless Skinless Chicken Breasts 🍗 | 1 ½ lb | Pounded to even thickness |
| Panko Breadcrumbs 🍞 | 2 cups | Japanese-style for extra crunch |
| All-Purpose Flour 🌾 | ½ cup | For initial dredging step |
| Large Eggs 🥚 | 2 whole | Beaten for egg wash |
| Olive Oil 🫒 | 2 tbsp | For light coating before baking |
| Garlic Powder 🧄 | 1 tsp | Adds savory depth to coating |
| Onion Powder 🧅 | 1 tsp | Complements the garlic flavor |
| Paprika 🌶️ | 1 tsp | Sweet or smoked variety |
| Salt 🧂 | 1 tsp | Kosher or sea salt preferred |
| Black Pepper 🌶️ | ½ tsp | Freshly ground for best flavor |
| Dijon Mustard 🟡 | 1 tbsp | Optional for extra tang in coating |
| Butter 🧈 | 2 tbsp | Melted, for richer breading |
The breading is everything here. Panko breadcrumbs (found in the Asian aisle at most Kroger or Walmart stores) give that signature crunch—regular breadcrumbs won’t cut it. Buy the plain, unseasoned variety. For the chicken, boneless, skinless breasts work best and are widely available. Pound them to an even thickness (about 1/2 inch) so they cook uniformly without drying out.
No panko on hand? Crush plain melba toast or saltine crackers for a similar texture. The Dijon mustard can be swapped for regular yellow mustard (or omitted entirely). If avoiding dairy, use olive oil instead of butter in the breading. The garlic and onion powders are essential for flavor, but fresh minced garlic at double the amount works in a pinch.
Prep the chicken just before breading to prevent drying. Baked chicken is best served fresh but holds its crispness for 20-30 minutes if kept warm. Leftovers keep 3-4 days in the fridge—reheat in the oven or air fryer to revive the crunch.
Why You’ll Love This Recipe
- One Pan Magic: I just coat, dip, and bake—no frying mess, and the oven does all the work.
- Crispy Perfection: That panko crust gives it the best crunch without being greasy.
- Weeknight Hero: Honestly, it’s my go-to for busy evenings when I need dinner fast.
- Leftovers Win: The chicken stays tender, so it’s just as good cold in sandwiches the next day.
Step-by-Step Instructions for Panko Baked Chicken
This method ensures crispy coating and moist meat with every bite.
Step 1: Prep and Season the Chicken
Preheat your oven to 400°F and line a baking sheet with parchment paper. Pound the 1.5 lb Boneless Skinless Chicken Breasts to an even ½-inch thickness using a meat mallet. This guarantees uniform cooking and prevents dry spots.
Season both sides of the chicken with the 1 tsp Salt and 0.5 tsp Black Pepper. I always let the seasoned chicken sit for 5 minutes while I prepare the breading station—this helps the salt penetrate the meat for better flavor.
Step 2: Set Up the Breading Station
In a shallow dish, combine the 0.5 cup All-Purpose Flour, 1 tsp Garlic Powder, 1 tsp Onion Powder, and 1 tsp Paprika. In a second dish, beat the 2 whole Large Eggs with the 1 tbsp Dijon Mustard until fully incorporated. Place the 2 cups Panko Breadcrumbs in a third dish.
I use this three-step dredging process for maximum crunch. The flour helps the egg wash adhere, while the Dijon in the egg mixture adds a subtle tang that complements the savory coating beautifully.
Step 3: Coat the Chicken Thoroughly
Dredge each breast in the flour mixture, shaking off any excess. Then dip it into the egg mixture, ensuring complete coverage. Finally, press the chicken into the Panko, turning to coat all sides and pressing firmly so the crumbs adhere well.
Place the breaded chicken on the prepared baking sheet. Drizzle the 2 tbsp Olive Oil and 2 tbsp Butter (melted) evenly over the top of each piece. This fat helps the Panko crisp up in the oven while adding rich flavor.
Step 4: Bake to Golden Perfection
Bake on the middle rack for 20-25 minutes or until the coating is golden brown and the internal temperature reaches 165°F. I check the thickest piece with an instant-read thermometer to be sure.
Don’t flip the chicken during baking—the Panko will crisp up beautifully without it. The high oven temperature ensures the coating gets crispy while the meat stays juicy inside, which is exactly what you want from this dish.
Pro Tips For Making Panko Baked Chicken
- Preheat the Pan: I learned this the hard way—start with a hot baking sheet (425°F) to guarantee the panko gets crispy without drying out the chicken.
- Pound the Breasts: Even 1/2-inch thickness means even cooking; skip this and you’ll get dry edges before the center’s done.
- Press the Crumbs: After dipping in egg and flour, really press the panko into the chicken so it sticks and forms that crunchy crust.
- Rest Before Serving: Give it 5 minutes under foil after baking—keeps the juices in and stops the crust from falling off when you cut it.
Perfect Pairings for This panko baked chicken
Side Dish Ideas
I love pairing this with a simple green salad tossed with balsamic vinaigrette—the acidity cuts through the richness. Toss 4 cups mixed greens with 2 tbsp olive oil and 1 tbsp balsamic vinegar for a quick side.
Starchy Sides
Garlic mashed potatoes make a comforting pairing, soaking up any extra crumbs from the chicken. For a lighter option, roasted baby potatoes with rosemary at 400°F for 25 minutes complement the baking temperature perfectly.
Vegetable Pairings
Try roasted asparagus or steamed broccoli with lemon butter. I toss asparagus with 1 tbsp olive oil and roast at 400°F for 12 minutes—it finishes at the same time as the chicken. 💛
Dipping Sauces
Honey mustard is my go-to—mix 3 tbsp mayo, 1 tbsp Dijon, and 1 tbsp honey. For a tangy kick, sriracha mayo (equal parts mayo and sriracha) adds heat without overpowering the dish.
Beverage Pairings
A crisp Pinot Grigio or Sauvignon Blanc balances the savory coating. For non-alcoholic options, sparkling lemonade or iced tea with a lemon wedge refreshes the palate. 🍷
Nutrition Facts
Frequently Asked Questions
Can I use regular breadcrumbs instead?
Regular breadcrumbs will work but won’t give the same light, crispy texture. Panko’s flaky structure creates a crunchier coating. For best results, stick with 2 cups Panko.
Why do I need to pound the chicken?
Pounding to ½-inch thickness ensures even cooking and prevents dry spots. Uniform pieces cook through at the same rate in the oven.
Can I make this ahead of time?
Bread the chicken and refrigerate uncovered for up to 2 hours before baking. This helps the coating set. Don’t leave it longer or the Panko may get soggy.
How do I keep the coating crispy after baking?
Serve immediately for maximum crunch. If storing, reheat in a 400°F oven for 5-10 minutes to restore crispiness. Avoid microwaving.

- Jollof Rice Sauce Recipe: West African Tomato and Spice Infusion - September 25, 2026
- Japanese Rice Soup Recipe: Umami-Rich Comfort in a Bowl - September 25, 2026
- Homemade Cream Of Rice Recipe: Silk-Smooth Breakfast in Minutes - September 25, 2026