
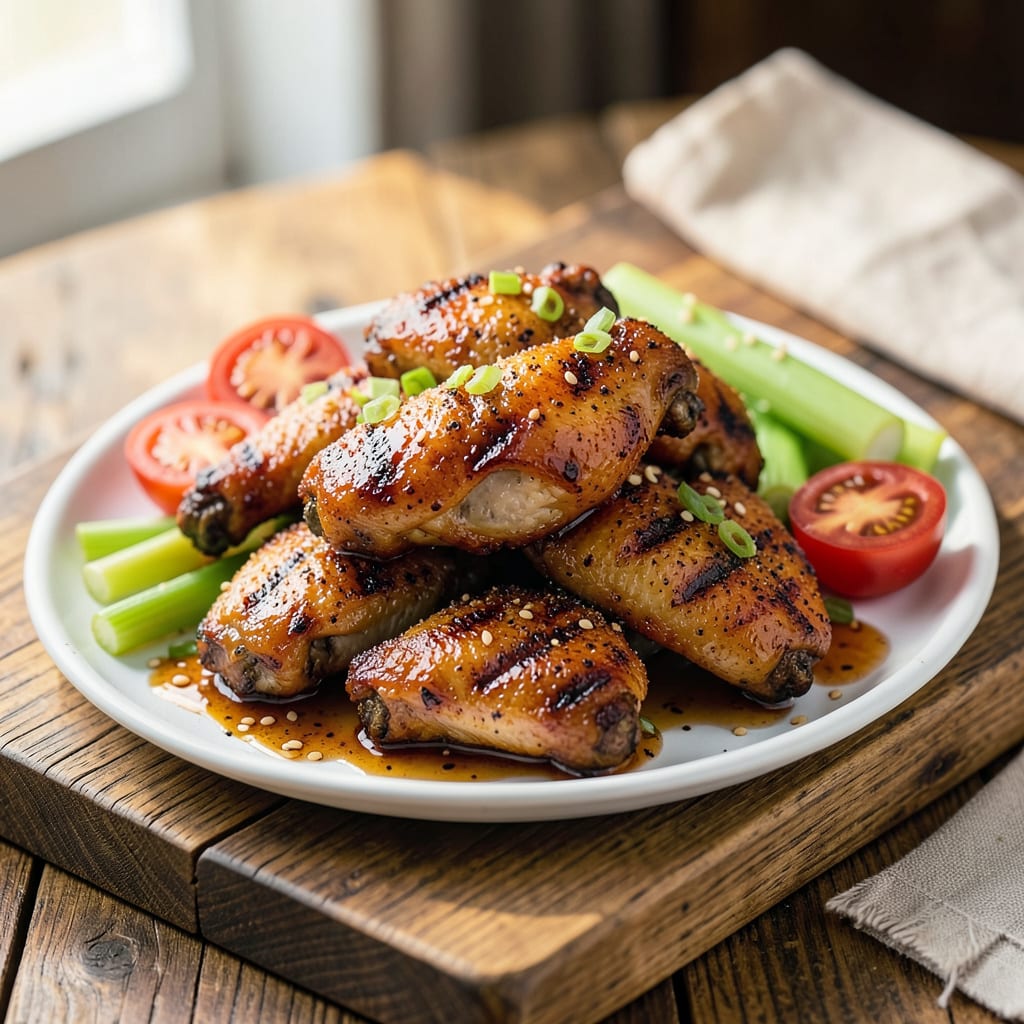
I’ll be real with you—grilling chicken wings without parboiling first is like trying to win a race with one shoe untied. This two-step method changed my wing game completely. The secret? A quick 10-minute parboil tenderizes the meat and renders out fat, so your wings hit the grill already halfway to perfection.
Here’s where it gets interesting: parboiling isn’t just about cooking faster. It actually creates a head start on that crispy skin we all crave by breaking down collagen while keeping the meat juicy. I toss bay leaves and garlic into the water for extra flavor that carries through to the final bite. No more dry, rubbery wings—just perfectly cooked meat every time.
The grill becomes your finishing touch. Because the wings are already partially cooked, you get those beautiful char marks and smoky flavor without worrying about raw centers. I like to brush them with a quick glaze during the last few minutes for sticky, caramelized edges that make these impossible to resist.
What you end up with is the best of both worlds: fall-off-the-bone tenderness inside with shatteringly crispy skin outside. Serve with cool ranch and spicy buffalo sauce for dipping, and watch them disappear faster than you can say “seconds, anyone?”
📚 In This Guide
- What You’ll Need
- Instructions
- Tips and Common Mistakes
What Youll Need
- ● Chicken wings: 2–3 lbs (about 12–18 wings), split into drumettes and flats (tip removed). Pro tip: Pat them dry for better crispiness! 🍗
- ● Large pot or Dutch oven: 5–6 quart capacity (for parboiling).
- ● Water: Enough to fully submerge wings (about 8–10 cups).
- ○ Aromatics (optional but recommended): 1 small onion, quartered
- ● 2 garlic cloves, smashed
- ● 1 bay leaf
- ● 1 tbsp salt (or to taste)
- ● 1 tsp black peppercorns
- ● Tongs or slotted spoon: For safe handling of hot wings.
- ● Paper towels or clean kitchen towel: To pat wings dry post-boiling.
- ● Grill: Charcoal, gas, or electric (preheated to medium-high ~400°F).
- ● Grill oil (high smoke point): Like canola or avocado oil (to prevent sticking).
- ○ Basting brush: For sauces or marinades (optional).
- ● Meat thermometer: To check doneness (target 165°F internal temp). 🌡️
- ● Aluminum foil or tray: For resting wings post-grill (keeps them warm).
- ○ Sauce or dry rub (optional): BBQ, buffalo, or your favorite seasoning!
Instructions
Here’s the simple process that guarantees perfectly crispy skin and juicy meat every time.
Prepare the Wings for Parboiling
Start by rinsing your chicken wings under cold water and patting them completely dry with paper towels. This removes any bone fragments and ensures better seasoning absorption. I like to trim off the wing tips (save them for stock) and separate the drumettes from the flats if they’re not already split.
Place the wings in a large pot and cover them with cold water by about 2 inches. The water should be enough to fully submerge the wings even when they float. Don’t add any salt or seasoning to the water at this stage—we’ll handle that after parboiling for maximum flavor impact.
Parboil the Wings for Optimal Texture
Bring the water to a rolling boil over high heat, then immediately reduce to medium-low to maintain a gentle simmer. Let the wings cook uncovered for 10-12 minutes, skimming off any foam that rises to the surface with a slotted spoon.
You’ll know they’re ready when the wings float to the top and the meat near the bone changes from pink to opaque white. Don’t overcook them at this stage—we just want to render some fat and start the cooking process. The internal temperature should reach about 160°F when checked with an instant-read thermometer.
Cool and Dry the Wings Thoroughly
Carefully drain the wings in a colander and rinse them briefly under cold water to stop the cooking process. Shake the colander gently to remove excess water, then transfer the wings to a wire rack set over a baking sheet. This setup allows air to circulate completely around each wing.
Pat the wings dry again with fresh paper towels, pressing firmly to absorb all moisture. Let them air-dry at room temperature for 15-20 minutes or refrigerate uncovered for up to 1 hour. The drier the skin, the crispier your final result will be—this is the secret to that perfect crunch.
Season and Grill to Perfection
Preheat your grill to medium-high heat (about 375-400°F). While it heats, toss the dried wings with your favorite seasoning. I use a simple mix of salt, pepper, and garlic powder, but you can get creative here with smoked paprika or cayenne for extra kick.
Arrange the wings on the grill in a single layer, leaving space between each piece. Cook for 6-8 minutes per side, turning once, until the skin is deep golden brown and crispy, and the internal temperature reaches 165°F. Watch for flare-ups from dripping fat—move wings to a cooler spot if needed, but don’t cover the grill.
Rest and Serve Immediately
Transfer the grilled wings to a clean platter and let them rest for 5 minutes before serving. This brief rest allows the juices to redistribute throughout the meat, ensuring every bite is moist and flavorful. The skin will stay crispy if you serve them right away.
Pile the wings high on a serving tray with your favorite dipping sauces. The contrast between the crispy, caramelized skin and the tender, juicy meat is what makes these wings irresistible. I promise your guests will ask for your secret—just tell them it’s all in the parboiling technique!
Tips and Common Mistakes
Mastering this technique is all about understanding the science behind each step. Here’s what I’ve learned from perfecting this method over countless batches.
Parboiling Precision: The 10-12 minutes in Step 2 is absolutely critical. I’ve found that 10 minutes gives you slightly more tender meat while 12 minutes creates a firmer texture that holds up better on the grill. Use that instant-read thermometer to hit exactly 160°F – this ensures the wings are cooked through but still juicy when they hit the grill. The moment they float to the surface is your visual cue that they’re ready.
Drying Technique: Don’t rush the 15-20 minutes of air-drying in Step 3. I actually prefer the full 1-hour refrigerator method when I have time – it gives the skin that perfect leather-like texture that crisps up beautifully on the grill. Press those paper towels firmly against every surface to remove all moisture. Any remaining dampness will steam instead of crisp during grilling.
Grill Temperature Control: That 375-400°F range in Step 4 is your sweet spot. I always preheat for at least 15 minutes to ensure even heat distribution. If your grill has hot spots, rotate the wings halfway through each side’s cooking time. The 6-8 minutes per side should give you that deep golden brown color – if you’re getting black spots, your grill is running too hot.
Seasoning Strategy: While the instructions suggest seasoning just before grilling, I’ve had great results tossing the wings with salt immediately after the 15-20 minute drying period. This gives the salt time to penetrate the skin, creating even better flavor and texture. Just be sure to add any delicate spices like garlic powder right before grilling to prevent burning.
Pro Tips for Parboil Chicken Wings Before Grilling
- Mastering this technique is all about understanding the science behind each step. Here’s what I’ve learned from perfe…
- Parboiling Precision: The 10-12 minutes in Step 2 is absolutely critical. I’ve found that 10 minutes gives you slight…
- Drying Technique: Don’t rush the 15-20 minutes of air-drying in Step 3. I actually prefer the full 1-hour refrigerato…
Frequently Asked Questions
Do I need to season the water when parboiling chicken wings?
Yes! Adding salt, garlic powder, or bay leaves to the water boosts flavor. A simple mix of 1 tbsp salt + 1 tsp pepper per quart of water works great. Avoid heavy spices—they can overpower the final taste after grilling.
How long should I parboil wings before grilling?
Parboil for 10–12 minutes for medium wings or 15 minutes for extra-large ones. The meat should turn opaque (165°F internally) but not fall off the bone. Overcooking makes them mushy—use a timer!
Can I skip parboiling and just grill the wings directly?
You can, but the skin won’t get as crispy, and the meat may dry out. Parboiling renders fat, tenderizes the meat, and cuts grilling time in half. For smoky flavor without parboiling, try brining or a dry rub instead.
Why are my parboiled wings rubbery after grilling?
Rubbery texture usually means they were over-parboiled or not dried well before grilling. Pat wings very dry with paper towels post-boil, and grill over medium-high heat (375–400°F) to crisp the skin fast.
What’s a good alternative to parboiling for crispy wings?
Try baking (400°F for 20 mins) or air-frying (375°F for 12 mins) before grilling to render fat. For extra crunch, toss wings in baking powder (1 tsp per lb) pre-grill—it draws out moisture for a crackly skin!
Parboiling your chicken wings before grilling is the game-changer you’ve been missing—juicier meat, crispier skin, and foolproof doneness every time! 🍗✨ Whether you’re prepping for a backyard BBQ or just leveling up your weeknight dinner, this simple step ensures wings that’ll have everyone asking for seconds.
Ready to fire up the grill? Grab your wings, try the method, and don’t forget to experiment with your favorite sauces or dry rubs. Your taste buds (and guests) will thank you! 😉

- Jollof Rice Sauce Recipe: West African Tomato and Spice Infusion - September 25, 2026
- Japanese Rice Soup Recipe: Umami-Rich Comfort in a Bowl - September 25, 2026
- Homemade Cream Of Rice Recipe: Silk-Smooth Breakfast in Minutes - September 25, 2026