
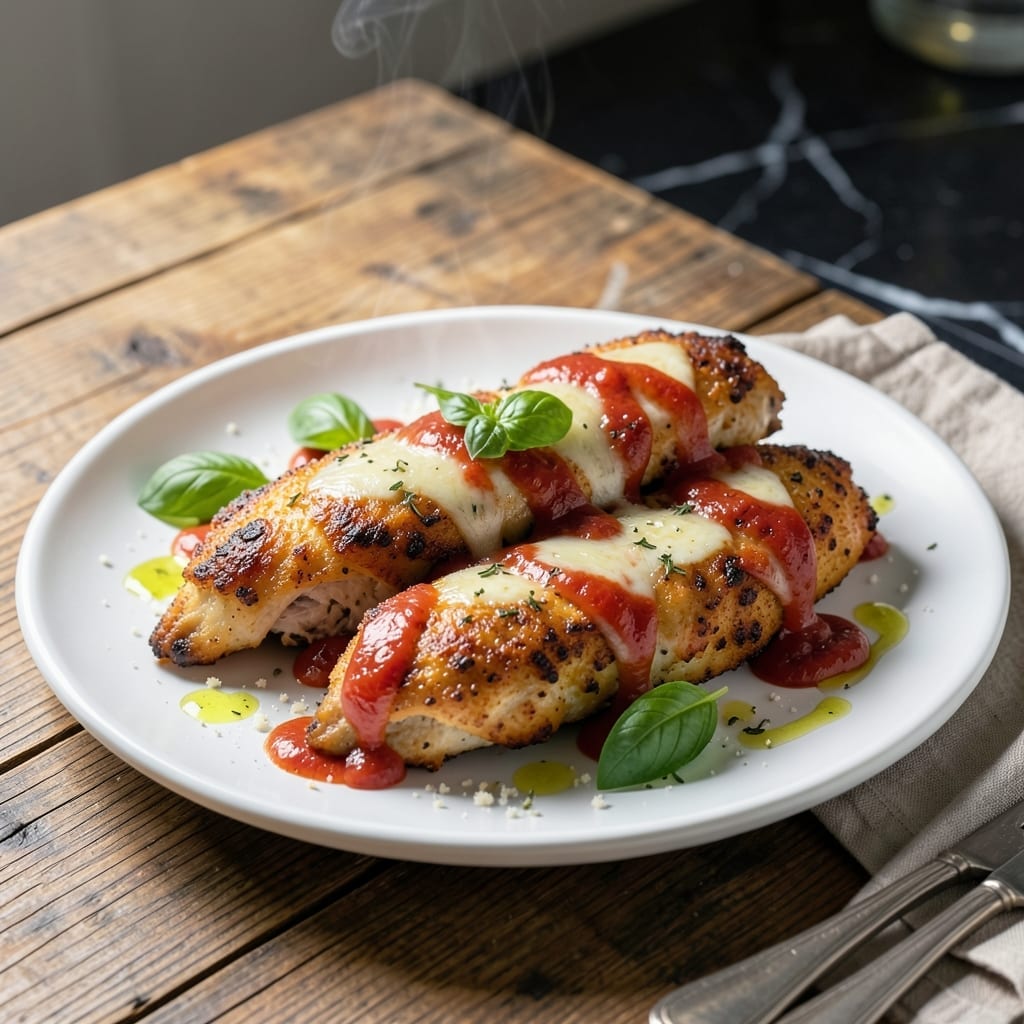
Achieving a crispy golden crust on chicken while keeping the cheese perfectly melted inside is easier than you think. This method delivers restaurant-quality results with a simple breading technique and precise baking.
The secret lies in coating the chicken with seasoned flour, egg wash, and a mixture of breadcrumbs and Parmesan. Baking at high heat ensures the exterior turns crispy while the cheese creates a gooey, melty layer underneath.
You’ll end up with tender chicken pieces encased in a flavorful, textured coating that stays intact with every bite. The Parmesan adds a rich, savory depth that elevates this dish beyond ordinary breaded chicken.
Ready in under an hour, this is a foolproof way to bring gourmet appeal to your weeknight dinner table.
Ingredients for Parmasean Chicken
Nothing exotic here—just good stuff for crispy, cheesy chicken perfection.
| Ingredient | Amount | Notes |
|---|---|---|
| Chicken Breast 🍗 | 1 ½ lb | Boneless, skinless, pounded to 1/2-inch thickness |
| All-Purpose Flour 🌾 | ¾ cup | For initial dredging coat |
| Salt 🧂 | 1 tsp | Kosher or sea salt preferred |
| Black Pepper 🌶️ | ½ tsp | Freshly ground for best flavor |
| Garlic Powder 🧄 | 1 tsp | For seasoning the flour |
| Paprika 🌶️ | 1 tsp | Sweet or smoked variety |
| Large Eggs 🥚 | 2 whole | Beaten for egg wash |
| Italian Breadcrumbs 🍞 | 1 ½ cups | Panko works for extra crispiness |
| Parmesan Cheese 🧀 | 1 cup | Freshly grated from wedge |
| Olive Oil 🫒 | ½ cup | For baking and crisping |
| Marinara Sauce 🍅 | 1 ½ cups | For serving or dipping |
| Mozzarella Cheese 🧀 | 8 oz | Shredded for melty layer |
| Dried Oregano 🍃 | 1 tsp | For additional seasoning |
The chicken is everything here. Boneless, skinless breasts work best—pound them to even thickness so they cook evenly. I grab mine from Costco for bulk savings, but any supermarket will do. The Parmesan needs to be freshly grated—pre-shredded has anti-caking agents that mess with the melt. Look for a wedge of Parmigiano-Reggiano at the deli counter (the good stuff, not the pre-shredded kind).
No Italian breadcrumbs? Panko plus Italian seasoning gives even better crunch. Out of Parmesan? Pecorino Romano works in a pinch (sharper flavor, but delicious). Want to skip the marinara? A simple lemon-garlic aioli is perfect. The mozzarella can be swapped for provolone if that’s what you’ve got. Fresh herbs like basil or parsley make a great garnish (frozen works in a pinch).
This keeps well in the fridge for 3-4 days—reheat in the oven to maintain crispiness. Freezes beautifully for up to 3 months. I like to make a double batch and freeze half for busy nights. Just thaw overnight before reheating.
Why You’ll Love This Recipe
- One Pan Wonder: I love that this comes together with just a skillet and a few pantry staples—no fancy tools needed.
- Garlic Lovers’ Dream: The garlic powder in the flour crust gives it that warm, savory punch in every bite.
- Weeknight Hero: Between us, this is my go-to for busy evenings when I need dinner fast but still crave something satisfying.
Step-by-Step Instructions for Parmesan Chicken
Here’s how I get that perfect crispy crust with gooey cheese every single time.
Step 1: Season and Dredge the Chicken
Pat the 1.5 lb chicken breast dry with paper towels to ensure maximum crispiness. In a shallow dish, mix the 0.75 cup all-purpose flour with 1 tsp salt, 0.5 tsp black pepper, 1 tsp garlic powder, and 1 tsp paprika until evenly combined.
Dredge each piece of chicken in the seasoned flour, pressing gently so the coating adheres well. Shake off any excess—you want a thin, even layer that will crisp up nicely without becoming gummy. This step creates the first barrier for that crunch we’re after.
Step 2: Create the Crispy Breadcrumb Coating
In another shallow dish, beat the 2 whole large eggs until well combined. In a third dish, mix the 1.5 cups Italian breadcrumbs with the 1 cup Parmesan cheese and 1 tsp dried oregano.
Dip each floured chicken piece into the egg, letting any excess drip off, then press it firmly into the breadcrumb mixture. Turn to coat all sides completely. I like to press down gently to ensure the crumbs stick well—this is what gives you that extra-crispy texture.
Step 3: Pan-Fry to Golden Perfection
Heat 0.5 cup olive oil in a large skillet over medium-high heat until shimmering but not smoking. Carefully add the breaded chicken pieces, working in batches if needed to avoid crowding the pan.
Cook for 4-5 minutes per side until the coating is deep golden brown and crispy. Don’t move the chicken around too much—let it develop that beautiful crust. You’ll know it’s ready to flip when the edges look set and the bottom is nicely browned.
Step 4: Add Cheese and Finish in the Oven
Preheat your oven to 375°F. Transfer the pan-fried chicken to a baking dish. Top each piece with a generous portion of the 8 oz mozzarella cheese, letting it spill over the edges a bit.
Bake for 10-12 minutes until the cheese is fully melted and bubbly with some light golden spots. This step ensures the chicken is cooked through while giving you that irresistible cheesy topping. The internal temperature should reach 165°F.
Step 5: Serve with Marinara for Dipping
Let the chicken rest for 2-3 minutes after removing from the oven—this helps the cheese set slightly so it doesn’t all slide off when you cut into it. Warm the 1.5 cups marinara sauce in a small saucepan or the microwave.
Serve the crispy Parmesan chicken hot with the marinara on the side for dipping. Each bite should give you that perfect contrast of crunchy coating, tender chicken, and stretchy melted cheese. The marinara adds just the right tangy complement to cut through the richness.
Pro Tips For Making Parmasean Chicken
- Pound the Chicken: Use a meat mallet or rolling pin to flatten the breasts to an even 1/2-inch thickness—this guarantees even cooking and prevents dry, overdone edges while the center catches up.
- Season the Flour: Mix the salt, black pepper, and garlic powder directly into the flour before dredging; this creates a more consistent, flavorful crust than sprinkling seasoning on the chicken afterward.
- Skip the Overcrowding: I learned this the hard way—fry the chicken in batches with at least an inch of space between pieces, or the pan cools down and you’ll end up with soggy, steamed breading instead of a crisp crust.
- Rest Before Serving: After baking, let the chicken rest for 5-10 minutes under loose foil; it keeps the juices inside where they belong instead of all over the plate.
Troubleshooting This Dish
Breading Falls Off
If your coating isn’t sticking, it’s likely because the chicken wasn’t dry enough before dredging. Always pat it with paper towels first. Also, press the breadcrumbs firmly into the egg-washed chicken—I use the heel of my hand for extra adhesion.
Soggy Bottoms
This happens when there’s too much oil in the pan. Use just enough olive oil to coat the bottom—about ¼ cup per batch. Maintain medium-high heat so the oil shimmers but doesn’t smoke. A cast-iron skillet gives the best even heat distribution. 🔥
Cheese Doesn’t Melt
Pre-shredded cheese often contains anti-caking agents that prevent proper melting. Always buy a wedge of Parmesan and grate it fresh. Also, ensure your oven is fully preheated to 375°F before baking.
Chicken Dries Out
Pounding the chicken to ½-inch thickness ensures even cooking without dryness. If your pieces are thicker, they may need more time in the oven. Use a meat thermometer to check for 165°F internal temperature at the thickest part.
Breading Burns
If your breadcrumbs are browning too quickly, lower the heat slightly during pan-frying. The breading should be golden brown, not dark brown. I find medium heat works better for longer cooking times.
Uneven Cooking
Crowding the pan causes uneven cooking and soggy breading. Cook in batches if needed, giving each piece 2 inches of space. This allows proper heat circulation and that perfect crisp we all want.
Nutrition Facts
Frequently Asked Questions
Can I use chicken thighs instead of breasts?
Thighs stay juicier and are more forgiving. Use bone-in, skin-on for extra flavor, but adjust cooking time to 6-7 minutes per side since they’re thicker.
How do I keep the coating crispy when reheating?
Reheat in the oven at 350°F for 10-12 minutes on a wire rack. This allows air circulation to maintain that perfect crunch. Microwaving will make it soggy.
Can I make this ahead of time?
Bread the chicken and refrigerate uncovered for up to 24 hours before cooking. This actually helps the coating adhere better. Don’t add cheese until ready to bake.
What’s the best oil for frying?
Use oils with a high smoke point like vegetable or avocado oil. Olive oil works but may smoke at medium-high heat. Avoid butter—it burns too easily.

- Jollof Rice Sauce Recipe: West African Tomato and Spice Infusion - September 25, 2026
- Japanese Rice Soup Recipe: Umami-Rich Comfort in a Bowl - September 25, 2026
- Homemade Cream Of Rice Recipe: Silk-Smooth Breakfast in Minutes - September 25, 2026