
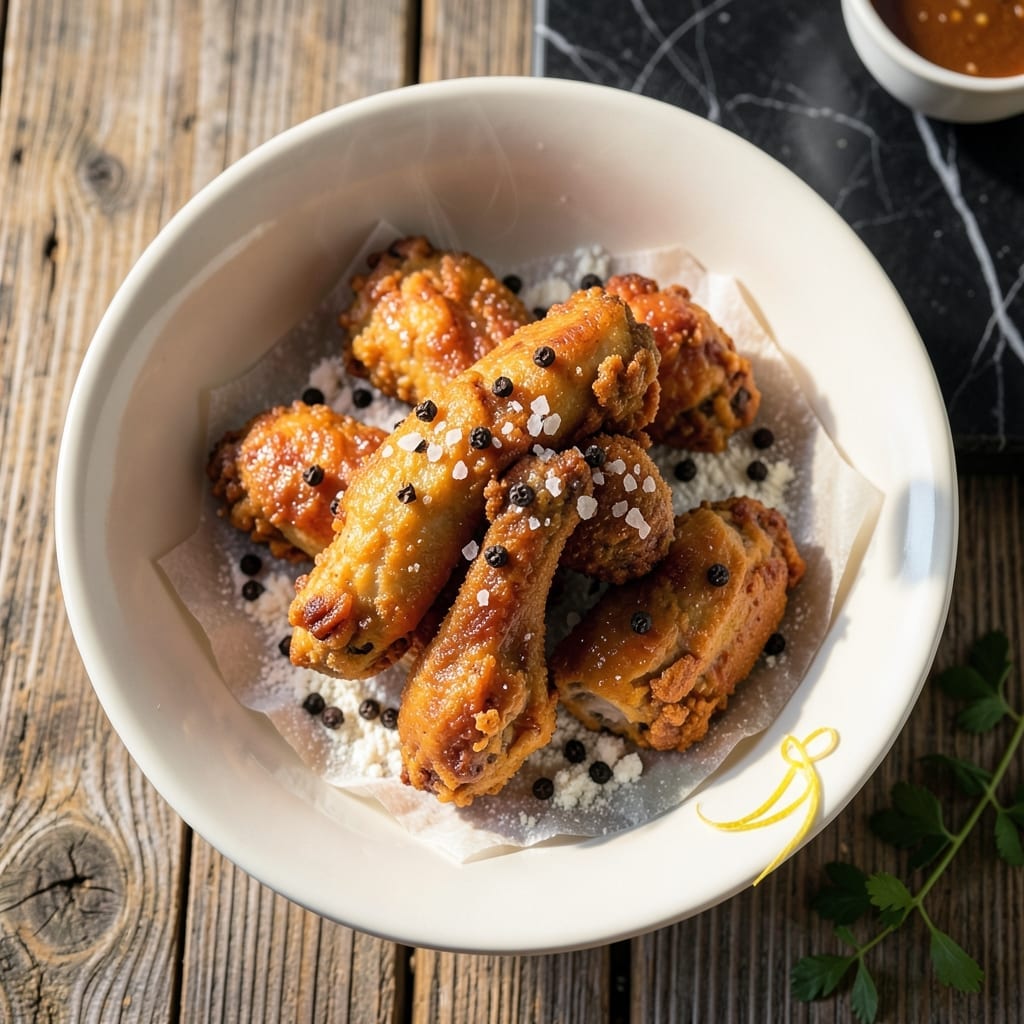
There’s a reason Southern fried chicken stands the test of time—its crispy, golden-brown exterior and juicy, tender meat create an irresistible combination that’s hard to beat.
This method relies on a well-seasoned flour coating and precise frying temperature to achieve that signature crunch without drying out the chicken.
Each piece emerges from the oil with a shatteringly crispy crust that gives way to perfectly cooked, flavorful meat inside.
The secret lies in the double-dipping technique and maintaining consistent oil temperature throughout the frying process.
Ingredients for Paula Deen Fried Chicken
Classic Southern pantry staples deliver that signature crispy, golden-brown finish every time.
| Ingredient | Amount | Notes |
|---|---|---|
| Chicken Pieces 🍗 | 3 lb | Bone-in, skin-on thighs and drumsticks |
| Buttermilk 🥛 | 2 cups | Full-fat for best texture |
| All-Purpose Flour 🌾 | 2 cups | Divided for double-dipping |
| Cornstarch 🌽 | ¼ cup | For extra crispiness |
| Salt 🧂 | 2 tsp | Diamond Crystal kosher preferred |
| Black Pepper 🌶️ | 1 tsp | Freshly ground |
| Garlic Powder 🧄 | 1 tsp | Not garlic salt |
| Onion Powder 🧅 | 1 tsp | Fine ground |
| Paprika 🌶️ | 1 tsp | Sweet or smoked variety |
| Cayenne Pepper 🔥 | ½ tsp | Adjust for spice preference |
| Vegetable Shortening 🫒 | 4 cups | For deep frying (Crisco recommended) |
| Large Eggs 🥚 | 2 whole | For binding coating |
| Hot Sauce 🔥 | 1 tbsp | Optional for buttermilk marinade |
The chicken is everything here. Bone-in, skin-on thighs and drumsticks yield the juiciest results—breasts tend to dry out. Buttermilk is non-negotiable for tenderizing and flavor; opt for full-fat. For the flour, White Lily (a Southern staple) creates the lightest crust, but any all-purpose works. The Crisco recommendation isn’t just nostalgia—its high smoke point and stability make it ideal for consistent frying temperatures.
Short on buttermilk? Whole milk plus 1 tbsp vinegar per cup works in a pinch. No cornstarch? Swap additional flour at a 1:1 ratio, though the crust won’t be as shatteringly crisp. For spice adjustments, reduce cayenne to 0.25 tsp for mild heat or omit entirely. The egg wash can be replaced with 2 tbsp buttermilk for a lighter coating, though it may adhere less securely.
Marinate the chicken in buttermilk for 12–24 hours for maximum tenderness. Frying oil can be reused 2–3 times if strained and stored in a cool, dark place. Leftovers keep in the fridge for 3–4 days, but they’re best eaten fresh—reheating in an oven at 375°F restores some crispness.
Why You’ll Love This Recipe
- Unfussy Method: I just soak the chicken in buttermilk, dredge in flour and cornstarch, and fry—no complicated steps.
- That Crispy Crunch: The cornstarch in the coating makes it shatter when you bite into it, with juicy meat underneath.
- Feeds a Crowd: I’ve served this at picnics and weeknight dinners, and it’s always the first thing to disappear.
- Budget Stretcher: A bag of thighs and drumsticks plus pantry staples gives me a meal that lasts for two nights.
Step-by-Step Instructions for Southern Fried Chicken
Here is my proven method for achieving that signature crispy coating and juicy interior.
Step 1: Marinate the Chicken in Buttermilk
Combine the 3 lb chicken pieces with 2 cups buttermilk and 1 tbsp hot sauce in a large bowl. I always use full-fat buttermilk for maximum tenderness—it breaks down proteins in the meat, ensuring a juicy result. Make sure every piece is fully submerged in the liquid.
Cover and refrigerate for at least 4 hours, or preferably overnight. This extended marination time allows the buttermilk to work its magic, resulting in chicken that stays moist even after frying. The hot sauce adds a subtle kick that complements the crispy coating perfectly.
Step 2: Prepare the Seasoned Flour Coating
In a large shallow dish, whisk together 2 cups all-purpose flour, 0.25 cup cornstarch, 2 tsp salt, 1 tsp black pepper, 1 tsp garlic powder, 1 tsp onion powder, 1 tsp paprika, and 0.5 tsp cayenne pepper. The cornstarch is the secret to that extra-crispy texture we all love.
In a separate bowl, beat the 2 whole large eggs lightly. This two-step coating process ensures maximum adhesion of the flour mixture to the chicken, creating an even, golden crust when fried. The spices in the flour give every bite that classic Southern flavor profile.
Step 3: Coat the Chicken for Maximum Crispiness
Remove the chicken from the buttermilk, letting any excess drip off. First dip each piece in the beaten eggs, then coat thoroughly in the seasoned flour mixture. Press the flour into the meat firmly to create an even layer that will crisp up beautifully.
For the crispiest result, I use the double-dipping method: after the first coating, dip the pieces back in the buttermilk, then coat in flour again. Place the coated chicken on a wire rack set over a baking sheet to allow air circulation while you heat the oil.
Step 4: Fry to Golden Perfection
In a deep heavy pot or Dutch oven, heat the 4 cups vegetable shortening to 350°F. Use a candy or deep-fry thermometer to monitor the temperature—maintaining consistent heat is crucial for even cooking and that perfect golden-brown color.
Fry the chicken in batches to avoid overcrowding, which would lower the oil temperature. Cook the dark meat for 12-15 minutes and white meat for 10-12 minutes, turning occasionally, until the coating is deep golden brown and the internal temperature reaches 165°F. The coating should be crispy and the juices should run clear when pierced.
Step 5: Drain and Rest Before Serving
Transfer the fried chicken to a wire rack set over paper towels to drain excess oil. This rack method prevents the coating from becoming soggy, which can happen if pieces sit directly on paper towels. Let the chicken rest for 5-10 minutes before serving.
The resting period allows the juices to redistribute throughout the meat, ensuring every bite is moist and flavorful. Serve immediately while hot and crispy. The result should be a perfect balance of crunchy exterior and tender, juicy meat that stays crispy even after plating.
Pro Tips For Making Paula Deen Fried Chicken
- Soak Overnight: I learned this the hard way—let the chicken pieces sit in the buttermilk for at least 8 hours, or overnight. The longer soak makes the meat tender and the crust stick like glue.
- Double Dredge: After the first flour dip, let the pieces rest 5 minutes before dredging again. Sounds weird, but it works: the crust ends up thicker and crispier.
- Skip Crowded Pan: Resist the urge to fit all the pieces in one batch. Overcrowding drops the oil temp fast, and you’ll end up with greasy, sad chicken.
- Use Cornstarch Boost: Mix a little cornstarch into your flour—about 2 tablespoons per cup. My grandmother swore by this, and she was right: it adds an extra crunch that flour alone can’t.
Flavor Customization for This Dish
Spicy Kick Upgrade
For extra heat, increase the cayenne pepper to 1 full tsp in your flour mix. I also add ½ tsp smoked paprika for depth. For serious spice lovers, mix 1 tbsp hot sauce into your buttermilk marinade. The heat builds beautifully without overpowering the crispy coating.
Herb Infusion
Add 1 tbsp dried thyme and 1 tbsp dried rosemary to your flour mixture. These herbs complement the classic spices while adding a sophisticated layer. Crush them between your fingers before adding to release their aromatic oils.
Cheesy Crust
Mix ½ cup finely grated Parmesan into your flour coating. The cheese creates a subtle umami depth and helps the crust brown even more beautifully. For a Southern twist, try ½ cup cornmeal instead for extra crunch.
Citrus Zing
Add 1 tbsp lemon zest to your flour mixture for a bright contrast to the rich fried chicken. The citrus oils in the zest will perfume the coating as it fries. I also add 1 tsp lemon pepper seasoning for extra zing. 🍋
Sweet Heat Glaze
After frying, brush pieces with a mix of ¼ cup honey and 1 tbsp hot sauce. Return to the oven at 375°F for 5 minutes to set the glaze. This creates a sticky, sweet-spicy finish that’s irresistible.
Buttermilk Variations
Swap plain buttermilk for buttermilk mixed with 2 tbsp ranch dressing in your marinade. The herbs in the ranch add wonderful complexity. For a tangy twist, use 1 cup buttermilk and 1 cup pickle juice for your soak. 💫
Nutrition Facts
Frequently Asked Questions
Can I use boneless chicken for this recipe?
Stick with bone-in pieces for best results. The bones help conduct heat evenly and keep the meat juicy during frying. Boneless tends to dry out faster and won’t hold up as well to the long cooking time.
What’s the best oil for frying?
Vegetable shortening (like Crisco) is ideal due to its high smoke point and stability. Peanut oil works well too. Avoid olive oil—its low smoke point can lead to burning at 350°F.
How do I keep the chicken crispy after frying?
Drain on a wire rack, not paper towels, to prevent sogginess. Keep pieces in a single layer in a 200°F oven while frying batches. Serve immediately for maximum crunch.
Can I bake this instead of frying?
For a lighter version, bake at 400°F for 25-30 minutes on a rack. The texture won’t be as crispy, but you’ll still get great flavor. Brush with oil first for better browning.

- Jollof Rice Sauce Recipe: West African Tomato and Spice Infusion - September 25, 2026
- Japanese Rice Soup Recipe: Umami-Rich Comfort in a Bowl - September 25, 2026
- Homemade Cream Of Rice Recipe: Silk-Smooth Breakfast in Minutes - September 25, 2026