
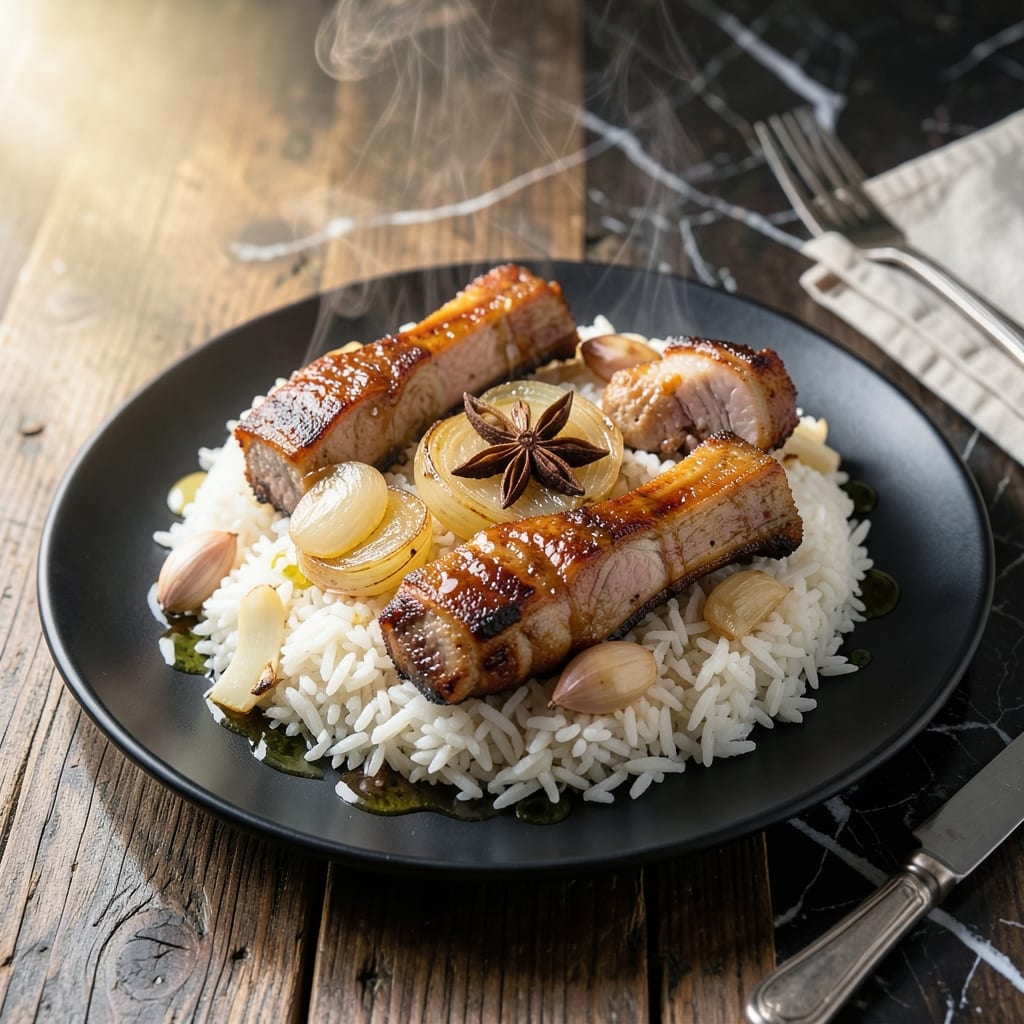
This pork backbone and rice dish delivers tender meat that falls off the bone with perfectly fluffy grains. A slow-cooked method ensures maximum flavor infusion into every bite.
The secret lies in simmering the pork with aromatic spices until it reaches melt-in-your-mouth perfection. Each grain of rice absorbs the rich, savory broth created during the process.
What emerges is a comforting one-pot meal where the pork becomes so tender it nearly dissolves into the rice. The result is hearty, satisfying, and deeply flavorful.
Ideal for family dinners or meal prep, this recipe transforms simple ingredients into a memorable dish. The slow cooking process guarantees consistent results every time.
Ingredients for Pork Backbone and Rice
Slow-cooked pork backbone and fluffy rice require aromatic spices and a few pantry staples for depth.
| Ingredient | Amount | Notes |
|---|---|---|
| Pork Backbone 🍖 | 2 lb | Cut into 2-inch pieces |
| Long-Grain White Rice 🍚 | 2 cups | Rinsed until water runs clear |
| Yellow Onion 🧅 | 1 whole | Medium, finely chopped |
| Garlic Cloves 🧄 | 6 cloves | Minced for depth of flavor |
| Fresh Ginger 🌿 | 1 tbsp | Peeled and grated |
| Star Anise Pods ⭐ | 2 whole | Whole pods for infusion |
| Bay Leaves 🍃 | 2 pieces | Dried, for aroma |
| Soy Sauce 🫒 | ¼ cup | Low-sodium preferred |
| Oyster Sauce 🫒 | 2 tbsp | For umami depth |
| Chicken Broth 🥣 | 4 cups | Low-sodium or homemade |
| Shaoxing Wine 🍶 | 2 tbsp | Or dry sherry substitute |
| Sesame Oil 🫒 | 1 tsp | Toasted, for finishing |
| Green Onions 🧅 | ½ cup | Thinly sliced for garnish |
| Salt 🧂 | 1 tsp | Adjust to taste |
| Black Pepper 🌶️ | ½ tsp | Freshly ground |
The pork backbone is critical—ask your butcher for neck or spine pieces with good meat coverage (avoid overly fatty cuts). Asian markets often carry pre-cut pieces, but most supermarkets can order them with a day’s notice. Look for bones with marbling throughout—this ensures the melt-in-your-mouth texture. For the rice, jasmine or long-grain white works best (avoid instant or parboiled).
No Shaoxing wine? Dry sherry at a 1:1 ratio works perfectly. Oyster sauce can be swapped for vegetarian oyster sauce or extra soy sauce in a pinch. Star anise is non-negotiable for authentic flavor, but if absent, a pinch of five-spice powder can substitute. For the broth, homemade is ideal, but store-bought low-sodium works—just reduce added salt.
This dish tastes even better the next day as flavors meld. Store in an airtight container in the fridge for up to 4 days or freeze for 3 months. Reheat gently with a splash of water to restore moisture (the rice absorbs it eagerly).
Why You’ll Love This Recipe
- One Pot Wonder: It’s literally just searing the pork backbone, tossing in rice and aromatics, and letting the pot do the work.
- Garlic-Ginger Magic: The combo of fresh ginger, garlic, and caramelized onion turned my rice into something I’d order at a restaurant.
- Feeds the Fam: Between us, this stretches to three meals for my family of four without feeling like leftovers.
Step-by-Step Instructions for Pork Backbone and Rice
This method ensures fall-apart pork and perfectly cooked grains with minimal effort.
Step 1: Sear the Pork Backbone for Depth of Flavor
Pat the 2 lb Pork Backbone dry with paper towels and season with 1 tsp Salt and 0.5 tsp Black Pepper. Heat a large pot over medium-high heat with a drizzle of oil. Add the pork pieces and sear until deeply browned on all sides, about 5-6 minutes per batch.
This step builds a flavorful fond that will infuse the rice with rich, caramelized notes. Don’t overcrowd the pot—work in batches if necessary to avoid steaming the meat. Transfer the seared pork to a plate and set aside.
Step 2: Toast Aromatics and Rice for Nutty Complexity
In the same pot, add the 1 whole Yellow Onion, 6 cloves Garlic Cloves, and 1 tbsp Fresh Ginger. Sauté for 2-3 minutes until fragrant and translucent. Stir in the 2 cups Long-Grain White Rice and cook for 1-2 minutes, toasting the grains until they appear slightly opaque.
This toasting step enhances the rice’s natural nuttiness and ensures each grain absorbs maximum flavor. Add the 2 whole Star Anise Pods and 2 pieces Bay Leaves to the pot, stirring to combine with the rice and aromatics.
Step 3: Deglaze and Simmer for Perfect Tenderness
Pour in the 2 tbsp Shaoxing Wine to deglaze the pot, scraping up any browned bits with a wooden spoon. Add the 0.25 cup Soy Sauce, 2 tbsp Oyster Sauce, and 4 cups Chicken Broth. Stir well to combine, then return the seared pork to the pot.
Bring the mixture to a boil, then reduce heat to low. Cover and simmer for 45-50 minutes, or until the pork is fork-tender and the rice has absorbed most of the liquid. Resist the urge to stir during cooking—this prevents the rice from becoming mushy.
Step 4: Rest and Finish with Aromatic Garnish
Once the pork is tender and the rice is cooked, remove the pot from heat. Discard the star anise pods and bay leaves. Drizzle the 1 tsp Sesame Oil over the top and gently fold it into the rice and pork.
Cover the pot and let it rest for 10 minutes. This allows the flavors to meld and the rice to fully absorb any remaining liquid. Garnish with 0.5 cup Green Onions just before serving to add a fresh, vibrant finish to the dish.
Pro Tips For Making Pork Backbone And Rice
- Brown the Backbone: Sear the pork backbone pieces in batches over medium-high heat until deeply browned—this builds a flavor base that plain boiling just can’t match. I learned this the hard way after making bland versions for years.
- Rinse the Rice: Give the long-grain white rice a quick rinse before cooking to remove excess starch, which prevents a gummy texture in the final dish.
- Skip Raw Ginger: Always sauté the fresh ginger with the onion and garlic first—raw ginger can leave a harsh, fibrous bite in the finished rice.
- Use Bone Broth: Swap water for pork or chicken bone broth when cooking the rice—it adds depth without extra effort, and the rice soaks up every bit of flavor.
Dietary Considerations for This Dish
Gluten-Free Friendly
This dish can easily fit a gluten-free diet. Simply swap the soy sauce for tamari and ensure your oyster sauce is labeled gluten-free. Many brands like San-J offer certified options. I always double-check labels to be safe.
Low-Sodium Option
For those watching their sodium, use low-sodium chicken broth and reduce the soy sauce to 2 tbsp. Boost flavor with extra garlic and ginger instead. The pork’s natural richness still shines through without excess salt.
Dairy-Free Naturally
This recipe is inherently dairy-free, as it relies on meat, rice, and plant-based seasonings. No substitutions are needed—just follow the recipe as written. The umami depth comes from oyster sauce and Shaoxing wine, not dairy products.
Pork Allergen Note
If pork is an allergen concern, consider substituting with beef short ribs or chicken thighs. The cooking method remains the same, though you may need to adjust simmering time. Always verify with your physician for severe allergies.
Meal Prep Friendly
This dish reheats beautifully, making it perfect for weekly meal prep. Portion into airtight containers and refrigerate for up to 4 days. Reheat with a splash of water to maintain moisture. The flavors actually deepen overnight. 💪
Balanced Macros
Each serving offers a good balance of protein from the pork and carbs from the rice. For extra veggies, stir in steamed broccoli or bok choy just before serving. This keeps the meal hearty yet nutritious.
Nutrition Facts
Frequently Asked Questions
Can I use a different cut of pork?
Yes, pork ribs or shoulder work well, but may need 5-10 minutes less cooking. Avoid lean cuts like tenderloin as they dry out. The backbone’s marbling is key for tender results.
What if my rice turns mushy?
This usually happens from stirring during cooking or using too much liquid. Stick to 4 cups broth for 2 cups rice and resist stirring. The resting time helps firm it up.
Can I make this in a rice cooker?
Sear the pork first, then add all ingredients to your cooker. Use the “porridge” setting for 45-50 minutes. Results may be slightly less crispy but just as flavorful.

- Jollof Rice Sauce Recipe: West African Tomato and Spice Infusion - September 25, 2026
- Japanese Rice Soup Recipe: Umami-Rich Comfort in a Bowl - September 25, 2026
- Homemade Cream Of Rice Recipe: Silk-Smooth Breakfast in Minutes - September 25, 2026