
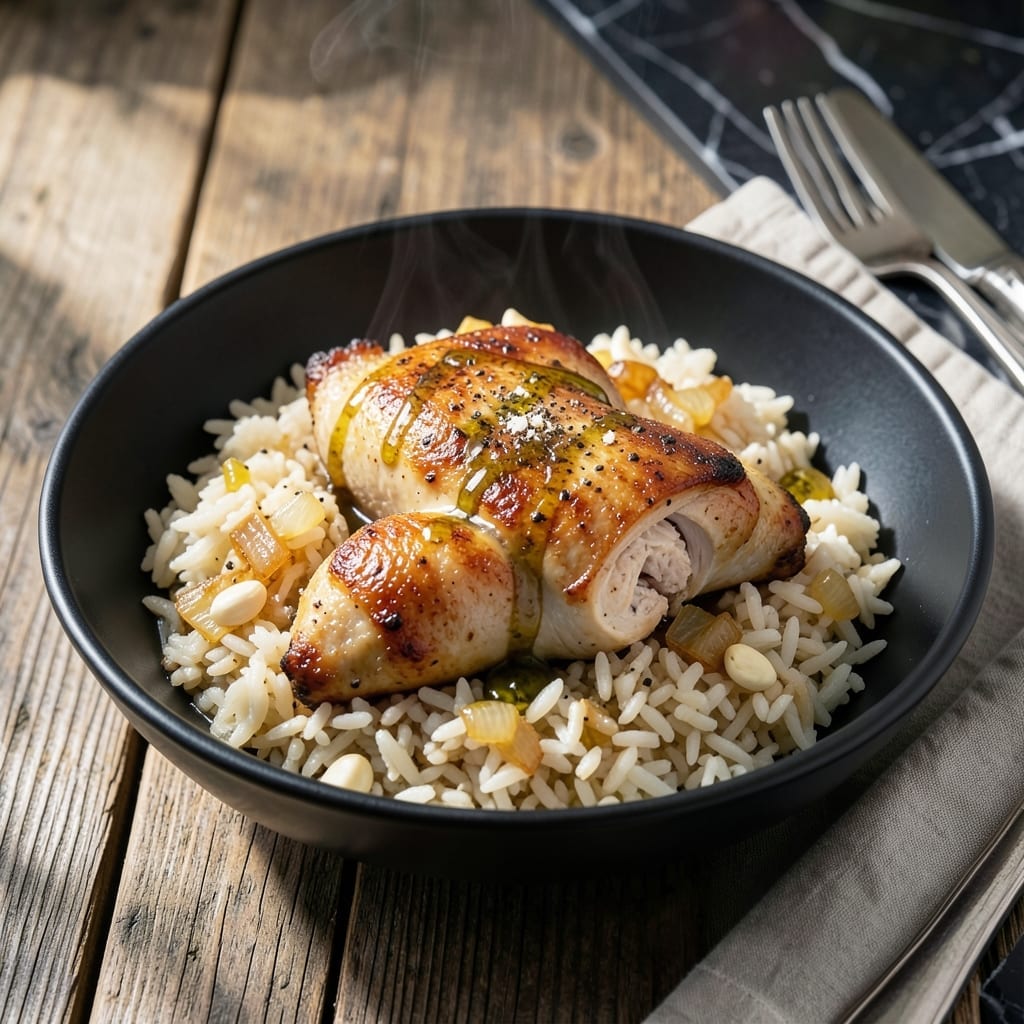
This one-pot meal is the solution to busy weeknights when you need dinner fast. The power pressure cooker transforms simple ingredients into a complete meal in under 30 minutes.
I developed this method after years of struggling with timing chicken and rice together. The pressure cooker locks in moisture, ensuring the chicken stays tender while the rice absorbs maximum flavor.
What you get is perfectly cooked chicken pieces nestled in fluffy, seasoned rice with minimal cleanup. The sealed environment means every grain soaks up the savory cooking liquid.
The beauty of this dish lies in its simplicity and reliability. Set it, forget it, and come back to a meal that tastes like it simmered for hours.
Ingredients for Power Pressure Cooker Chicken and Rice
Simple ingredients for a complete one-pot dinner. Nothing fancy, just flavor.
| Ingredient | Amount | Notes |
|---|---|---|
| Boneless Chicken Thighs 🍗 | 1 ½ lb | Skin-on or skinless, your choice |
| Long-Grain White Rice 🍚 | 1 ½ cups | Uncooked, rinsed before use |
| Chicken Broth 🥣 | 2 ½ cups | Low-sodium preferred |
| Yellow Onion 🧅 | 1 whole | Medium size, finely diced |
| Garlic Cloves 🧄 | 4 cloves | Minced for maximum flavor |
| Olive Oil 🫒 | 2 tbsp | Extra-virgin or light |
| Dried Thyme 🌿 | 1 tsp | Crushed between fingers |
| Dried Oregano 🍃 | 1 tsp | Mediterranean variety ideal |
| Paprika 🌶️ | 1 tsp | Sweet or smoked, your preference |
| Salt 🧂 | 1 tsp | Kosher or sea salt |
| Black Pepper 🌶️ | ½ tsp | Freshly ground preferred |
| Bay Leaf 🌿 | 1 whole | Remove before serving |
| Frozen Peas 🌱 | 1 cup | Optional for color and texture |
The chicken is the backbone here. Thighs stay juicier than breasts under pressure—look for skin-on if you want extra richness (crisp it up after cooking). I get mine from Whole Foods or Costco—their organic options are solid. The rice? Jasmine or basmati also work, but adjust liquid slightly since they absorb differently.
No chicken broth? Water plus bouillon cube saves the day. Fresh garlic is ideal but jarred minced at half the amount works in a pinch. Out of thyme? Swap in poultry seasoning—it’s basically thyme plus other good stuff. For the peas, fresh or canned (drained) are fine. The paprika can be skipped if you’re not a fan, but it adds a nice depth.
Leftovers keep beautifully—4-5 days in the fridge. Freeze portions for up to 3 months (the rice might soften a bit, but it’s still tasty). Pro tip: Sauté the onions and garlic first. Worth the extra minute.
Why You’ll Love This Recipe
- Set It & Forget: I dump everything in the pressure cooker and walk away while it works its magic.
- Garlicky Gold: The chicken broth and garlic cloves infuse the rice with a rich, savory depth that’s honestly addictive.
- Weeknight Hero: Between us, this is my go-to after soccer practice—ready before the kids finish their homework.
- Stretches Far: One batch makes enough for dinner tonight and lunches tomorrow, and the chicken thighs keep it budget-friendly.
Step-by-Step Instructions for Chicken and Rice
Here’s how to make this one-pot wonder with minimal effort and maximum flavor.
Step 1: Sear the Chicken Thighs
Set your pressure cooker to the sauté function and add the 2 tbsp olive oil. Once hot, add the 1.5 lb boneless chicken thighs in a single layer. I like to season them with 1 tsp salt and 0.5 tsp black pepper right before they hit the pan.
Sear for 3-4 minutes per side until golden brown and easily released from the bottom. This step builds deep flavor, so don’t rush it. Remove the chicken and set aside—it doesn’t need to be fully cooked yet.
Step 2: Build the Flavor Base
In the same pot, add the finely diced 1 whole yellow onion and cook for 2-3 minutes until soft and translucent. Stir in the minced 4 cloves garlic cloves and cook for 30 seconds until fragrant.
Add the 1 tsp dried thyme, 1 tsp dried oregano, and 1 tsp paprika, stirring to coat the onions and garlic. This creates a rich aromatic foundation for the dish. Pour in ½ cup of the 2.5 cups chicken broth to deglaze, scraping up any browned bits.
Step 3: Pressure Cook the Rice and Chicken
Add the remaining 2 cups chicken broth, the 1.5 cups long-grain white rice, and the 1 whole bay leaf to the pot. Stir well to combine. Return the seared chicken to the pot, nesting it into the rice mixture.
Secure the lid and set the pressure cooker to high pressure for 8 minutes. It’ll take about 10-15 minutes to come to pressure. Once done, let the pressure release naturally for 5 minutes, then quick-release any remaining pressure.
Step 4: Finish with Peas and Rest
Open the lid carefully and remove the 1 whole bay leaf. Stir in the 1 cup frozen peas—they’ll heat through quickly. Let the dish sit covered for 5 minutes to allow the rice to absorb any remaining liquid and the flavors to meld.
The rice should be tender and the chicken should reach 165°F internally. If the mixture seems too thick, stir in a splash of water or broth. The peas add a pop of color and sweetness that balances the savory notes perfectly.
Pro Tips For Making Power Pressure Cooker Chicken And Rice
- Sear the Thighs: Brown the boneless chicken thighs in the pressure cooker first—about 3-4 minutes per side—before adding anything else. I learned this the hard way: skipping this step means bland, pale chicken.
- Rinse the Rice: Always rinse the long-grain white rice until the water runs clear. Sounds tedious, but it keeps the dish from turning gummy or starchy.
- Skip Overfilling: Never exceed the halfway mark in your pressure cooker—rice expands, and broth needs room to circulate. My first attempt overflowed, and I spent an hour scrubbing the valve.
- Use Room-Temp Broth: Pour in chicken broth that’s not ice-cold straight from the fridge—it adds 5-10 minutes to pressuring time. I was skeptical until I tried it and shaved a third off my cook time.
Wine and Beer Pairings for This power pressure cooker chicken and rice
White Wine Pairings
A crisp Sauvignon Blanc from New Zealand cuts through the richness beautifully. I love the citrus notes from Kim Crawford or Oyster Bay—they complement the savory chicken and rice without overpowering. Serve chilled at 45-50°F for best results. 🍷
Red Wine Options
For red lovers, a light Pinot Noir from Oregon works surprisingly well. Try Meiomi or La Crema—their bright acidity and red fruit notes pair nicely with the dish’s herbaceous flavors. Avoid heavy Cabernets that will dominate the meal.
Craft Beer Choices
A wheat beer like Blue Moon or Hoegaarden enhances the dish’s comforting qualities. The citrus and coriander notes in these Belgian-style brews complement the thyme and oregano. Serve in a frosted glass at 40-45°F. 🍺
Light Beer Pairing
For a simpler option, a crisp American lager like Samuel Adams or Budweiser cleanses your palate between bites. The carbonation cuts through the richness while the mild flavor won’t compete with the meal.
Non-Alcoholic Suggestions
Sparkling water with a squeeze of lime makes a refreshing alcohol-free pairing. I also enjoy iced tea—unsweetened with a lemon wedge lets the dish’s flavors shine.
Nutrition Facts
Frequently Asked Questions
Can I use chicken breasts instead of thighs?
Yes, but reduce cooking time to 6 minutes under pressure to prevent dryness. Thighs stay juicier, but breasts work if that’s what you have.
What if my rice turns out mushy?
This usually means too much liquid or stirring after cooking. Use exactly 2.5 cups broth and let it rest undisturbed for 5 minutes after cooking.
Can I add other vegetables?
Try diced carrots or bell peppers with the onions. For frozen veggies, add them with the peas at the end.
How do I know when the chicken is done?
Use a meat thermometer to check for 165°F internally. The chicken will be tender and easily pull apart when done.

- Jollof Rice Sauce Recipe: West African Tomato and Spice Infusion - September 25, 2026
- Japanese Rice Soup Recipe: Umami-Rich Comfort in a Bowl - September 25, 2026
- Homemade Cream Of Rice Recipe: Silk-Smooth Breakfast in Minutes - September 25, 2026