
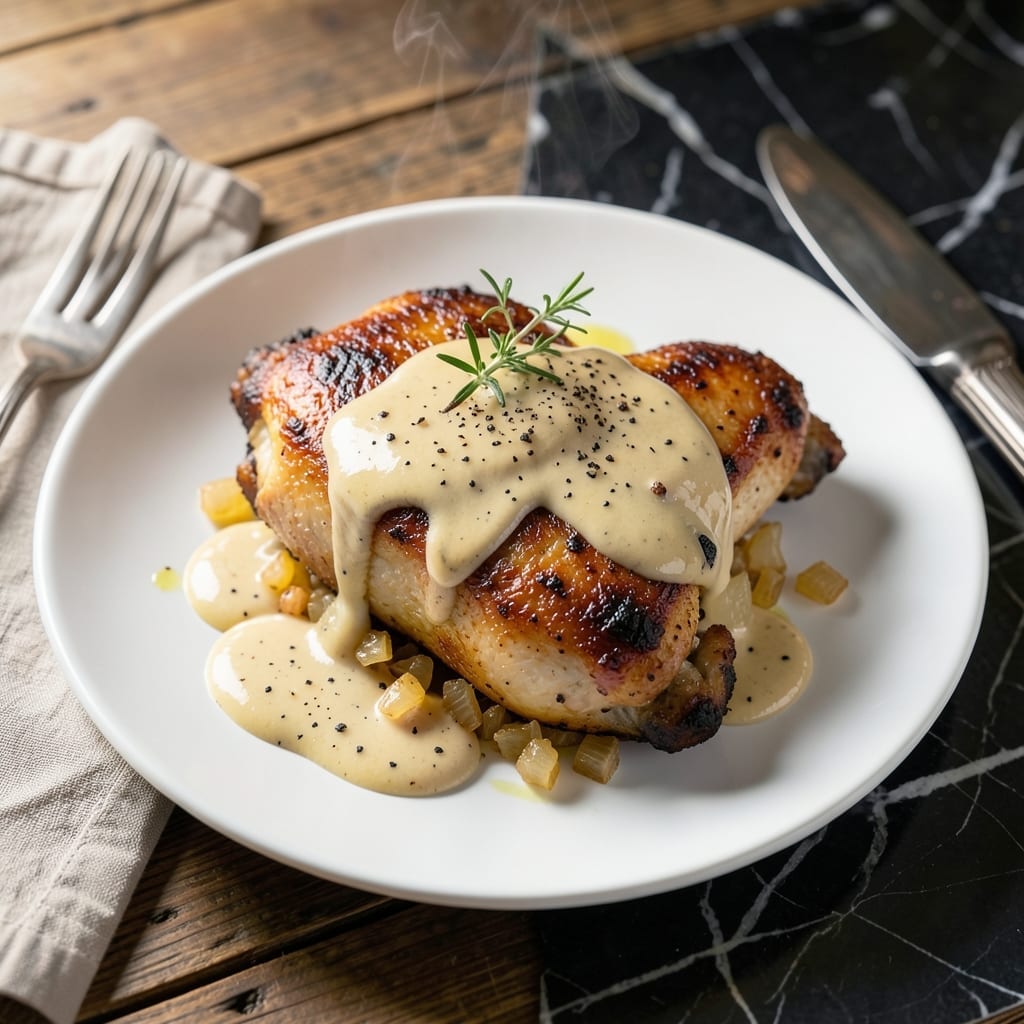
This skillet recipe delivers weeknight comfort without the fuss, bringing tender chicken and rich gravy together in record time. The method streamlines classic techniques into a quick one-pan process that never sacrifices flavor.
The key is searing chicken thighs to build a flavorful fond, then using that base to create a velvety gravy with minimal ingredients. Every step serves double duty, ensuring maximum taste with minimal effort.
What emerges is juicy chicken smothered in a comforting gravy that soaks into every bite. The result tastes like it simmered for hours, though it comes together in under 30 minutes.
Perfect for busy evenings when you need a satisfying meal fast. The skillet does all the work for you.
Ingredients for Quick Chicken and Gravy
Tender chicken and velvety gravy come together with just a handful of pantry staples.
| Ingredient | Amount | Notes |
|---|---|---|
| Chicken Thighs 🍗 | 1 ½ lb | Boneless, skinless preferred |
| All-Purpose Flour 🌾 | ½ cup | For thickening gravy |
| Chicken Broth 🥣 | 2 cups | Low-sodium preferred |
| Heavy Cream 🥛 | ½ cup | Full-fat for richness |
| Unsalted Butter 🧈 | 4 tbsp | Divided for searing and gravy |
| Yellow Onion 🧅 | 1 whole | Medium, finely diced |
| Garlic Cloves 🧄 | 3 cloves | Minced for depth |
| Fresh Thyme Sprigs 🌿 | 4 pieces | Leaves stripped, stems discarded |
| Dijon Mustard 🟡 | 1 tbsp | For acidity balance |
| Worcestershire Sauce 🍶 | 1 tsp | Adds umami complexity |
| Kosher Salt 🧂 | 1 ½ tsp | Diamond Crystal preferred |
| Freshly Ground Black Pepper 🌶️ | 1 tsp | Coarse grind recommended |
| Olive Oil 🫒 | 1 tbsp | For initial searing |
The chicken thighs are non-negotiable here—bone-in, skin-on yields the most flavor, though boneless works in a pinch. Costco often carries high-quality thighs in bulk, or look for organic options at Whole Foods for superior texture. The key is a good sear, so don’t overcrowd the skillet. Fresh thyme makes a difference, but dried (at one-third the amount) is fine if that’s what’s on hand.
No heavy cream? Whole milk with a splash of half-and-half works, though the gravy won’t be as rich. For a dairy-free option, full-fat coconut milk is surprisingly good. Swap the Dijon for yellow mustard if needed, but the depth won’t be quite the same. The Worcestershire can be omitted, but it adds a complexity that’s worth the bottle. Annie’s makes a great natural version.
Leftovers keep beautifully—store in an airtight container for up to 4 days in the fridge. The gravy thickens as it cools, so thin with a splash of broth when reheating. Freezes well for 3 months, though the texture changes slightly. Always bring to a simmer before serving.
Why You’ll Love This Recipe
- One Pan Wonder: I love that this comes together in a single skillet—just sear the chicken, make the gravy, and you’re done.
- Creamy Comfort: The heavy cream and butter create this rich, velvety gravy that clings to the chicken thighs like a warm hug.
- Weeknight Hero: Honestly, it’s my go-to for busy evenings when I need something hearty on the table fast.
- Budget Friendly: Chicken thighs stay affordable, and a little flour and broth stretch into a meal that feeds my whole family.
Step-by-Step Instructions for Chicken and Gravy
This streamlined method delivers tender chicken with rich gravy in under an hour.
Step 1: Season and Sear the Chicken Thighs
Pat the 1.5 lb chicken thighs dry with paper towels and season both sides with 1.5 tsp kosher salt and 1 tsp freshly ground black pepper. The dry surface ensures a proper sear rather than steaming.
Heat 1 tbsp olive oil in a large skillet over medium-high heat until shimmering. Add the chicken and sear for 4-5 minutes per side until deep golden brown and the internal temperature reaches 165°F. Remove and set aside.
Step 2: Build the Flavor Base
In the same skillet, melt 2 tbsp unsalted butter over medium heat. Add the finely diced yellow onion and cook for 5 minutes until softened and translucent, stirring occasionally to prevent browning.
Add the minced garlic cloves and stripped fresh thyme leaves, cooking for 30 seconds until fragrant. Stir in 1 tbsp Dijon mustard and 1 tsp Worcestershire sauce, allowing them to bloom in the fat for 1 minute.
Step 3: Create the Gravy
Sprinkle 0.5 cup all-purpose flour over the onion mixture and stir constantly for 2 minutes to cook out the raw flour taste. The mixture should reach a light golden color, forming a roux that will thicken the gravy.
Gradually whisk in 2 cups chicken broth, scraping up any browned bits from the bottom of the skillet. Bring to a simmer and cook for 3-4 minutes until the gravy begins to thicken. Stir in 0.5 cup heavy cream and the remaining 2 tbsp unsalted butter.
Step 4: Finish and Serve
Return the chicken to the skillet, nestling it into the gravy. Spoon the gravy over the chicken and simmer for 2-3 minutes to allow the flavors to meld and the chicken to reheat. The gravy should coat the back of a spoon with a velvety consistency.
Taste and adjust seasoning if needed, though the initial salting should be sufficient. Serve immediately, ensuring each portion has plenty of that rich, savory gravy spooned over the top. The chicken should be fall-apart tender with a glossy, flavorful sauce.
Pro Tips For Making Quick Chicken And Gravy
- Brown the Thighs Well: Get a deep golden crust on the chicken before removing it—this builds the fond that makes your gravy rich and flavorful. I learned this the hard way after my first few batches tasted flat.
- Use Cold Heavy Cream: Add the cream straight from the fridge to prevent curdling when it hits the hot broth. Sounds weird, but it works every time.
- Skip the Overcrowding: Cook the thighs in batches if needed—crowding the pan steams them instead of browning, and you’ll end up with sad, pale chicken.
- Deglaze with Broth: After removing the chicken, pour in about ½ cup broth and scrape the bottom of the pan. Those browned bits are pure flavor, and skipping this step guarantees a weaker gravy.
Pro Cooking Tips for Great quick chicken and gravy
Perfect Searing Technique
Pat the chicken completely dry before seasoning—this ensures a beautiful, deep golden crust. Heat your skillet over medium-high heat until the oil shimmers but doesn’t smoke. I use a cast-iron skillet for even heat distribution. 🔥
Roux Timing
Cook the flour and butter mixture for exactly 2 minutes—any less and your gravy will taste raw, any longer and it risks burning. Stir constantly and watch for that light golden color, which signals it’s ready for liquid.
Deglazing Properly
When adding the broth, use a wooden spoon to scrape up every browned bit from the skillet bottom. Those caramelized bits pack enormous flavor into your gravy. Whisk vigorously to prevent lumps as you pour in the 2 cups chicken broth.
Gravy Consistency
If your gravy thickens too much before the chicken returns to the pan, simply whisk in an additional ¼ cup chicken broth. The perfect consistency should coat the back of a spoon but still drip slowly. I check this with a metal spoon for accuracy. 💡
Resting the Chicken
Let the chicken rest in the gravy for those final 2-3 minutes off the heat. This brief rest allows the juices to redistribute, ensuring every bite stays moist and flavorful when served.
Final Seasoning Check
Taste the gravy one last time before serving— parfois the searing process concentrates the salt, so you might need just a pinch more. I always keep kosher salt and pepper on hand for final adjustments.
Nutrition Facts
Frequently Asked Questions
Can I use chicken breasts instead of thighs?
You can, but thighs stay juicier and handle the quick cooking better. If using breasts, reduce searing time to 3-4 minutes per side and check internal temperature reaches 165°F to avoid dryness.
How do I fix lumpy gravy?
Whisk vigorously while adding broth to prevent clumps. If lumps form, strain through a fine-mesh sieve or blend briefly with an immersion blender for a silky texture.
What can I serve with this dish?
Classic pairings include mashed potatoes, buttered noodles, or crusty bread to soak up the gravy. Roasted vegetables like green beans or carrots add a fresh contrast.
Can I make this ahead of time?
Yes! Cook and refrigerate for up to 3 days. Reheat gently on the stove with a splash of broth to thin the gravy. Avoid microwaving to prevent separation.

- Rice Mix Recipe: Fluffy Grains With Customizable Flavor Boost - September 25, 2026
- Soupy Rice Recipe: Broth-Soaked Grains With Rustic Depth - September 25, 2026
- Rice Paper Pancakes Recipe: Crispy Vietnamese Breakfast Delight - September 25, 2026