
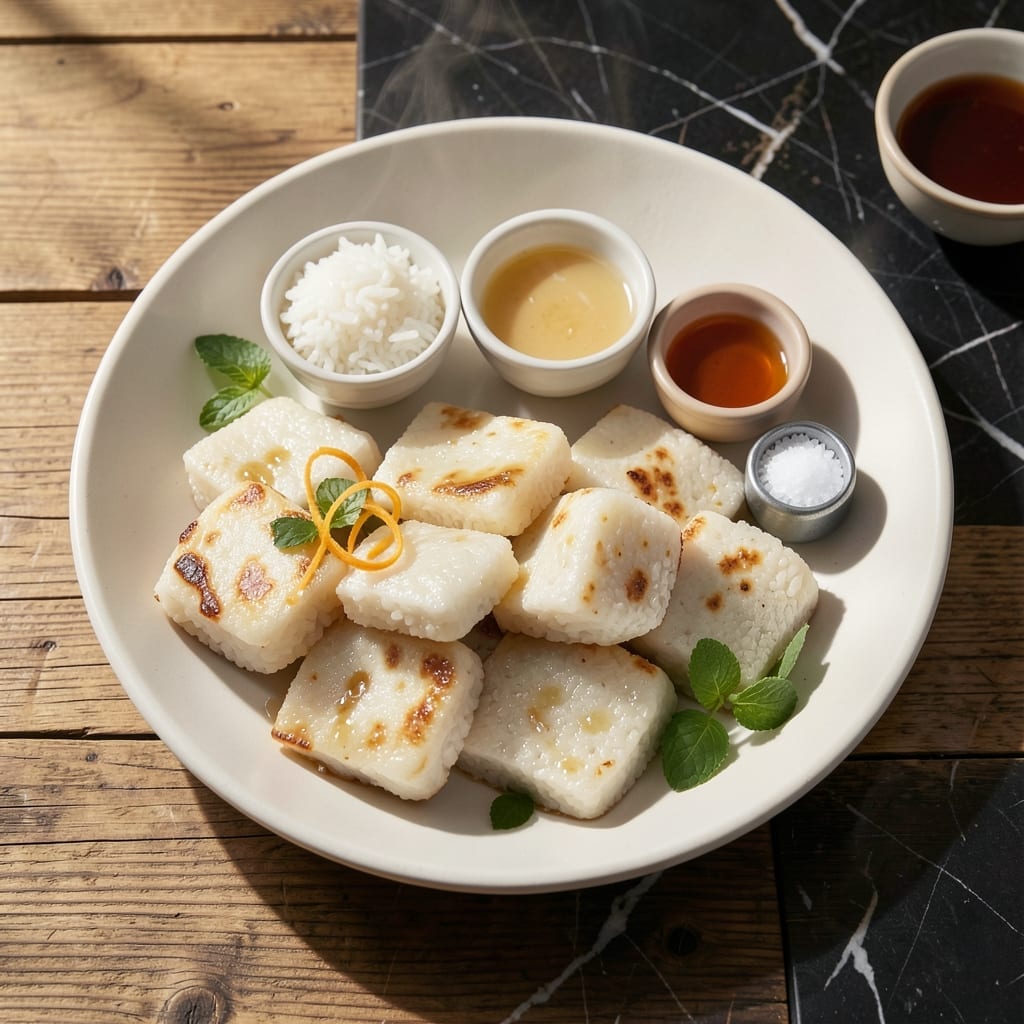
This recipe delivers perfectly textured rice cakes with minimal effort. The contrast between crispy edges and soft centers makes every bite satisfying.
I developed this method after testing numerous approaches to achieve that ideal texture. The key is using the right rice-to-water ratio and precise cooking times.
You’ll love how these come together in under 20 minutes with just a few pantry staples. The process is straightforward but yields impressive results.
Serve warm for the best experience, when the edges are at their crispiest. This dish proves that simple ingredients can create something extraordinary.
Ingredients for Quick Rice Cake
Short list of pantry staples transforms into crispy-edged rice cakes in minutes.
| Ingredient | Amount | Notes |
|---|---|---|
| Sushi Rice 🍚 | 2 cups | Short-grain, rinsed thoroughly |
| Water 💧 | 2 ½ cups | For cooking rice |
| Rice Vinegar 🍶 | 2 tbsp | Seasoned or unseasoned |
| Granulated Sugar 🍚 | 1 tsp | Dissolved in vinegar |
| Salt 🧂 | ½ tsp | Fine sea salt preferred |
| Neutral Oil 🫒 | 2 tbsp | For crisping, like vegetable or canola |
| Sesame Seeds 🌿 | 1 tbsp | Toasted, for garnish |
| Green Onions 🧅 | 2 whole | Thinly sliced for topping |
| Soy Sauce 🍶 | 1 tbsp | For serving, optional |
| Sesame Oil 🫒 | ½ tsp | For drizzling, optional |
The rice is non-negotiable here. Short-grain sushi rice delivers the sticky texture needed to hold shape while crisping. Look for brands like Koshihikari or Nishiki at Asian markets or well-stocked supermarkets. Rinse until the water runs clear—this removes excess starch that could make the cakes gummy rather than crisp.
No sushi rice? Arborio works in a pinch but requires an extra rinse. Skip the sugar if you prefer savory cakes, or swap in mirin for depth. The neutral oil can be any with a high smoke point—avocado or grapeseed oil are great. For gluten-free, use tamari instead of soy sauce (or omit entirely).
Cooked rice cakes keep 3-4 days refrigerated in an airtight container. Re-crisp in a dry skillet or air fryer for 2-3 minutes. Freeze uncooked patties on a tray first, then store in bags for up to 1 month.
Why You’ll Love This Recipe
- Ready in 20: I can have these rice cakes sizzling in the pan before my coffee cools down. Just mix, shape, and cook—no fancy techniques.
- Sweet-Tangy Bite: That balance of rice vinegar’s zing with a whisper of sugar makes them irresistibly moreish. Honestly, I sneak one straight from the pan every time.
- Meal Prep Hero: They reheat like a dream, so I make a batch Sunday and toss them in lunches all week. My kids beg for them cold, too.
- Pantry Staples: Sushi rice and a few cupboard basics are all it takes. I’ll be real: it’s cheaper than takeout and just as satisfying.
Step-by-Step Instructions for Quick Rice Cake
This method delivers perfectly crisp edges with tender centers in minimal time.
Step 1: Prepare and Cook the Sushi Rice
Rinse the 2 cups sushi rice thoroughly under cold water until the water runs clear. This removes excess starch that could make the rice cakes gummy. Drain well in a fine-mesh sieve.
Combine the drained rice with 2.5 cups water in a rice cooker or saucepan. Cook according to standard sushi rice instructions until the water is absorbed and the rice is tender. Let it sit covered for 10 minutes off heat.
Step 2: Season the Cooked Rice
While the rice is still warm, transfer it to a large bowl. In a small bowl, whisk together 2 tbsp rice vinegar, 1 tsp granulated sugar, and 0.5 tsp salt until dissolved. Drizzle this mixture over the rice.
Gently fold the seasoning into the rice using a cutting motion with a rice paddle or silicone spatula. Be careful not to mash the grains—you want each to remain intact. The rice should be sticky but not mushy.
Step 3: Form and Crisp the Rice Cakes
Heat 2 tbsp neutral oil in a nonstick skillet over medium-high heat until shimmering. While the oil heats, divide the seasoned rice into 8 equal portions (about ¼ cup each) and shape into compact rounds or triangles.
Working in batches, place the rice cakes in the hot oil. Cook undisturbed for 4-5 minutes until the bottoms develop a deep golden crust. Flip carefully and cook another 3-4 minutes until equally crisp. The edges should be lacy and browned.
Step 4: Garnish and Serve Immediately
Transfer the crispy rice cakes to a paper towel-lined plate to drain excess oil. While still hot, sprinkle with 1 tbsp sesame seeds and thinly sliced 2 whole green onions. The heat will help the toppings adhere.
Serve warm with optional drizzles of 1 tbsp soy sauce and 0.5 tsp sesame oil for added depth. The contrast between the crispy exterior and soft interior is best enjoyed fresh from the pan.
Pro Tips For Making Quick Rice Cake
- Rinse the Rice: Wash the sushi rice until the water runs clear—this removes excess starch so your rice cakes hold their shape instead of turning gummy.
- Heat the Vinegar: Warm the rice vinegar, sugar, and salt mixture slightly before mixing with rice; it dissolves better and coats the grains evenly without clumping.
- Press While Warm: Shape the rice into cakes while it’s still warm and sticky—waiting until it cools makes it harder to form and can lead to crumbly results.
- Use a Damp Cloth: Keep a damp towel over the rice while you work to prevent it from drying out, especially if you’re making multiple batches.
Essential Equipment for Perfect Results
Rice Cooker
A reliable rice cooker is non-negotiable for perfectly cooked sushi rice. I use my Zojirushi 3-cup model—it consistently turns out fluffy, evenly cooked grains every time. The keep-warm function is great for maintaining temperature while you prep the cakes. 💡
Nonstick Skillet
For crisping, a heavy-bottomed nonstick skillet (like my 12-inch All-Clad) prevents sticking and promotes even browning. The nonstick surface lets you flip the cakes without tearing. Avoid thin pans that create hot spots.
Fine-Mesh Sieve
Rinsing the rice properly requires a fine-mesh sieve to catch all the starch without losing grains. I use a stainless steel Oxo model that fits over my sink. This step is crucial for achieving the right texture.
Rice Paddle
A wooden rice paddle or silicone spatula helps fold the seasoning into the rice without crushing the grains. The flat surface cuts through the rice gently. I keep mine soaking in water to prevent sticking.
Paper Towels
Have paper towels ready to drain the crispy cakes after frying. This keeps them from getting soggy. I use Bounty for its absorbency. The cakes stay crisp longer when excess oil is removed immediately.
Kitchen Scale
For consistent portioning, a digital kitchen scale ensures each cake is the same size. I weigh out 60g portions for uniformity. This is especially helpful when making larger batches for parties. ⚡
Nutrition Facts
Frequently Asked Questions
Can I use leftover rice for this?
Yes, but it must be fresh and warm. Cold rice loses moisture and won’t crisp as well. Reheat slightly and add 1-2 tsp water to restore stickiness before shaping.
Why did my rice cakes fall apart?
This usually means the rice wasn’t sticky enough. Use short-grain sushi rice and rinse thoroughly to remove excess starch. Pack the portions tightly before frying.
How do I make them extra crispy?
Press the cakes firmly in the pan with a spatula for the first 2 minutes. Use medium-high heat and don’t flip too soon. A bit more oil helps too.

- Jollof Rice Sauce Recipe: West African Tomato and Spice Infusion - September 25, 2026
- Japanese Rice Soup Recipe: Umami-Rich Comfort in a Bowl - September 25, 2026
- Homemade Cream Of Rice Recipe: Silk-Smooth Breakfast in Minutes - September 25, 2026