
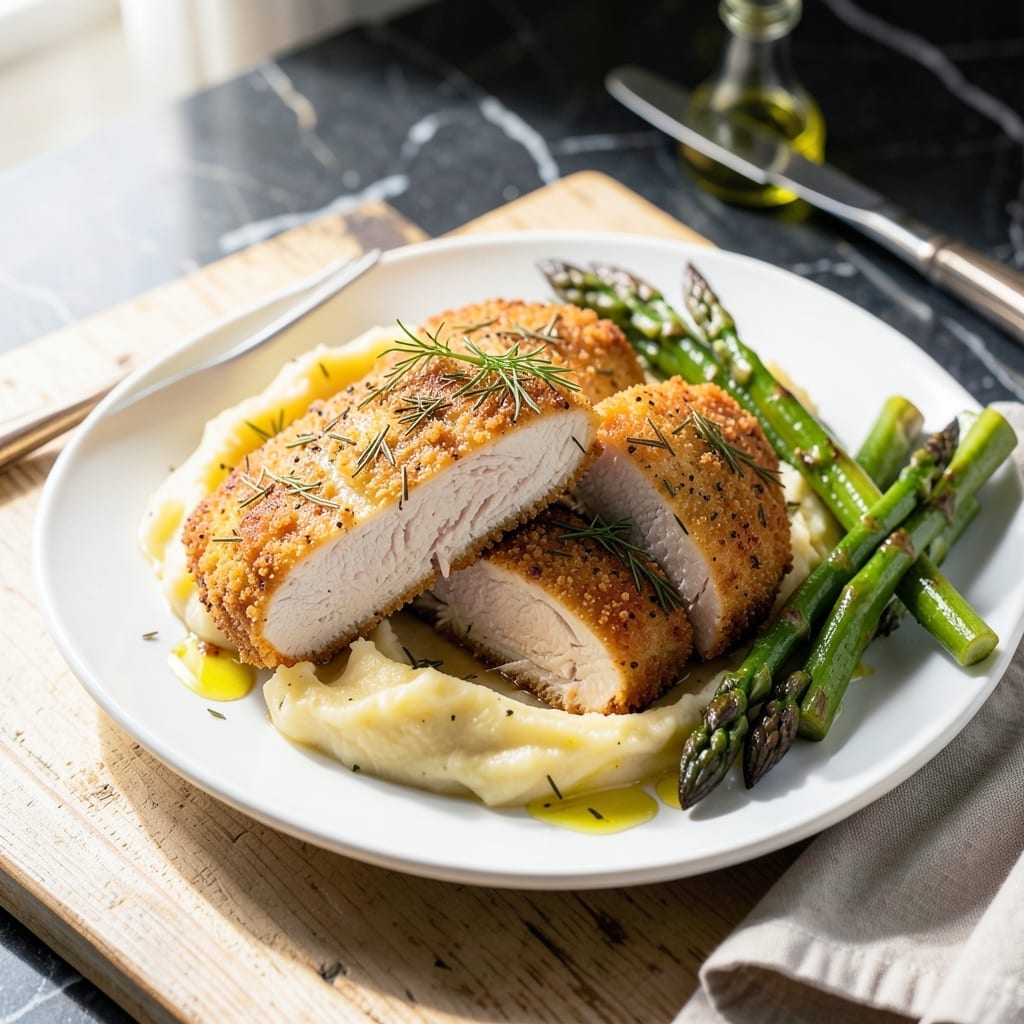
This recipe delivers crispy ranch chicken with a golden, herb-infused coating that’s impossible to resist. The secret lies in a simple yet effective breading technique that locks in moisture while creating a satisfying crunch.
I’ve perfected this method to ensure the coating stays crispy without drying out the chicken. A blend of ranch seasoning, herbs, and breadcrumbs forms a flavorful crust that bakes to perfection in under 30 minutes.
What you get is juicy, tender chicken with a crunchy exterior packed with savory ranch flavor. The coating clings beautifully, ensuring every bite is loaded with that unmistakable herbaceous taste.
Serve it hot for the best texture, paired with your favorite sides. Here’s how to make it.
Ingredients for Ranch Chicken
These ingredients create that golden, herb-infused crispy coating everyone loves on perfect ranch chicken.
| Ingredient | Amount | Notes |
|---|---|---|
| Boneless, Skinless Chicken Breasts 🍗 | 1 ½ lb | Pounded to even thickness |
| Ranch Seasoning Mix 🌿 | 2 tbsp | Store-bought or homemade blend |
| All-Purpose Flour 🌾 | ¾ cup | For initial dredging layer |
| Large Eggs 🥚 | 2 whole | Beaten for egg wash |
| Panko Breadcrumbs 🍞 | 1 ½ cups | For crispy coating texture |
| Dried Dill Weed 🌿 | 1 tsp | Freshly crushed for best flavor |
| Dried Parsley Flakes 🍃 | 1 tsp | Rehydrated in warm water |
| Garlic Powder 🧄 | 1 tsp | Not garlic salt substitute |
| Onion Powder 🧅 | 1 tsp | Enhances savory depth |
| Salt 🧂 | 1 tsp | Diamond Crystal kosher preferred |
| Black Pepper 🌶️ | ½ tsp | Freshly ground for maximum aroma |
| Buttermilk 🥛 | ½ cup | Full-fat for optimal adhesion |
| Olive Oil 🫒 | 2 tbsp | For pan-searing and crisping |
| Unsalted Butter 🧈 | 2 tbsp | Melted for extra richness |
The chicken quality is paramount. Costco or Whole Foods offer consistently tender boneless, skinless breasts. Pounding to even thickness ensures uniform cooking and maximum crispiness. For the ranch seasoning, Hidden Valley packets work in a pinch, but a homemade blend yields superior flavor control. The panko breadcrumbs must be fresh—stale ones won’t achieve that signature crunch.
No buttermilk? Whole milk plus 1 tbsp vinegar works as a substitute. Swap panko for regular breadcrumbs if needed (texture will be slightly less crisp). Fresh herbs can replace dried at one-third the amount, but dried are more reliable for consistent coverage. The olive oil should be neutral-flavored—avocado oil is an excellent alternative for high-heat cooking.
The breaded chicken keeps in the fridge for up to 2 days before cooking. Once cooked, store leftovers in an airtight container for 3-4 days. Reheat in the oven at 375°F to maintain crispiness—microwaving will soften the coating.
Why You’ll Love This Recipe
- One Bowl Wonder: Honestly, I just dump the flour, eggs, and panko in separate bowls—no fancy prep, just dip and coat.
- Crave-Worthy Crisp: That panko crust with the ranch seasoning? Ridiculously good, like a flavor party in every bite.
- Feeds the Crew: I made this for my picky nephew and he asked for seconds—even the leftovers disappear fast.
- Budget Hero: Chicken breasts and pantry staples keep it cheap, and I stretch it for two meals with zero extra effort.
Step-by-Step Instructions for Herb-Infused Crispy Ranch Chicken
This method ensures maximum crunch and herbaceous flavor in every bite.
Step 1: Prepare the Chicken and Seasoning Blend
Begin by pounding the 1.5 lb boneless, skinless chicken breasts to an even ½-inch thickness using a meat mallet. This guarantees uniform cooking and prevents dry spots. Place the pounded chicken between sheets of parchment paper for easier cleanup.
In a shallow bowl, combine the 1.5 cups panko breadcrumbs, 2 tbsp ranch seasoning mix, 1 tsp dried dill weed, 1 tsp dried parsley flakes, 1 tsp garlic powder, 1 tsp onion powder, 1 tsp salt, and 0.5 tsp black pepper. Stir thoroughly to distribute the seasoning evenly throughout the breadcrumb mixture.
Step 2: Create the Breading Station
Set up a breading station with three shallow dishes. Place the 0.75 cup all-purpose flour in the first dish. In the second, whisk together the 2 whole large eggs and 0.5 cup buttermilk until fully combined—the mixture should be smooth with no visible streaks.
Transfer the seasoned breadcrumb mixture to the third dish. This three-step process (flour, egg wash, breadcrumbs) creates the ultimate crispy texture. The buttermilk in the egg wash adds tanginess and helps the coating adhere better than plain eggs.
Step 3: Bread and Rest the Chicken
Dredge each piece of chicken in the flour, shaking off any excess. Then dip it into the egg-buttermilk mixture, allowing any excess to drip off. Finally, press the chicken firmly into the breadcrumb mixture, ensuring complete coverage on all sides. The pressure helps the coating stick during cooking.
Place the breaded chicken on a wire rack set over a baking sheet. Let it rest for 10 minutes at room temperature. This resting period allows the coating to set, preventing it from falling off during cooking. The chicken should feel slightly tacky to the touch when ready.
Step 4: Pan-Fry to Golden Perfection
Heat a large skillet over medium heat and add the 2 tbsp olive oil and 2 tbsp unsalted butter. Once the butter melts and begins to foam, carefully add the breaded chicken. Cook for 4-5 minutes per side or until the coating is deep golden brown and crispy.
Avoid moving the chicken too soon—the crust should release easily from the pan when properly browned. The internal temperature should reach 165°F when measured with a meat thermometer. The coating should be uniformly crispy with no soft spots.
Step 5: Rest and Serve
Transfer the cooked chicken to a clean wire rack or paper towel-lined plate. Let it rest for 5 minutes before serving. This brief rest allows the juices to redistribute, ensuring moist meat beneath the crispy coating.
Serve immediately while the coating remains at its peak crispiness. The exterior should have a satisfying crunch that gives way to tender, juicy chicken with every bite. Any leftovers can be reheated in a 350°F oven for 10-12 minutes to restore crispiness.
Pro Tips For Making Ranch Chicken
- Pound the Chicken: Butterflying and pounding the chicken breasts to an even 1/2-inch thickness guarantees they cook through without drying out—no more sad, dry edges.
- Double the Crunch: Press the panko breadcrumbs extra hard into the egg-washed chicken so they really stick, then give it a second dip in the ranch seasoning for maximum flavor.
- Skip the Cold Oil: Heat the oil in the pan until it shimmers before adding the chicken—I learned this the hard way after too many pale, soggy crusts.
- Rest Before Serving: Let the chicken rest 5 minutes on a wire rack after cooking so the crust stays crispy instead of turning into a sad, steamy mess.
Health Benefits of This Recipe
High-Quality Protein
This dish provides excellent high-quality protein from the 1.5 lb chicken breasts, with each serving delivering about 35-40 grams. Protein is essential for muscle repair, immune function, and keeping you full longer. The breading adds minimal protein but enhances the overall satisfaction. 💪
B Vitamin Boost
Chicken is rich in B vitamins, particularly B6 and B12, which support energy metabolism and brain health. A single serving covers about 30% of your daily B6 needs and 15% of B12. These nutrients help your body convert food into fuel efficiently.
Low-Carb Option
By using panko breadcrumbs and flour in moderation, this recipe keeps carbs reasonable at about 25-30 grams per serving. The protein-to-carb ratio makes it a balanced choice for active lifestyles. I often serve it with a side salad to keep the meal low-carb.
Healthy Fats
The olive oil and butter used for cooking provide heart-healthy fats, including monounsaturated fats from the olive oil. These fats support cell function and help your body absorb fat-soluble vitamins. A single serving contains about 12-15 grams of fat.
Calcium and Dairy
The buttermilk and ranch seasoning contribute calcium—about 10-15% of your daily needs per serving. This mineral is vital for bone health and muscle function. The breading also adds a small amount of iron from the enriched flour. 💛
Moderate Calories
Each serving contains approximately 400-450 calories, making this a satisfying yet calorie-conscious main course. The crispy coating adds texture without excessive calories, especially when baked rather than deep-fried. I find it’s filling without being heavy.
Nutrition Facts
Frequently Asked Questions
Can I use chicken tenders instead of breasts?
Yes! Chicken tenders work perfectly and cook even faster. Reduce cooking time to 3-4 minutes per side since they’re thinner. They’ll still get that crispy coating everyone loves.
Why does the coating fall off sometimes?
Usually from not letting the breading rest before cooking. That 10-minute rest lets the egg wash dry slightly, helping the coating adhere. Also press firmly when breading to ensure it sticks.
How do I keep it crispy when reheating?
Use your oven at 350°F for 10-12 minutes. The dry heat restores the crunch better than a microwave. Place on a wire rack so air circulates underneath.
Can I bake this instead of pan-frying?
Bake at 400°F for 18-20 minutes, flipping halfway. Use a wire rack on a baking sheet for even crisping on all sides.

- Jollof Rice Sauce Recipe: West African Tomato and Spice Infusion - September 25, 2026
- Japanese Rice Soup Recipe: Umami-Rich Comfort in a Bowl - September 25, 2026
- Homemade Cream Of Rice Recipe: Silk-Smooth Breakfast in Minutes - September 25, 2026