
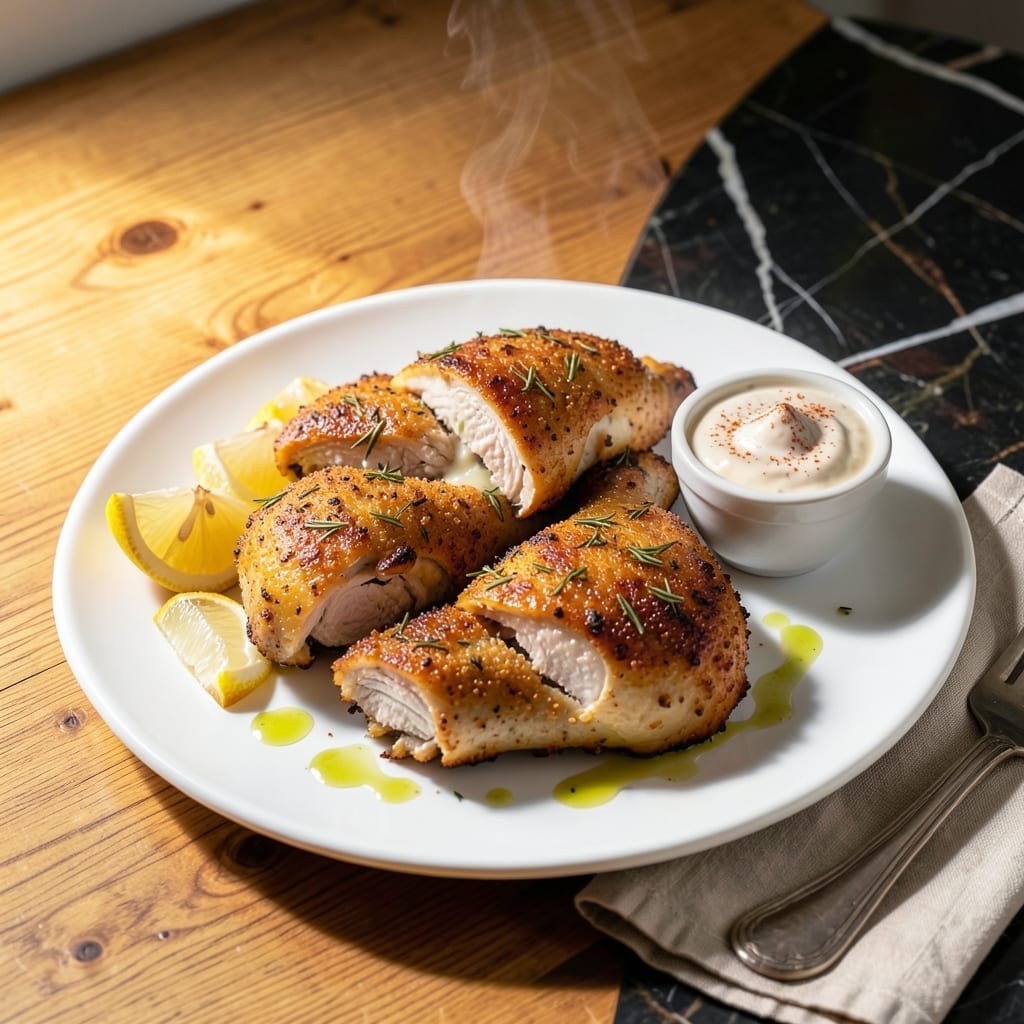
Achieving a crispy herbed crust on oven-baked chicken thighs requires the right technique and a flavorful ranch seasoning blend. This method delivers restaurant-quality results with minimal effort.
I developed this recipe by perfecting the balance between seasoning and texture. The chicken emerges golden and crispy, with juicy meat underneath that stays tender throughout cooking.
The ranch seasoning creates a savory crust that adheres perfectly to the chicken, while a high oven temperature ensures that crispy exterior. Each bite offers herby, tangy flavor with satisfying texture.
This dish works equally well for weeknight dinners or casual gatherings. The technique guarantees consistent results every time you make it.
Ingredients for Ranch Chicken Thighs
Simple ingredients create that crispy, herbed crust on juicy oven-baked chicken thighs effortlessly.
| Ingredient | Amount | Notes |
|---|---|---|
| Bone-In Chicken Thighs 🍗 | 2 lb | Skin-on for crispiness |
| Ranch Seasoning Mix 🌿 | 3 tbsp | Store-bought or homemade |
| All-Purpose Flour 🌾 | ½ cup | For dredging chicken |
| Large Eggs 🥚 | 2 whole | Beaten for binding |
| Panko Breadcrumbs 🍞 | 1 cup | For extra crispy crust |
| Buttermilk 🥛 | ½ cup | For tenderizing chicken |
| Olive Oil 🫒 | 2 tbsp | For baking sheet prep |
| Garlic Powder 🧄 | 1 tsp | Enhances savory flavor |
| Onion Powder 🧅 | 1 tsp | Adds depth to seasoning |
| Dried Dill Weed 🌿 | 1 tsp | Essential ranch flavor |
| Dried Parsley 🌿 | 1 tsp | For color and freshness |
| Salt 🧂 | 1 tsp | Kosher or sea salt |
| Black Pepper 🌶️ | ½ tsp | Freshly ground preferred |
| Paprika 🌶️ | ½ tsp | For color and mild heat |
The chicken thighs must be bone-in, skin-on for optimal crispiness and flavor. Costco and Whole Foods carry high-quality options with consistent sizing. Look for thighs with vibrant color and no off odors. The buttermilk is non-negotiable—it tenderizes the meat and helps the crust adhere. If you can’t find buttermilk, whole milk with a tablespoon of vinegar works in a pinch.
No ranch seasoning mix? Combine 1 tbsp each dried dill, parsley, and garlic powder with 1 tsp onion powder and a pinch of salt. Panko is key for that extra-crispy texture—regular breadcrumbs will work but won’t deliver the same crunch. For a gluten-free version, crushed cornflakes substitute well. The olive oil can be any neutral oil, but avoid butter (it burns at high temps).
Store raw chicken in the coldest part of your fridge and use within 2 days. Cooked leftovers keep for 4-5 days and reheat beautifully in the oven. The ranch seasoning blend stays fresh for 6 months in an airtight container.
Why You’ll Love This Recipe
- One Pan Wonder: I just toss the thighs with flour, dip in egg, coat with panko and ranch mix, then bake—no fancy steps.
- That Ranch Zing: The seasoning gives every bite this herby, garlicky kick that makes the crispy coating irresistible.
- Weeknight Savior: Honestly, it’s my go-to for busy evenings when I need something hot and satisfying on the table fast.
- Budget-Friendly Feast: Bone-in thighs are cheap, and one batch easily stretches for leftovers or sandwiches the next day.
Step-by-Step Instructions for Oven-Baked Ranch Chicken Thighs
Here’s the proven method for achieving that perfect crispy crust with juicy meat underneath.
Step 1: Prepare the Seasoned Flour Mixture
In a shallow dish, combine the 0.5 cup all-purpose flour, 3 tbsp ranch seasoning mix, 1 tsp garlic powder, 1 tsp onion powder, 1 tsp dried dill weed, 1 tsp dried parsley, 1 tsp salt, 0.5 tsp black pepper, and 0.5 tsp paprika.
Whisk until all the spices are evenly distributed throughout the flour. This creates a flavorful base layer that will cling to the chicken. The ranch seasoning mix should be fully incorporated—no dry pockets of seasoning remaining.
Step 2: Set Up the Breading Station
Create an assembly line with three shallow dishes. Place the seasoned flour mixture in the first dish. In the second dish, whisk together the 2 whole large eggs and 0.5 cup buttermilk until fully combined and slightly frothy. Pour the 1 cup panko breadcrumbs into the third dish.
This three-step breading process ensures maximum crispiness and flavor adhesion. The buttermilk-egg wash helps the breadcrumbs stick while tenderizing the meat. I’ve found that using a fork to whisk the egg mixture creates the ideal consistency for coating.
Step 3: Bread the Chicken Thighs
Pat the 2 lb bone-in chicken thighs dry with paper towels—this is crucial for the breading to adhere properly. Season both sides lightly with a pinch of salt and pepper, though the main seasoning comes from the flour mixture.
Dredge each thigh in the seasoned flour, pressing gently to ensure full coverage. Shake off any excess, then dip into the egg-buttermilk mixture, letting any excess drip off. Finally, press into the panko breadcrumbs, coating all sides thoroughly. Place the breaded thighs on a plate and let them rest for 5 minutes to help the coating set.
Step 4: Bake to Crispy Perfection
Preheat your oven to 400°F. Line a baking sheet with parchment paper and drizzle with 2 tbsp olive oil, spreading it evenly to coat the surface. This prevents sticking and promotes even browning.
Arrange the breaded chicken thighs on the prepared baking sheet, leaving space between each piece to ensure proper air circulation. Bake for 25 minutes, then flip each thigh carefully and bake for another 15-20 minutes until the coating is golden brown and the internal temperature reaches 165°F. The crust should be crispy and the juices should run clear when pierced.
Pro Tips For Making Ranch Chicken Thighs
- Pat the Thighs Dry: Use paper towels to thoroughly dry the chicken thighs before dredging—I learned this the hard way after my first few batches turned out soggy instead of crispy.
- Double Dredge for Crunch: Dip the thighs in flour, egg, then panko, but repeat the egg and panko step for a thicker, crunchier crust that holds up to the ranch seasoning.
- Skip Crowding the Pan: Cook only 2-3 thighs at a time in the pan—after burning a batch from overcrowding, I finally realized they steam instead of crisp if packed in.
- Rest Before Serving: Give the thighs a solid 5 minutes on a wire rack after frying so the coating sets and doesn’t slide off when you cut into them.
Serving Suggestions for This Dish
Family-Style Presentation
Arrange the crispy chicken on a large wooden board or platter for a rustic touch. The golden-brown crust looks stunning against natural wood. I like to stack 2-3 thighs per person with lemon wedges scattered around for freshness. 💛
Fresh Salad Pairing
A crisp green salad with a tangy vinaigrette balances the richness perfectly. Toss 6 cups mixed greens with ¼ cup buttermilk ranch dressing—it echoes the chicken’s flavors beautifully. Add thinly sliced cucumbers and cherry tomatoes for color.
Comfort Food Sides
Serve with garlic mashed potatoes to soak up the savory juices. The creamy texture contrasts wonderfully with the crispy crust. I also love roasted sweet potato wedges—toss them with olive oil and paprika for a sweet-savory combo.
Dipping Sauces
Offer ranch dressing and honey mustard for dipping. The ranch doubles down on the flavor, while honey mustard adds a sweet-tangy contrast. I mix 2 tbsp mayo with 1 tbsp Dijon and 1 tbsp honey for my go-to version.
Garnish Ideas
Sprinkle with fresh herbs right before serving. Chopped parsley adds color, while dill sprigs reinforce the ranch flavor. A light dusting of grated Parmesan adds a salty finish that guests always love.
Nutrition Facts
Frequently Asked Questions
Can I use boneless thighs instead?
Yes, but bone-in works better for this recipe. Boneless tends to dry out faster during the 40-45 minute bake time. If using boneless, reduce cooking to 25-30 minutes total.
Why does the breading need to rest before baking?
Resting for 5 minutes lets the coating adhere properly and prevents it from falling off during cooking. This step ensures that crispy crust you want.
Can I make this gluten-free?
Replace all-purpose flour with gluten-free flour and use gluten-free panko. Crushed cornflakes work as an alternative breading.
How do I know when it’s fully cooked?
Use a meat thermometer—165°F in the thickest part means it’s done. The juices should run clear, not pink, when pierced.

- Jollof Rice Sauce Recipe: West African Tomato and Spice Infusion - September 25, 2026
- Japanese Rice Soup Recipe: Umami-Rich Comfort in a Bowl - September 25, 2026
- Homemade Cream Of Rice Recipe: Silk-Smooth Breakfast in Minutes - September 25, 2026