
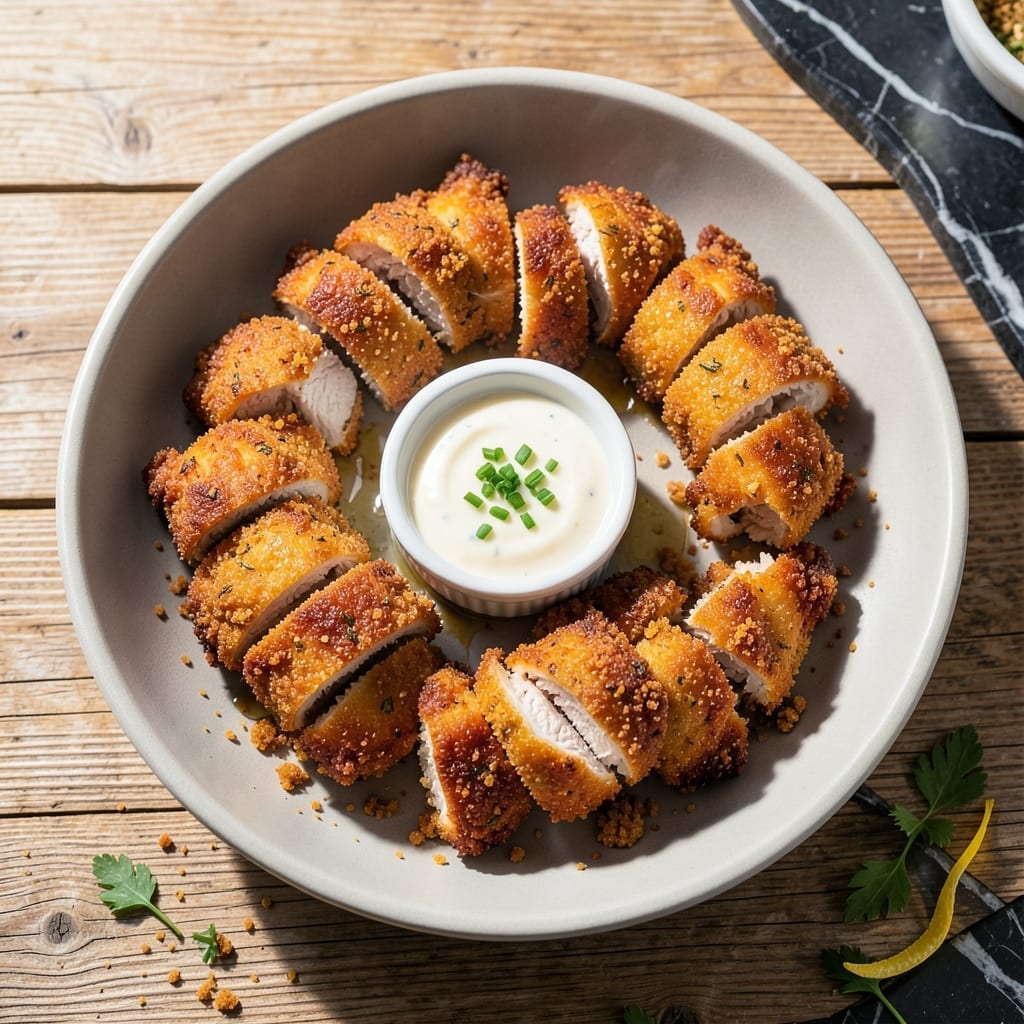
There’s a simple satisfaction in achieving crispy chicken tenders that stay juicy inside. This method uses a two-step coating process and precise frying temperature to lock in moisture while creating that coveted crunch.
The secret lies in the resting period between coating and frying, which allows the flour mixture to adhere properly. Maintaining oil at exactly 350°F ensures even cooking without drying out the meat.
Each bite delivers a tender interior with a shatteringly crispy exterior that holds up to dipping. The technique is straightforward but requires attention to detail for professional results.
Serve immediately for maximum texture contrast. The difference between good and exceptional fried chicken is in these small but critical steps.
Ingredients for Recipe for Deep Fried Chicken Tenders
A few pantry staples and fresh chicken deliver that perfect crispy-juicy contrast everyone craves.
| Ingredient | Amount | Notes |
|---|---|---|
| Chicken Tenders 🍗 | 1 ½ lb | Boneless, skinless, uniform size |
| All-Purpose Flour 🌾 | 1 ½ cups | Divided for dredging and batter |
| Large Eggs 🥚 | 2 whole | Beaten for egg wash |
| Buttermilk 🥛 | 1 cup | Full-fat for best results |
| Cornstarch 🌽 | ½ cup | For extra crispiness |
| Baking Powder 🧂 | 1 tsp | Helps coating adhere |
| Salt 🧂 | 1 ½ tsp | Diamond Crystal kosher preferred |
| Black Pepper 🌶️ | 1 tsp | Freshly ground for best flavor |
| Paprika 🌶️ | 1 tsp | Sweet or smoked variety |
| Garlic Powder 🧄 | 1 tsp | Not garlic salt |
| Onion Powder 🧅 | 1 tsp | Fresh ground preferred |
| Vegetable Oil 🫒 | 4 cups | For deep frying, high smoke point |
| Cayenne Pepper 🔥 | ¼ tsp | Optional for heat |
The chicken quality is non-negotiable here. Air-chilled tenders from Whole Foods or Costco yield the best texture—avoid pre-brined or enhanced products, as they can turn mushy. For the flour, King Arthur all-purpose is the gold standard for consistent results. The buttermilk should be full-fat (trust me on this); low-fat versions lack the richness needed for proper adhesion and flavor development.
No buttermilk? Whole milk plus 1 tbsp lemon juice or vinegar per cup works in a pinch. For a gluten-free version, swap the all-purpose flour for rice flour plus cornstarch at a 1:1 ratio. If you’re out of cornstarch, arrowroot powder is an acceptable substitute. The spices can be adjusted to taste, but don’t skip the baking powder—it’s key for that shatteringly crisp coating.
Fry in batches to avoid crowding the pot, which lowers oil temperature. Leftovers (if there are any) reheat surprisingly well in a 400°F oven for 10-12 minutes. The oil can be cooled, strained, and reused 2-3 times if stored properly in a cool, dark place.
Why You’ll Love This Recipe
- No-Fuss Breading: I just toss the tenders in flour, dip in buttermilk and egg, then cornstarch—no complicated steps.
- Crispy Outside, Juicy Inside: That cornstarch in the mix gives an insane crunch while keeping the chicken tender and moist.
- Crowd Pleaser: Honestly, these disappear faster than I can fry them at family gatherings or game nights.
- Budget Stretch: A bag of tenders and pantry staples feed my whole crew without breaking the bank.
Step-by-Step Instructions for Deep Fried Chicken Tenders
Master the technique for crispy, golden tenders with a juicy interior every time.
Step 1: Prepare the Seasoned Flour Mixture
In a large bowl, whisk together 1.5 cups all-purpose flour, 0.5 cup cornstarch, 1 tsp baking powder, 1.5 tsp salt, 1 tsp black pepper, 1 tsp paprika, 1 tsp garlic powder, 1 tsp onion powder, and 0.25 tsp cayenne pepper until fully combined. The cornstarch is key for extra crunch, while the baking powder helps the coating adhere and stay light.
Divide this mixture in half, placing ¾ cup in a shallow dish for dredging and reserving the rest for the batter. This separation ensures each step has the right texture for optimal coating adhesion.
Step 2: Create the Wet Batter
In a second bowl, whisk 2 whole large eggs with 1 cup buttermilk until smooth and homogenous. The buttermilk’s acidity tenderizes the chicken tenders while adding richness to the batter.
Gradually whisk the reserved flour mixture into the wet ingredients until just combined. The batter should be thick enough to cling to the chicken but not so dense that it doesn’t coat evenly. Small lumps are fine—overmixing develops gluten, which can make the coating tough.
Step 3: Coat and Rest the Chicken
Pat the 1.5 lb chicken tenders completely dry with paper towels. This step is critical—excess moisture prevents the coating from adhering properly. Season the tenders lightly with a pinch of salt and black pepper before dredging.
Dredge each tender in the seasoned flour, shaking off excess, then dip into the batter, letting any excess drip off. Return the coated tenders to the flour for a final dredge, pressing lightly to ensure full coverage. Place them on a wire rack and let rest for 10 minutes—this allows the coating to set, preventing it from sliding off during frying.
Step 4: Fry to Golden Perfection
In a deep, heavy-bottomed pot or Dutch oven, heat 4 cups vegetable oil to 350°F over medium-high heat. Use a deep-fry or candy thermometer for accuracy. The oil is ready when a pinch of flour sizzles and floats immediately when dropped in.
Carefully lower 3-4 tenders at a time into the hot oil, avoiding overcrowding, which lowers the oil temperature and leads to greasy results. Fry for 4-5 minutes per side until the coating is deep golden brown and the internal temperature reaches 165°F. The tenders should float freely when fully cooked.
Step 5: Drain and Serve Immediately
Transfer the fried tenders to a wire rack or paper towel-lined plate to drain excess oil. This step prevents sogginess by allowing air circulation on all sides. Sprinkle with a pinch of salt while still hot to enhance the flavor of the crispy coating.
Serve immediately while the coating is at its crispiest. The contrast between the crunchy exterior and the juicy, tender chicken inside will be at its peak. For best results, fry in batches and keep finished tenders warm in a 200°F oven if needed.
Pro Tips For Making Recipe For Deep Fried Chicken Tenders
- Double Dip the Coating: After the initial flour dip, let the tenders rest for 5 minutes before dipping in buttermilk and flour again—this builds a craggier, crunchier crust that actually stays put.
- Heat the Oil Right: Use a thermometer and keep the oil at 350°F; any cooler and the tenders absorb grease, any hotter and the outside burns before the inside cooks through.
- Dry the Chicken First: Pat the tenders completely dry with paper towels before coating—I learned this the hard way when my first batch had a sad, soggy crust that slid right off.
- Swap Half the Flour: Replace ¼ cup of the all-purpose flour with cornstarch in your dredge; it makes the coating lighter and crispier without changing the flavor.
Health Benefits of This recipe for deep fried chicken tenders
Protein Powerhouse
Chicken tenders pack a serious protein punch with about 26 grams per 3-ounce serving. This lean protein supports muscle repair and growth, making it ideal for active lifestyles. I love how it keeps me full for hours after eating. 💪
Essential Vitamins
You’ll get a boost of B vitamins, particularly B6 and B12, which are crucial for energy metabolism and nervous system health. A serving provides about 10% of your daily niacin needs, supporting overall vitality.
Mineral Rich
This dish is a good source of selenium and phosphorus. Selenium acts as a powerful antioxidant, while phosphorus works with calcium to build strong bones. The minerals in chicken also support immune function.
Low in Saturated Fat
When prepared with skinless tenders, this meal remains relatively low in saturated fat compared to red meat options. The 1.5 lb portion contains about 3 grams of saturated fat per serving, making it heart-healthier.
Energy Boost
The combination of protein and B vitamins provides steady energy without the crash. I notice better focus and stamina on days I include lean chicken in my meals. The amino acids help maintain blood sugar levels. ✨
Nutrient Density
Chicken tenders offer more nutrients per calorie than many other protein sources. With proper frying techniques, you preserve most of these benefits while adding that irresistible crispy texture we all love.
Nutrition Facts
Frequently Asked Questions
What oil works best for frying?
Use a neutral oil with a high smoke point like peanut, canola, or vegetable. Vegetable oil is most common and handles 350°F perfectly without imparting off-flavors. Avoid olive oil—its low smoke point burns at frying temps.
How do I keep them crispy after frying?
Drain on a wire rack, not paper towels, to prevent steam from making the coating soggy. Keep finished batches warm in a 200°F oven for up to 30 minutes. Frying in small batches maintains oil temperature for consistent results.
Why did my coating fall off?
This usually happens if the chicken wasn’t patted dry or didn’t rest after coating. Ensure each piece is completely dry before dredging, and let the coated tenders rest for 10 minutes to set the batter. Overcrowding the fryer can also cause coating failure.

- Jollof Rice Sauce Recipe: West African Tomato and Spice Infusion - September 25, 2026
- Japanese Rice Soup Recipe: Umami-Rich Comfort in a Bowl - September 25, 2026
- Homemade Cream Of Rice Recipe: Silk-Smooth Breakfast in Minutes - September 25, 2026