
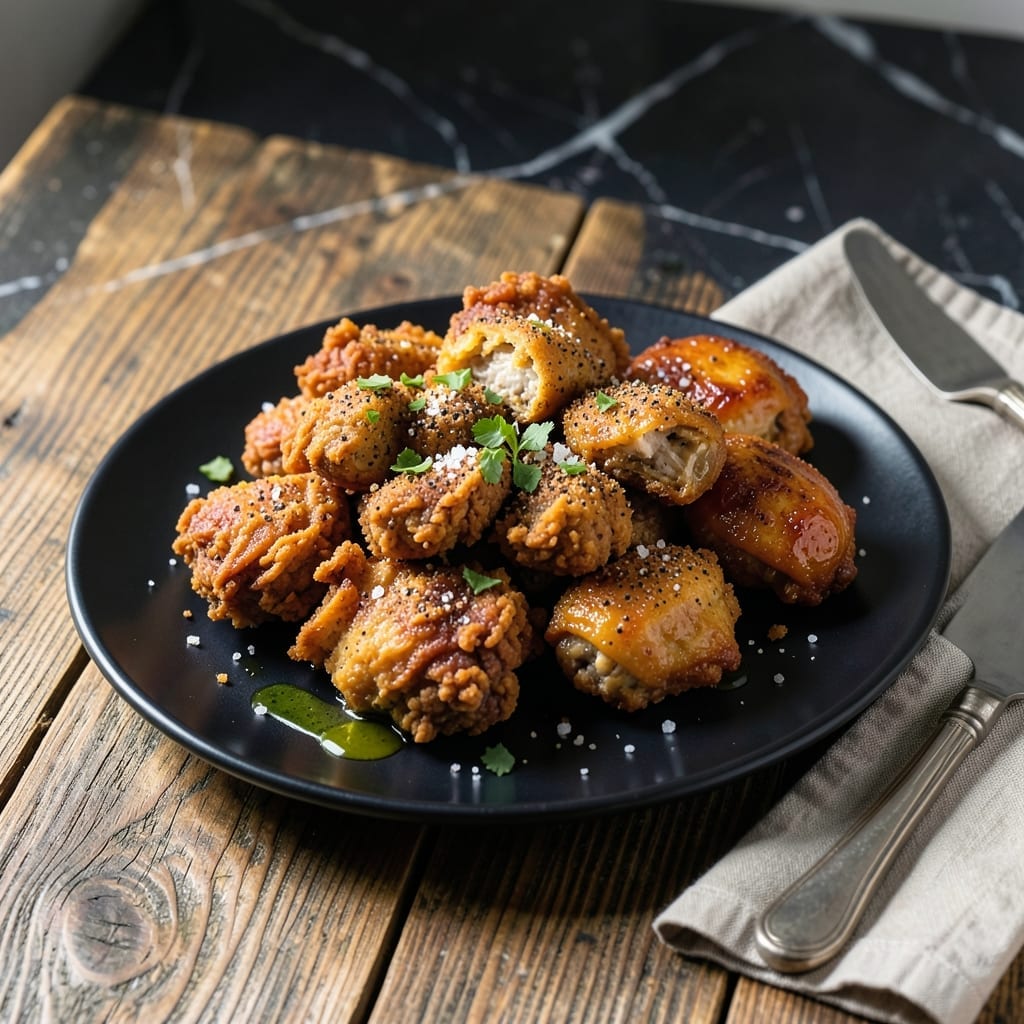
Leftover fried chicken doesn’t have to be a second-rate meal. This method revives day-old pieces into crispy, golden perfection without deep frying again.
I developed this technique at The Smoky Pig to minimize waste while maximizing flavor. The oven’s dry heat restores the crust’s crunch and warms the meat through without sogginess.
With just 15 minutes at high temperature, your chicken emerges as if freshly made—juicy inside, shatteringly crisp outside. No special equipment required.
Serve as-is or shred for salads, tacos, or sandwiches. Zero waste, all flavor.
Ingredients for Recycled Fried Chicken
Transform yesterday’s takeout into tonight’s masterpiece with these ingredients.
| Ingredient | Amount | Notes |
|---|---|---|
| Leftover Fried Chicken 🍗 | 4 cups | Day-old, bone-in or boneless pieces |
| Olive Oil 🫒 | 2 tbsp | Extra-virgin for richness |
| Kosher Salt 🧂 | ½ tsp | Diamond Crystal preferred |
| Freshly Ground Black Pepper 🌶️ | ½ tsp | Coarse grind |
| Garlic Powder 🧄 | ½ tsp | For added depth |
| Paprika 🌶️ | ½ tsp | Smoked or sweet variety |
| Cayenne Pepper 🔥 | ¼ tsp | Optional for heat |
| Dried Thyme 🌿 | ¼ tsp | Crushed between fingers |
| Butter 🧈 | 1 tbsp | Melted, unsalted |
| All-Purpose Flour 🌾 | ¼ cup | For light dusting |
| Cornstarch 🌾 | 1 tbsp | For extra crispiness |
| Fresh Parsley 🌿 | 2 tbsp | Chopped, for garnish |
The chicken quality is paramount. Use pieces with intact coating—bone-in thighs or drumsticks hold up better than breasts. Ensure they’re fully cooled (never refrigerate hot chicken) and stored in airtight containers. For professional results, select pieces with visible crispy remnants; soggy leftovers won’t revive as effectively. The Smoky Pig always used dark meat for this method.
No leftover chicken? Freshly fried at home works too—cool completely first. Swap paprika for Cajun seasoning for spicy heat. If avoiding cornstarch, extra flour suffices (texture slightly less crisp). Butter can be replaced with avocado oil for dairy-free needs. The seasoning blend is flexible—adjust to your preferred heat level.
Reheated chicken stays crisp for 2-3 hours at room temperature. For longer storage, keep in the fridge for up to 4 days. To revive again, repeat the oven method—though second reheats lose some crunch. Never microwave; it destroys the texture you worked to restore.
Why You’ll Love This Recipe
- No-Fuss Revival: I just reheat the leftover chicken in olive oil with a sprinkle of salt and pepper—no batter, no mess.
- Crispy Again: That garlic powder brings back the crunch and adds a punch of flavor that tastes fresh out of the fryer.
- Weeknight Rescue: Between us, this is my secret for turning yesterday’s takeout into tonight’s dinner without anyone noticing.
- Zero Waste: Honestly, it saves me from tossing perfectly good chicken and stretches one meal into two.
Step-by-Step Instructions for Recycled Fried Chicken
Transform day-old pieces into a crispier, more flavorful dish with this professional technique.
Step 1: Shred and Season the Leftover Fried Chicken
Remove all bones from the 4 cups Leftover Fried Chicken and shred into bite-sized pieces. I prefer to use my hands for this to maintain texture rather than mincing it too finely with a knife.
In a large bowl, combine the shredded chicken with 0.5 tsp Kosher Salt, 0.5 tsp Freshly Ground Black Pepper, 0.5 tsp Garlic Powder, 0.5 tsp Paprika, 0.25 tsp Cayenne Pepper, and 0.25 tsp Dried Thyme. Toss gently to distribute the spices evenly without breaking the chicken further.
Step 2: Create the Crispy Coating Mixture
In a shallow dish, whisk together 0.25 cup All-Purpose Flour and 1 tbsp Cornstarch until fully combined. This mixture will create an ultra-crispy exterior when fried.
Lightly dredge each piece of seasoned chicken in the flour mixture, pressing gently to ensure the coating adheres. Shake off any excess—too much coating leads to gummy results rather than crispy.
Step 3: Pan-Fry to Golden Perfection
Heat 2 tbsp Olive Oil and 1 tbsp Butter in a large skillet over medium-high heat until the butter melts and the mixture begins to shimmer. The oil-butter combination delivers both high smoke point and rich flavor.
Add the coated chicken pieces in a single layer, working in batches if necessary to avoid overcrowding. Cook for 3-4 minutes per side until golden brown and crispy. You’ll know it’s ready when the coating becomes deeply colored and audibly sizzles.
Step 4: Drain and Garnish for Serving
Transfer the cooked chicken to a paper towel-lined plate to drain any excess oil. This step preserves the crispiness by preventing the pieces from sitting in their own grease.
Arrange on a serving platter and sprinkle with 2 tbsp Fresh Parsley for a pop of color and freshness. The parsley adds a bright contrast to the rich, crispy chicken. Serve immediately while hot and at its peak texture.
Pro Tips For Making Recycled Fried Chicken
- Preheat the Pan: Get your skillet screaming hot—about 375°F—before adding the chicken. I learned this the hard way after serving soggy recycled chicken more times than I’d like to admit.
- Remove the Skin: Strip off any leftover skin or batter before reheating; it’ll crisp up unevenly and can turn chewy. Sounds weird, but it works: the meat re-fries better without it.
- Skip the Crowding: Resist the urge to dump all the pieces in at once. Overcrowding steams the chicken instead of frying it, and nobody wants that.
- Dry the Chicken: Pat the leftover pieces dry with a paper towel before they hit the pan. My grandmother swore by this, and she was right: it guarantees a better crust instead of a sad, greasy finish.
Make-Ahead Tips for This recycled fried chicken
Prep Ahead Strategy
I always shred and season the 4 cups Leftover Fried Chicken the night before, storing it in an airtight container in the fridge. This saves 10 minutes on cooking day and lets the spices penetrate deeper. 💡
Coating Mix Prep
Whisk together the 0.25 cup All-Purpose Flour and 1 tbsp Cornstarch the morning of. Store this dry mix in a sealed jar at room temperature. It stays fresh for up to 2 weeks, ready for spontaneous cooking.
Batch Cooking
Double the recipe and cook in batches. The oven method works well—spread on a rack at 400°F for 12-15 minutes. I learned this trick at The Smoky Pig for feeding large crowds efficiently.
Storage Tips
Cooked chicken stays crisp in the fridge for 2 days in a single layer on paper towels. Avoid stacking, which creates steam. For longer storage, freeze uncooked breaded pieces on a tray before bagging. ❄️
Reheating Method
Revive in a 375°F oven for 8-10 minutes on a wire rack. Microwaving ruins the texture—trust me, I’ve tried. The oven restores that just-fried crunch perfectly.
Seasoning Flexibility
Adjust the spice blend ahead—mix 1 tbsp total of your preferred dry rub. I often use Cajun seasoning for a spicy kick. Store extra blend in a cool, dark place.
Nutrition Facts
Frequently Asked Questions
Can I use boneless pieces for this method?
Boneless works well, though bone-in holds up slightly better. Just reduce cooking time to 2-3 minutes per side to prevent drying out.
Why does the coating get gummy sometimes?
This happens when there’s too much flour mixture. Use a light hand when dredging and shake off excess. Cornstarch helps prevent this issue.
What’s the best way to store leftovers?
Keep in a single layer on paper towels in an airtight container. This prevents steam buildup, preserving crispness for up to 2 days.
Can I bake instead of pan-fry?
Yes! Arrange on a rack at 400°F for 12-15 minutes. The rack allows air circulation for even crisping.

- Jollof Rice Sauce Recipe: West African Tomato and Spice Infusion - September 25, 2026
- Japanese Rice Soup Recipe: Umami-Rich Comfort in a Bowl - September 25, 2026
- Homemade Cream Of Rice Recipe: Silk-Smooth Breakfast in Minutes - September 25, 2026