
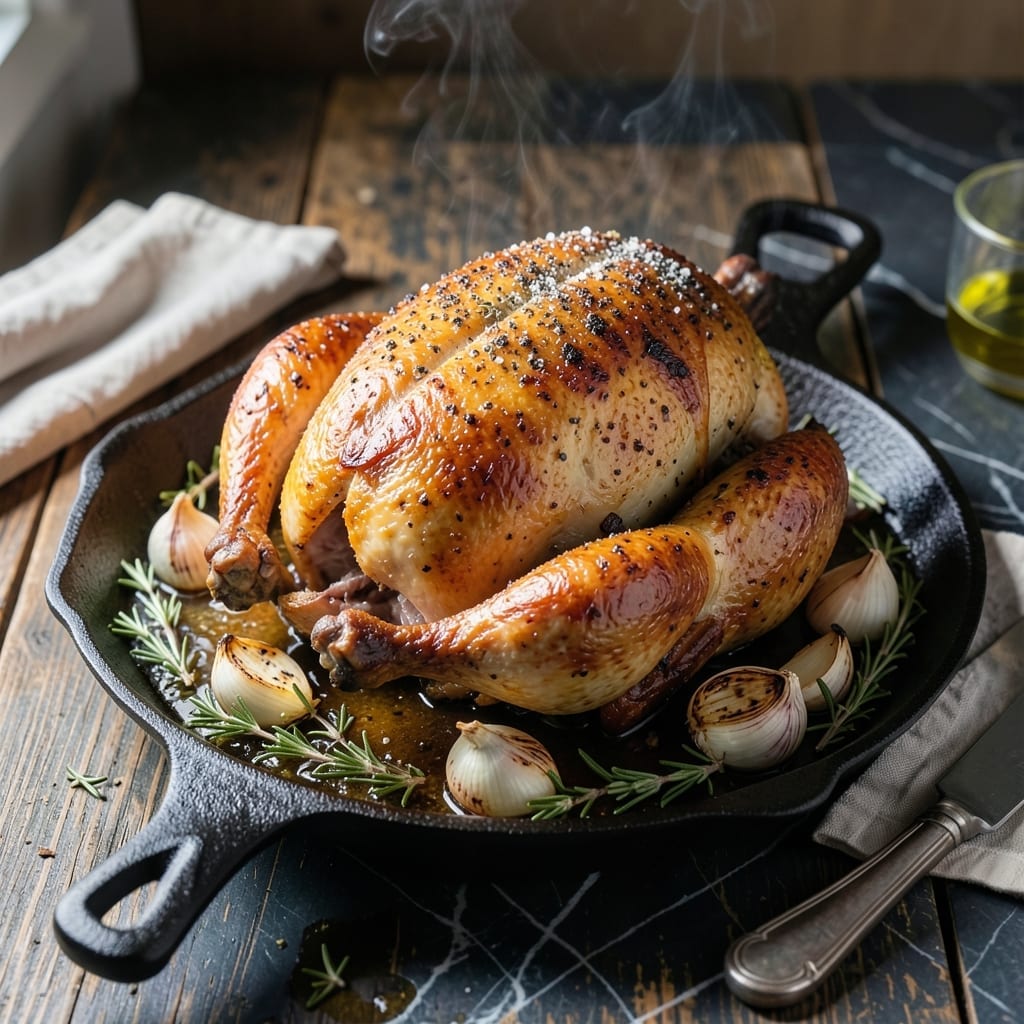
This farmhouse-style chicken delivers crispy skin and moist meat every time. The secret lies in a simple but precise cooking method that locks in juices while achieving golden-brown perfection.
I developed this technique after years of testing to create chicken that rivals any restaurant version. The key is patience—letting the skin render slowly for maximum crispness while keeping the meat tender.
What you get is chicken with shatteringly crispy skin and meat so moist it nearly falls off the bone. The aromatic seasoning enhances the natural flavor without overpowering it.
This method works for whole chickens or pieces, making it versatile for any meal. The results speak for themselves.
Ingredients for Red Barn Chicken
Whole chicken and aromatic herbs create this farmhouse classic with shatteringly crispy skin and impossibly moist meat.
| Ingredient | Amount | Notes |
|---|---|---|
| Whole Chicken 🍗 | 1 whole | 3-4 lb, patted dry inside and out |
| Kosher Salt 🧂 | 1 ½ tbsp | Diamond Crystal preferred for even seasoning |
| Freshly Ground Black Pepper 🌶️ | 1 tsp | Coarse grind for texture |
| Garlic Powder 🧄 | 1 tsp | Not garlic salt |
| Onion Powder 🧅 | 1 tsp | For depth of flavor |
| Dried Thyme 🌿 | 1 tsp | Rubbed between fingers to release oils |
| Dried Rosemary 🍃 | 1 tsp | Crushed lightly before using |
| Unsalted Butter 🧈 | 4 tbsp | Melted for basting |
| Fresh Lemon 🍋 | 1 whole | Zest and juice for brightness |
| Fresh Thyme Sprigs 🌿 | 4 pieces | For cavity aromatics |
| Yellow Onion 🧅 | 1 whole | Quartered for cavity |
| Carrots 🥕 | 2 whole | Cut into chunks for roasting |
| Celery Stalks 🌿 | 2 pieces | Cut into chunks for roasting |
| Olive Oil 🫒 | 1 tbsp | For roasting vegetables |
The chicken is the star here. Source a 3-4 lb bird—smaller ones dry out faster. Look for air-chilled at Whole Foods or your local butcher; it crisps up better than water-chilled. Pat it extremely dry (paper towels, inside and out) before seasoning—this is non-negotiable for that signature shatter. The skin should be unblemished and taut, not wrinkled or torn.
No fresh herbs for the cavity? Dried work at one-third the amount, but fresh is ideal. Swap thyme for sage or add a bay leaf. The butter can be replaced with avocado oil for a dairy-free option. Garlic powder missing? Fresh minced garlic at double the amount will do. The lemon can be omitted, but it adds a brightness that balances the richness.
Store the raw chicken in its original packaging on the coldest shelf of your fridge—use within 2 days. Leftovers keep for 4 days refrigerated, or freeze the meat (shredded or whole pieces) for up to 3 months. The roasted vegetables don’t reheat as well, so eat those fresh.
Why You’ll Love This Recipe
- Five Ingredients Only: I just toss the chicken with salt, pepper, garlic and onion powder—no chopping, no fuss.
- Crispy Skin Magic: The dry rub creates the most addictive golden crust that crackles with every bite.
- Weeknight Hero: Honestly, it’s my go-to for busy Tuesdays when I need dinner on the table fast.
- Leftovers for Days: One whole chicken means sandwiches, tacos, or soup for the rest of the week.
Step-by-Step Instructions for Farmhouse-Style Crispy Skin Chicken
Master the technique for achieving perfectly crisp skin and tender meat with this traditional method.
Step 1: Season and Prepare the Chicken
Pat the whole chicken completely dry inside and out with paper towels—this is critical for crispy skin. Generously season the cavity and exterior with the 1.5 tbsp Kosher Salt, 1 tsp Freshly Ground Black Pepper, 1 tsp Garlic Powder, 1 tsp Onion Powder, 1 tsp Dried Thyme, and 1 tsp Dried Rosemary.
Rub the seasoning into the skin to ensure even coverage. Place the 1 whole Fresh Lemon (halved) and 4 pieces Fresh Thyme Sprigs inside the cavity. Let the chicken sit uncovered in the refrigerator for 1 hour to allow the skin to dry further.
Step 2: Truss and Prepare the Roasting Pan
Remove the chicken from the refrigerator and let it come to room temperature for 30 minutes. Truss the legs together with kitchen twine and tuck the wings under the body to ensure even cooking and protect the breast meat.
Meanwhile, prepare the roasting pan: quarter the 1 whole Yellow Onion, cut the 2 whole Carrots and 2 pieces Celery Stalks into chunks, and toss them with the 1 tbsp Olive Oil. Spread the vegetables in the bottom of a roasting pan to create a natural rack for the chicken.
Step 3: Roast at High Heat for Crispy Skin
Preheat your oven to 425°F. Place the chicken breast-side up on the bed of vegetables in the roasting pan. Melt the 4 tbsp Unsalted Butter and brush it generously over the skin of the chicken. This basting step ensures a golden, crispy finish.
Roast the chicken for 1 hour to 1 hour 15 minutes, basting with the pan juices every 20 minutes. The skin should turn deep golden brown and crisp, while the juices in the cavity should run clear when pierced.
Step 4: Rest and Carve
Transfer the chicken to a cutting board and tent loosely with foil. Let it rest for 15-20 minutes before carving. This resting period allows the juices to redistribute, ensuring moist and flavorful meat.
Carve the chicken into serving pieces, discarding the twine. Serve immediately with the roasted vegetables, drizzling any accumulated pan juices over the top for added moisture and flavor.
Pro Tips For Making Red Barn Chicken
- Dry the Skin: Pat the whole chicken very dry with paper towels before seasoning—this guarantees crispy skin, not steamed. I learned this the hard way after my first three attempts came out rubbery.
- Season Under Skin: Loosen the skin over the breasts and thighs, then rub the salt, pepper, garlic powder, and onion powder directly onto the meat. Sounds fussy, but it actually changes the outcome.
- Skip Cold Chicken: Let the chicken sit at room temperature for 30-45 minutes before roasting. After burning one straight from the fridge, I finally figured out why the meat was tough.
- Rest Before Carving: Tent the chicken with foil and give it a solid 15 minutes to rest after roasting—this keeps the juices in the meat, not on your cutting board. My grandmother swore by this, and she was right.
Troubleshooting Great red barn chicken
Skin Not Crispy
If your skin isn’t crispy, the chicken likely wasn’t dry enough before roasting. Pat it extremely dry with paper towels, inside and out. Also, ensure you’re roasting at 425°F and basting with melted butter every 20 minutes. 💡
Uneven Cooking
Uneven cooking often happens when the chicken isn’t at room temperature before roasting. Let it sit out for 30 minutes after refrigeration. Also, truss the legs and tuck the wings to promote even heat distribution.
Dry Meat
Dry meat usually means it was overcooked. Use a meat thermometer to check for 165°F in the thickest part of the thigh. Also, let it rest for 15-20 minutes after roasting to redistribute the juices.
Bland Flavor
If the flavor seems bland, you might have under-seasoned. Use the full 1.5 tbsp Kosher Salt and rub it into the skin.
Sticking to Pan
A good vegetable rack prevents sticking. Ensure you’ve cut the onion, carrots, and celery into chunks and tossed them with 1 tbsp Olive Oil. This creates a natural non-stick surface.
Butter Burning
If the butter burns, your oven might be too hot. Stick to 425°F and baste carefully. If it still burns, try basting less frequently or using a lower oven temperature for the first 30 minutes. 🔥
Nutrition Facts
Frequently Asked Questions
Why do I need to pat the chicken dry?
Drying removes moisture that prevents crisping. Extremely dry skin is essential for that shatteringly crisp texture. Even a little moisture creates steam, ruining the crust.
Can I use a smaller chicken?
Avoid birds under 3 lbs—they dry out faster. The 3-4 lb range gives the best balance of crispy skin and moist meat. Smaller chickens may overcook before the skin crisps.
What if I don’t have kitchen twine?
Use aluminum foil to tie legs together or skip trussing. Tucking wings under helps, but the chicken will still cook well. Just expect slightly less even browning.
How do I know when it’s done?
Check the thickest part of the thigh with a thermometer—it should read 165°F. Juices should run clear when pierced, and the skin turns deep golden brown.

- Curd Rice Recipe: South Indian Comfort With Cooling Yogurt - September 25, 2026
- Rice Mix Recipe: Fluffy Grains With Customizable Flavor Boost - September 25, 2026
- Soupy Rice Recipe: Broth-Soaked Grains With Rustic Depth - September 25, 2026