
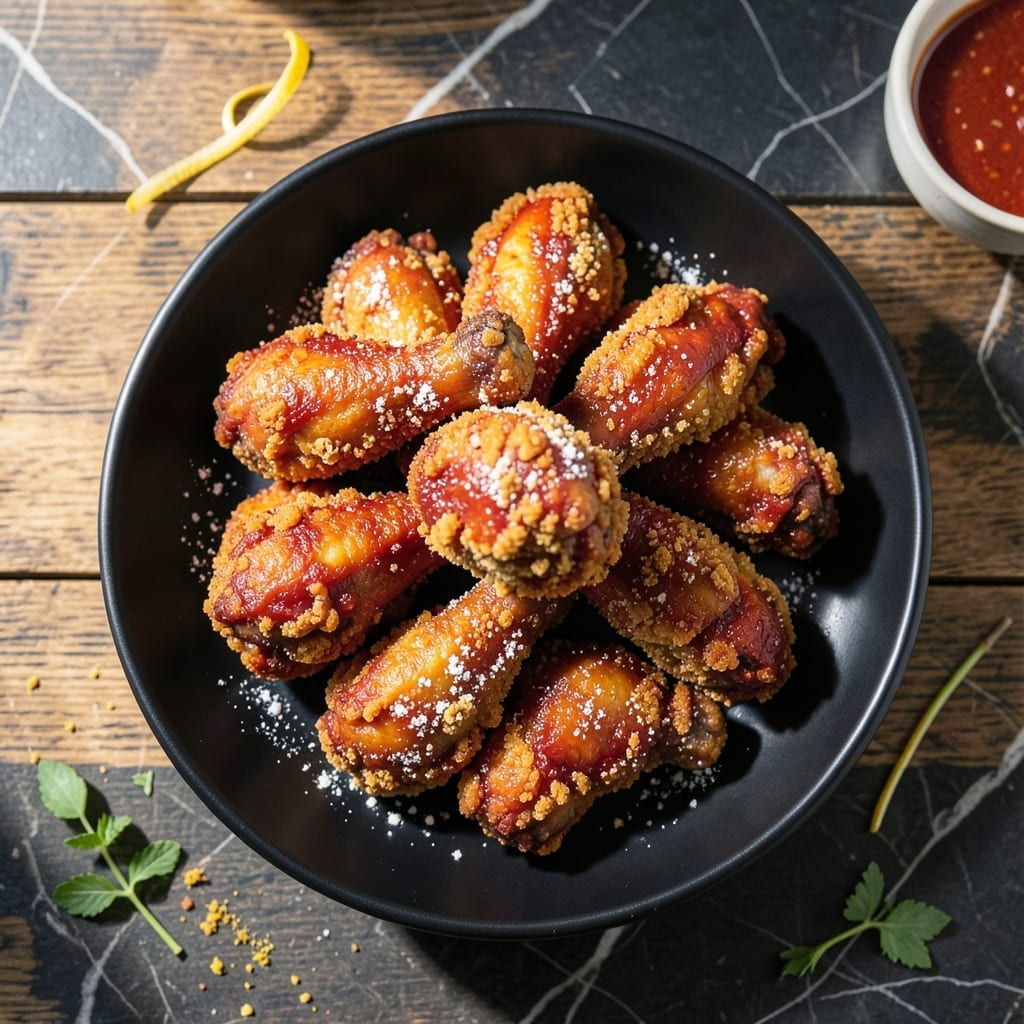
This red fried chicken delivers a crispy, golden exterior with a spicy kick that sets it apart from traditional versions. The secret lies in the seasoned coating, which creates an irresistible crunch in every bite.
The spice blend infuses the chicken with bold flavor while maintaining that signature crispy texture. A double-frying method ensures the coating stays perfectly golden and shatteringly crispy without becoming greasy.
What emerges is tender, juicy chicken encased in a vibrant, spiced crust that’s both visually striking and packed with heat. The result is a dish that satisfies cravings for both texture and flavor in one memorable bite.
Perfect for gatherings or a special weeknight meal, this recipe transforms simple ingredients into a showstopping main course. The spice level can be adjusted to suit any preference.
Ingredients for Red Fried Chicken
Transform simple chicken into a showstopping dish with this vibrant, spiced coating.
| Ingredient | Amount | Notes |
|---|---|---|
| Chicken Thighs 🍗 | 2 lb | Boneless, skin-on for crispiness |
| All-Purpose Flour 🌾 | 2 cups | For the crispy coating |
| Cornstarch 🌾 | ½ cup | Creates extra crunch |
| Kosher Salt 🧂 | 1 tbsp | Diamond Crystal preferred |
| Black Pepper 🌶️ | 1 tbsp | Freshly ground for best flavor |
| Smoked Paprika 🌶️ | 2 tbsp | For depth and color |
| Cayenne Pepper 🔥 | 1 tbsp | Adjust for heat preference |
| Garlic Powder 🧄 | 1 tbsp | Not garlic salt |
| Onion Powder 🧅 | 1 tbsp | Enhances savory notes |
| Red Food Coloring 🎨 | 1 tbsp | Gel-based for vibrant hue |
| Buttermilk 🥛 | 1 cup | For marinating chicken |
| Hot Sauce 🌶️ | 2 tbsp | Adds tangy heat to marinade |
| Vegetable Oil 🫒 | 4 cups | For deep frying |
The chicken thighs are non-negotiable for that juicy interior—bone-in works too but skin-on is essential for maximum crunch. Costco and Whole Foods carry high-quality thighs with good fat marbling. For the flour, King Arthur or Gold Medal all-purpose are reliable. The red food coloring might feel unnatural, but gel-based versions (like Wilton) provide consistent color without thinning the batter.
No buttermilk? Whole milk plus 1 tbsp vinegar works in a pinch. Swap cayenne for gochugaru (Korean chili flakes) for a different heat profile. The smoked paprika can be replaced with regular paprika plus a pinch of liquid smoke, but the flavor won’t be as complex. If avoiding food coloring, beet powder adds a natural red tint (though it’s more muted).
Fry the chicken in batches to avoid crowding—this keeps the oil temp steady for that shatteringly crispy crust. Leftovers hold up well in the fridge for 3-4 days but lose crispness. Reheat in a 400°F oven for 10 minutes to revive the texture.
Why You’ll Love This Recipe
- I’ll be real: I double the batch, and it’s still gone by the end of the night.
- One Pan Wonder: I just coat the thighs in flour and cornstarch, fry them up, and boom—dinner in one pan.
- Crispy Perfection: That cornstarch in the mix gives it this ridiculous crunch that’s honestly hard to beat.
- Feeds a Crowd: I’ll be real: I double the batch, and it’s still gone by the end of the night.
Step-by-Step Instructions for Red Fried Chicken
Master the technique for achieving that signature crispy coating with vibrant color and ideal texture.
Step 1: Marinate the Chicken Thighs
In a large bowl, whisk together the 1 cup buttermilk and 2 tablespoons hot sauce until fully combined. This acidic mixture tenderizes the meat while adding a subtle tang that balances the heat.
Add the 2 lb chicken thighs to the buttermilk mixture, ensuring each piece is fully coated. Cover and refrigerate for at least 4 hours, or preferably overnight. The longer marinating time allows the flavors to penetrate deeply and guarantees maximum tenderness.
Step 2: Prepare the Seasoned Coating
In a large, shallow dish, combine the 2 cups all-purpose flour, 0.5 cup cornstarch, 1 tablespoon kosher salt, 1 tablespoon black pepper, 2 tablespoons smoked paprika, 1 tablespoon cayenne pepper, 1 tablespoon garlic powder, 1 tablespoon onion powder, and 1 tablespoon red food coloring.
Whisk the dry ingredients thoroughly until the mixture is uniform and the red food coloring is evenly distributed. The cornstarch is key here—it creates micro-crispiness that all-purpose flour alone can’t achieve. The smoked paprika and cayenne deliver both color and heat.
Step 3: Dredge and Rest the Chicken
Remove the chicken from the buttermilk marinade, allowing excess liquid to drip off briefly. Dredge each piece in the seasoned flour mixture, pressing firmly to ensure the coating adheres completely to all surfaces. Shake off any excess—thick clumps won’t fry evenly.
Place the dredged chicken on a wire rack set over a baking sheet. Let it rest for 15-20 minutes. This step is crucial: it allows the coating to hydrate slightly, which prevents it from falling off during frying and ensures a thicker, crunchier crust.
Step 4: Deep-Fry to Golden Perfection
In a large, heavy-bottomed pot or Dutch oven, heat the 4 cups vegetable oil to 350°F. Use a deep-fry thermometer to monitor the temperature accurately—oil that’s too cool will create greasy chicken, while oil that’s too hot will burn the outside before the inside cooks through.
Carefully lower 2-3 pieces of chicken into the hot oil at a time to avoid crowding the pot, which would lower the oil temperature. Fry for 12-15 minutes, turning occasionally, until the coating is deep golden-red and the internal temperature reaches 165°F. The cornstarch in the coating will create audible crackling as it fries—a sign you’re achieving that extra crispiness.
Step 5: Drain and Serve Immediately
Transfer the fried chicken to a wire rack or paper towel-lined plate to drain. The rack method is superior as it allows air to circulate, preventing the bottom from becoming soggy. Let it rest for 5 minutes—just long enough to cool slightly but not so long that it loses its crispness.
Serve the chicken immediately while hot and crispy. The exterior should shatter at the first bite, revealing juicy, flavorful meat inside. The vibrant red hue from the food coloring and smoked paprika will be visually striking, while the cayenne provides a lingering warmth that builds with each bite.
Pro Tips For Making Red Fried Chicken
- Double Fry for Crisp: Fry the chicken once at 325°F until cooked through, then rest 5 minutes before frying again at 375°F for that shatteringly crisp red crust—this is how you get it right every time.
- Pat Dry Thoroughly: I learned this the hard way: even a little moisture on the thighs makes the flour coating slide right off, so press between paper towels until bone dry before dredging.
- Skip Crowded Pan: Resist the urge to cook all the pieces at once—overcrowding drops the oil temp and gives you soggy, greasy chicken instead of that deep red, crunchy finish.
- Use Cornstarch Boost: Swap 2 tablespoons of the flour for cornstarch in your dredge; it’s the lazy upgrade that actually changes the outcome, giving you a lighter, crisper coating with less oil absorption.
Serving Suggestions for This Dish
Classic Comfort Sides
I love serving this with creamy mashed potatoes—the cool, smooth texture balances the spicy crunch beautifully. Use Yukon Gold potatoes and fold in ½ cup sour cream for extra richness. The potatoes soak up any crumbs that fall from the chicken. 💛
Fresh and Bright
A crisp coleslaw cuts through the heat with its cool, tangy crunch. I make mine with green cabbage, carrots, and a dressing of mayonnaise, apple cider vinegar, and 1 tsp sugar. The acidity refreshes your palate between bites of spicy chicken.
Southern Staples
For a true Southern spread, add buttermilk biscuits and collard greens. The biscuits are perfect for making mini chicken sandwiches, while the greens’ slight bitterness complements the dish’s bold flavors. I use White Lily flour for my biscuits—it’s a Southern classic.
Dipping Sauces
Offer ranch dressing and honey mustard for dipping. The ranch cools the heat, while the honey mustard enhances the spicy-sweet balance. I mix ¼ cup mayo, ¼ cup buttermilk, and 1 tbsp dried dill for my ranch. 🔥
Lighter Options
For a fresher take, serve with a simple green salad tossed in a lemon vinaigrette. The acidity cuts through the richness, and the crisp lettuce provides a nice texture contrast. I like adding thinly sliced radishes for a peppery bite.
Family-Style Feast
Turn it into a feast with cornbread and baked beans. The cornbread’s sweetness pairs wonderfully with the heat, while the smoky beans add heartiness. I use Jiffy mix for quick, foolproof cornbread every time.
Nutrition Facts
Frequently Asked Questions
Why use both flour and cornstarch in the coating?
The cornstarch creates micro-crispiness that flour alone can’t achieve. Combined with 2 cups flour, it delivers an extra shatteringly crispy texture that’s the signature of this dish.
Can I bake this instead of frying?
You can bake at 400°F for 25-30 minutes, but the texture won’t be as crispy. For best results, finish under the broiler for 2-3 minutes to crisp the coating. The oil frying method is still ideal for authentic results.
How do I adjust the spice level?
Reduce or omit the 1 tablespoon cayenne for milder heat. For more kick, add ½ teaspoon extra or include 1 chopped jalapeño to the marinade. The smoked paprika adds color and depth without much heat.
What if my coating falls off during frying?
This usually means the chicken didn’t rest after dredging. Always let it sit for 15-20 minutes post-dredge so the coating adheres properly. Also, ensure oil is at 350°F before adding chicken.

- Jollof Rice Sauce Recipe: West African Tomato and Spice Infusion - September 25, 2026
- Japanese Rice Soup Recipe: Umami-Rich Comfort in a Bowl - September 25, 2026
- Homemade Cream Of Rice Recipe: Silk-Smooth Breakfast in Minutes - September 25, 2026