
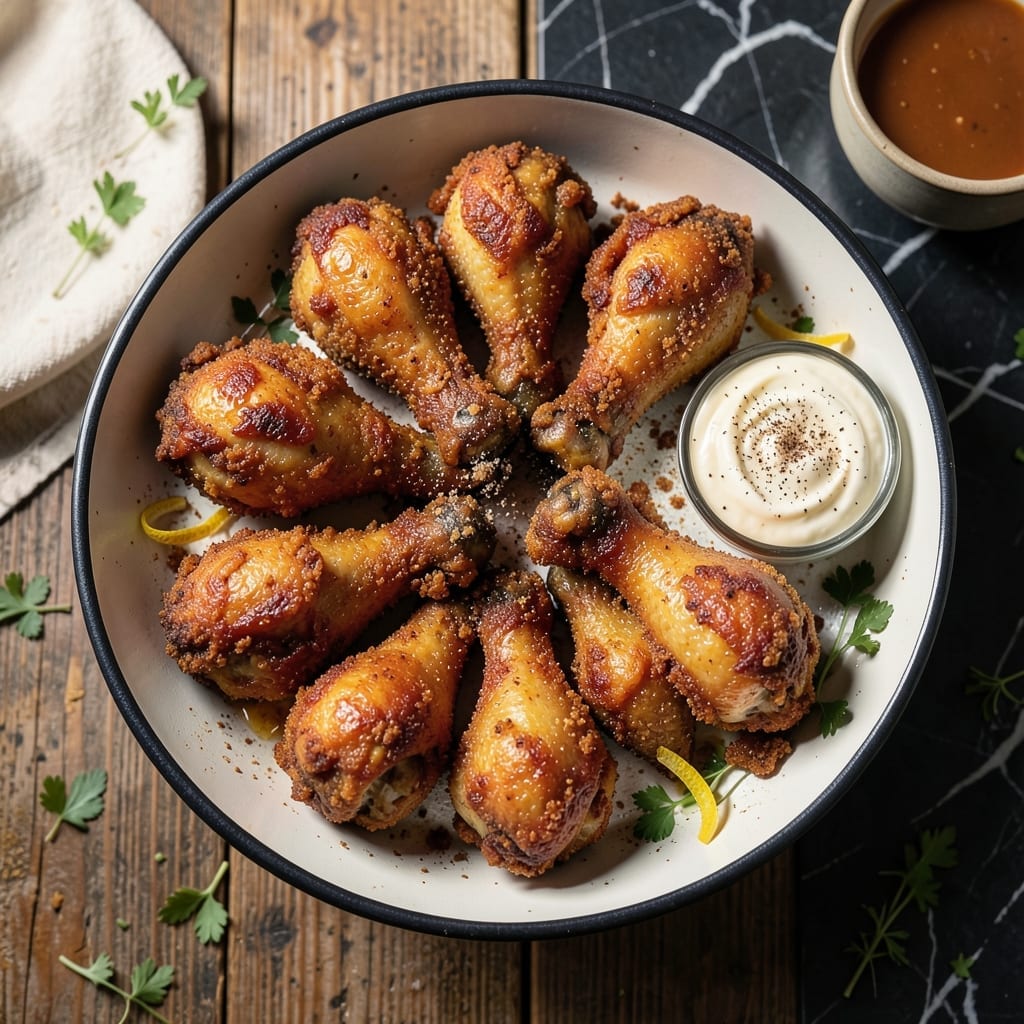
This recipe brings back the lost art of crispy, golden-brown fried chicken with a modern twist. The buttermilk brine ensures juicy, flavorful meat that stays tender even after frying.
I’ve refined this method over years of testing to perfect the balance between a shatteringly crispy crust and succulent interior. The key lies in the double-dredging technique and maintaining the right oil temperature.
Each bite delivers the nostalgic crunch of traditional fried chicken with a depth of flavor that sets it apart. The buttermilk not only tenderizes but also infuses the meat with a subtle tang.
Serve hot for the best texture, though leftovers reheat surprisingly well. This is fried chicken as it was meant to be.
Ingredients for Revival Fried Chicken
Crispy golden perfection starts with a buttermilk brine and double-dredged coating. Nothing less will do.
| Ingredient | Amount | Notes |
|---|---|---|
| Chicken Thighs and Drumsticks 🍗 | 3 ½ lb | Bone-in, skin-on, about 8 pieces |
| Buttermilk 🥛 | 4 cups | Full-fat for maximum tenderness |
| All-Purpose Flour 🌾 | 3 cups | Divided for double dredging |
| Cornstarch 🌽 | ½ cup | For extra crispiness |
| Kosher Salt 🧂 | 2 tbsp | Diamond Crystal preferred |
| Black Pepper 🌶️ | 2 tsp | Freshly ground for best flavor |
| Garlic Powder 🧄 | 2 tsp | Not garlic salt |
| Onion Powder 🧅 | 2 tsp | Fresh ground preferred |
| Paprika 🌶️ | 1 ½ tbsp | Sweet or smoked variety |
| Cayenne Pepper 🔥 | ½ tsp | Adjust for heat preference |
| Peanut Oil 🫒 | 8 cups | For frying, or use vegetable oil |
| Large Eggs 🥚 | 2 whole | For egg wash in dredge |
| Hot Sauce 🌶️ | 1 tbsp | Optional for brine tang |
The chicken must be bone-in, skin-on for authentic texture and flavor. Thighs and drumsticks hold up best to frying—breasts tend to dry out. Source from Whole Foods or a trusted butcher for quality. Diamond Crystal kosher salt is essential for the brine; iodized table salt will over-season. The buttermilk should be full-fat (trust me on the full-fat version) for optimal tenderizing and flavor infusion.
No buttermilk? Whole milk with 1 tbsp vinegar or lemon juice per cup works in a pinch. Swap peanut oil for vegetable or canola oil if needed—just maintain 350°F-375°F consistently. For gluten-free, use a 1:1 all-purpose GF flour blend. The cayenne can be omitted for mild flavor, but the paprika is non-negotiable for that classic color and depth.
Brine the chicken 12-24 hours ahead—this is where the magic happens. Leftovers keep 3-4 days in the fridge but are best reheated in a 400°F oven for 12-15 minutes to revive the crunch. Never microwave—it’ll turn soggy faster than you can say ‘sad chicken’.
Why You’ll Love This Recipe
- One Bowl Wonder: I toss everything from the buttermilk marinade to the flour-cornstarch coating in the same bowl—minimal cleanup, maximum flavor.
- That Buttermilk Magic: The tangy buttermilk soaks into the thighs and drumsticks overnight, making the meat absurdly tender before the crispy crust even hits the pan.
- Feeds a Hungry Table: I’ve served this at picnics, Sunday suppers, and random weeknights—it’s the kind of dish that disappears fast, no matter the crowd.
- Budget-Friendly Crisp: Thighs and drumsticks stay cheap, and a little flour and cornstarch stretch into a big batch of golden, crunchy perfection.
Step-by-Step Instructions for Buttermilk-Brined Crispy Fried Chicken
Master the technique for achieving that signature crunch with juicy meat beneath the golden crust.
Step 1: Brine the Chicken in Buttermilk
In a large bowl, whisk together the 4 cups Buttermilk and 1 tbsp Hot Sauce until fully combined. Submerge all 3.5 lb Chicken Thighs and Drumsticks in the mixture, ensuring each piece is completely coated. Cover and refrigerate for at least 4 hours, or ideally overnight.
The buttermilk’s acidity tenderizes the meat while the fat ensures moisture retention during frying. I’ve found that longer brining times yield the most flavorful results, with the hot sauce adding a subtle tang that balances the richness.
Step 2: Prepare the Double-Dredge Coating
In a shallow dish, combine 2 cups of the 3 cups All-Purpose Flour with 0.5 cup Cornstarch, 2 tbsp Kosher Salt, 2 tsp Black Pepper, 2 tsp Garlic Powder, 2 tsp Onion Powder, 1.5 tbsp Paprika, and 0.5 tsp Cayenne Pepper. Mix thoroughly to ensure even distribution of spices.
In a separate bowl, beat the 2 whole Large Eggs with 2 tablespoons of the reserved buttermilk to create an egg wash. This two-step dredging process creates a shatteringly crisp crust. The cornstarch in the flour mixture is the secret to that extra crunch.
Step 3: Dredge and Rest the Chicken
Remove each piece of chicken from the buttermilk brine, allowing excess to drip off. Dredge in the flour mixture, pressing firmly to adhere. Shake off excess, then dip in the egg wash, and finally dredge in the flour mixture a second time. Place on a wire rack set over a baking sheet.
Let the coated chicken rest at room temperature for 15-20 minutes. This crucial step allows the coating to set, preventing it from falling off during frying. You’ll notice the dredge transforms from a wet paste to a dry, firm layer—this indicates it’s ready for the oil.
Step 4: Fry to Golden Perfection
Heat the 8 cups Peanut Oil in a large, heavy pot or Dutch oven to 350°F. Use a deep-fry thermometer for accuracy. Carefully lower in the chicken pieces in batches, being careful not to overcrowd the pot. Fry for 12-15 minutes for drumsticks and 15-18 minutes for thighs.
The oil temperature will drop when you add the chicken—maintain it between 325-350°F throughout cooking. Turn the pieces occasionally for even browning. The chicken is done when the internal temperature reaches 165°F and the coating is a deep, golden brown with visible crispy texture.
Step 5: Drain and Serve Immediately
Transfer the fried chicken to a wire rack set over paper towels to drain. This elevation prevents the crust from becoming soggy by allowing air circulation on all sides. Sprinkle with additional Kosher Salt while hot if desired.
Serve immediately while the coating is at its crispiest. The contrast between the shatteringly crisp exterior and the juicy, tender meat beneath is what makes this dish exceptional. For best results, avoid covering the chicken as this will trap steam and soften the crust.
Pro Tips For Making Revival Fried Chicken
- Double Fry for Crisp: I learned this the hard way—fry once at 325°F until cooked through, then crank the heat to 375°F for a second dip to get that shatteringly crisp crust.
- Buttermilk Overnight: Sounds like a hassle, but soaking the chicken in buttermilk for at least 12 hours makes a real difference in tenderness and flavor penetration.
- Skip the Crowding: Resist the urge to fill the pan—overcrowding drops the oil temp fast, and you’ll end up with greasy, soggy chicken instead of golden, crisp pieces.
- Cornstarch Boost: Mixing 2 tablespoons of cornstarch into your flour dredge actually changes the outcome, giving you a lighter, crunchier crust without changing the flavor.
Creative Variations of revival fried chicken
Spicy Nashville Hot
Add 2 tbsp cayenne pepper and 1 tbsp brown sugar to the dredge mix for that signature fiery kick. After frying, brush with ½ cup hot oil infused with 3 tbsp cayenne and 1 tbsp brown sugar. Serve with pickles to cut the heat. 🔥
Honey Butter Glaze
Mix ¼ cup melted butter with 3 tbsp honey and 1 tsp vanilla extract. Toss hot fried chicken in this glaze for a sweet-savory twist. The contrast of crispy skin and sticky glaze is irresistible.
Herb-Infused Crust
Add 1 tbsp dried thyme, 1 tbsp rosemary, and 2 tsp dried sage to your flour mix. This gives an aromatic depth reminiscent of classic Southern cooking. I love the earthy notes this adds.
Air Fryer Adaptation
Spray coated chicken lightly with avocado oil and air fry at 375°F for 20-25 minutes, flipping halfway. The results won’t be identical but come surprisingly close. Great for when you want crispy without the deep-fry mess.
Double-Dipped Crunch
For extra thickness, repeat the entire dredging process a second time after the initial rest. This creates a craggy, ultra-crispy exterior. Just be sure to fry at a slightly lower temp (340°F) to cook through completely. 💛
Lemon-Pepper Version
Add 2 tbsp lemon zest and 1 tbsp cracked black pepper to your flour mixture. The bright citrus cuts through the richness beautifully. Finish with a squeeze of fresh lemon juice right before serving.
Nutrition Facts
Frequently Asked Questions
Why use buttermilk for brining?
Buttermilk’s acidity tenderizes the meat while its fat keeps it moist during frying. It also adds a subtle tang that enhances flavor.
How do I keep the coating crispy?
Use a wire rack for draining to allow air circulation. Avoid covering the chicken, as steam will soften the crust. Serve immediately for maximum crunch.
Can I use an air fryer instead?
Yes! Spray coated chicken with oil and air fry at 375°F for 20-25 minutes. Flip halfway for even browning.
What oil temperature should I maintain?
Keep oil between 325-350°F during frying. Use a thermometer for accuracy, as temperature drops when adding chicken.

- Jollof Rice Sauce Recipe: West African Tomato and Spice Infusion - September 25, 2026
- Japanese Rice Soup Recipe: Umami-Rich Comfort in a Bowl - September 25, 2026
- Homemade Cream Of Rice Recipe: Silk-Smooth Breakfast in Minutes - September 25, 2026