
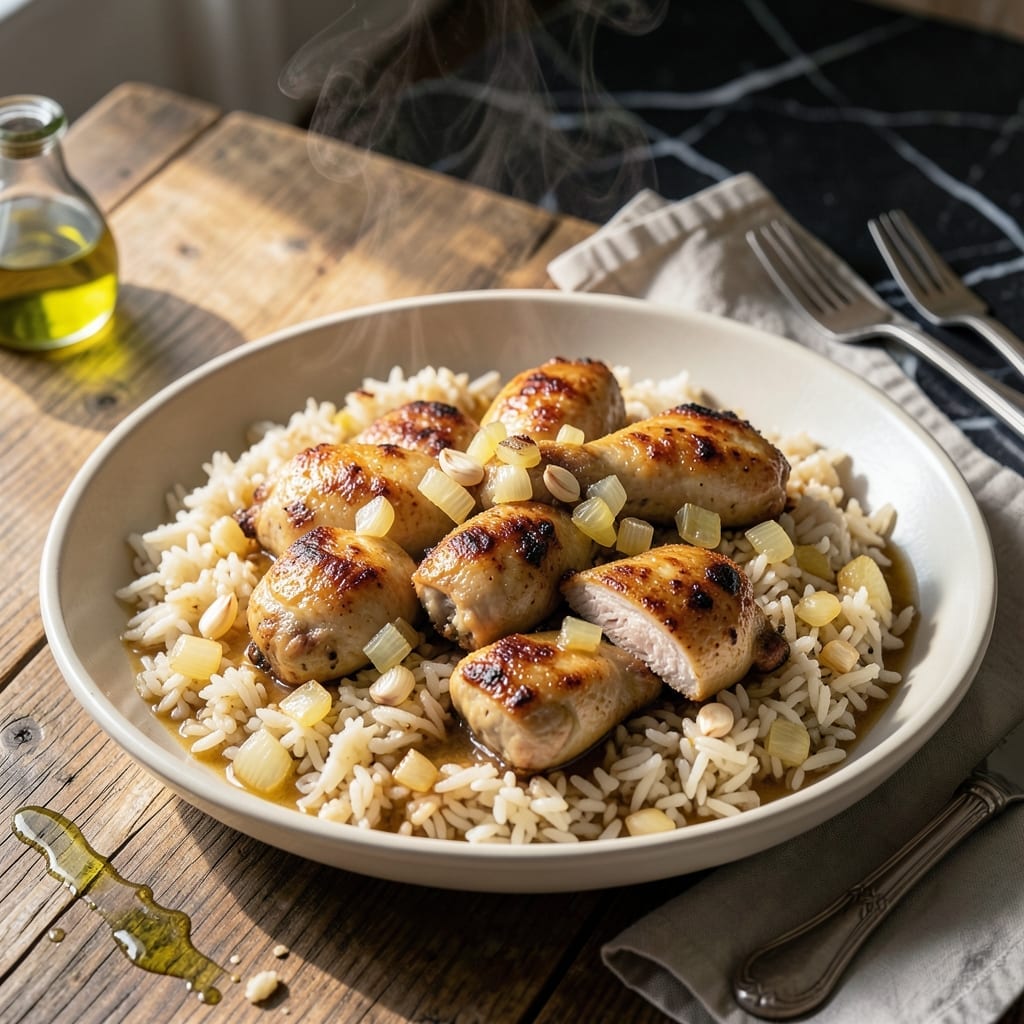
This one-pot dish combines tender chicken with savory rice for a meal that’s both simple and satisfying. The beauty lies in its streamlined process—everything cooks together for minimal cleanup and maximum flavor.
With just a few pantry staples and one pot, you’ll create a hearty, comforting dish that’s perfect for busy weeknights. The rice absorbs the rich, aromatic broth, delivering a texture that’s both fluffy and flavorful.
Ingredients for Rice a Roni Chicken and Rice
Pantry staples plus a quick chop. One pot does all the work here.
| Ingredient | Amount | Notes |
|---|---|---|
| Boneless Skinless Chicken Thighs 🍗 | 1 ½ lb | Cut into bite-sized pieces |
| Long-Grain White Rice 🍚 | 1 ½ cups | Uncooked, rinsed before use |
| Chicken Broth 🍲 | 3 cups | Low-sodium preferred for control |
| Unsalted Butter 🧈 | 2 tbsp | Melted for sautéing |
| Yellow Onion 🧅 | 1 whole | Medium-sized, finely diced |
| Garlic Cloves 🧄 | 3 cloves | Minced for aromatic base |
| Dried Parsley 🌿 | 1 tsp | Or use fresh at triple amount |
| Dried Thyme 🍃 | ½ tsp | Rubbed between fingers to release flavor |
| Salt 🧂 | 1 tsp | Adjust to taste at the end |
| Ground Black Pepper 🌶️ | ½ tsp | Freshly ground preferred |
| Worcestershire Sauce 💧 | 1 tbsp | Adds depth to the broth |
| Dried Minced Onion 🧅 | 1 tbsp | Rehydrates in cooking liquid |
| Bay Leaf 🍃 | 1 whole | Removed before serving |
The chicken is the star—thighs stay juicier than breasts in this long simmer. Costco has great prices on boneless, skinless, or grab whatever’s on sale at your supermarket. For the broth, Swanson or Better Than Bouillon work fine, but homemade is next-level if you’ve got it. The rice? Any long-grain white, but avoid instant—it turns to mush (the good stuff, not the pre-cooked kind).
No chicken thighs? Breasts work in a pinch but watch the clock—they dry out fast. Out of fresh onion? Double the dried minced onion for similar flavor. Missing thyme? Poultry seasoning at half the amount covers it. The Worcestershire adds umami, but soy sauce works too if that’s what’s in your fridge. Fresh herbs? Skip the dried and toss in a handful at the end.
This keeps 4-5 days in the fridge—tastes even better after the flavors meld. Freezes beautifully for 3 months (portion first, trust me on this). Leftovers reheat great with a splash of water to loosen the rice.
Why You’ll Love This Recipe
- One Pan Magic: I just dump everything in, let it simmer, and the rice soaks up all that chicken broth flavor without me babysitting the stove.
- Rich Comfort: The butter and onions caramelize while the thighs stay juicy—it’s like a hug in a bowl.
- Feeds My Week: I make a double batch on Sunday and pack it for lunch all week. Honestly, it tastes even better the next day.
- Budget Hero: Boneless thighs and pantry staples stretch far, and it fills up my family of four without breaking the bank.
Step-by-Step Instructions for Chicken and Rice
This one-pot method keeps cleanup simple while delivering maximum flavor in every bite.
Step 1: Sear the Chicken Thighs
Start by heating the 2 tbsp unsalted butter in a large, heavy pot or Dutch oven over medium-high heat. When the butter melts and starts to foam, add the 1.5 lb boneless skinless chicken thighs cut into bite-sized pieces.
Cook for 5-6 minutes, stirring occasionally, until the chicken develops a golden brown crust on all sides. The pieces should be just cooked through but not overdone—they’ll finish cooking in the next steps. Remove the chicken and set aside.
Step 2: Sauté the Aromatics
In the same pot, add the finely diced yellow onion. Sauté for 3-4 minutes until it turns translucent and begins to soften. Then add the 3 cloves minced garlic and cook for 30 seconds until fragrant.
Stir in the 1 tbsp dried minced onion, 1 tsp dried parsley, 0.5 tsp dried thyme, 1 tsp salt, and 0.5 tsp ground black pepper. I rub the thyme between my fingers as I add it to release its full aroma. Cook for 1 minute to toast the spices.
Step 3: Toast the Rice and Add Liquids
Add the 1.5 cups long-grain white rice to the pot and stir to coat in the butter and aromatics. Toast for 2 minutes until the rice turns slightly opaque and begins to smell nutty.
Pour in the 3 cups chicken broth, 1 tbsp Worcestershire sauce, and add the 1 whole bay leaf. Stir well to combine, scraping up any browned bits from the bottom of the pot. These bits add incredible depth to the dish.
Step 4: Simmer and Finish
Return the chicken to the pot, nestling the pieces into the rice mixture. Bring to a boil, then reduce heat to low, cover, and simmer for 18-20 minutes. Don’t peek during this time—keeping the lid on traps steam for even cooking.
After 20 minutes, turn off the heat and let it sit covered for 5 minutes. The rice should be tender and the liquid fully absorbed. Remove the bay leaf, fluff the rice with a fork, and adjust seasoning if needed before serving.
Pro Tips For Making Rice A Roni Chicken And Rice
- Brown the Chicken First: Sear the boneless thighs in the butter until golden—about 4-5 minutes per side. This builds flavor that the rice absorbs as it cooks, and I learned this the hard way when I skipped it once and the dish tasted flat.
- Toast the Rice: After removing the chicken, let the rice cook in the butter and onion for 2-3 minutes until it’s lightly golden. Sounds weird, but it works: it prevents mushy rice and adds a nutty depth.
- Use Warm Broth: Pour in chicken broth straight from the fridge and your rice will take forever to cook. I was skeptical until I tried it—warm broth (not boiling) cuts the simmer time and keeps the texture consistent.
- Skip the Lid Peeking: Resist the urge to stir or check the rice while it simmers. Every time you lift the lid, you lose steam and risk undercooked grains—I ruined two batches before I finally left it alone for the full 15 minutes.
Storing and Reheating This Recipe
Refrigerator Storage
Let your dish cool for no more than 2 hours before transferring to airtight containers. I use glass containers with snap-tight lids. Store in the fridge at 40°F or below for up to 4-5 days. The flavors deepen overnight as everything melds together. ❄️
Freezer Storage
This freezes beautifully for up to 3 months without quality loss. Portion into individual servings using quart-sized freezer bags—they stack flat and thaw quickly. Squeeze out excess air to prevent freezer burn and label with the date.
Stovetop Reheating
My preferred method: transfer to a heavy pot, add 2-3 tbsp water or broth to prevent sticking, and heat over medium-low heat for 8-10 minutes. Stir occasionally and add a splash more liquid if needed. The rice plumps back up perfectly.
Microwave Reheating
For quick meals, microwave individual portions covered with a damp paper towel. Use 70% power for 2-3 minutes, stir, then continue in 30-second bursts until reaching 165°F. The damp towel adds moisture to keep the rice tender. 🔥
Nutrition Facts
Frequently Asked Questions
Can I use chicken breasts instead of thighs?
Yes, but reduce simmer time to 15 minutes to prevent dryness. Thighs stay juicier, but breasts work in a pinch.
What if my rice is still crunchy after cooking?
Add 1/4 cup broth, cover, and cook for 5 more minutes on low. Check liquid levels next time.
Can I make this in a slow cooker?
Brown chicken first, then combine all ingredients. Cook on low for 4-5 hours or high for 2-3 hours.
How do I prevent the rice from burning?
Use a heavy pot and keep heat at low after boiling. Never lift the lid while simmering.

- Jollof Rice Sauce Recipe: West African Tomato and Spice Infusion - September 25, 2026
- Japanese Rice Soup Recipe: Umami-Rich Comfort in a Bowl - September 25, 2026
- Homemade Cream Of Rice Recipe: Silk-Smooth Breakfast in Minutes - September 25, 2026