
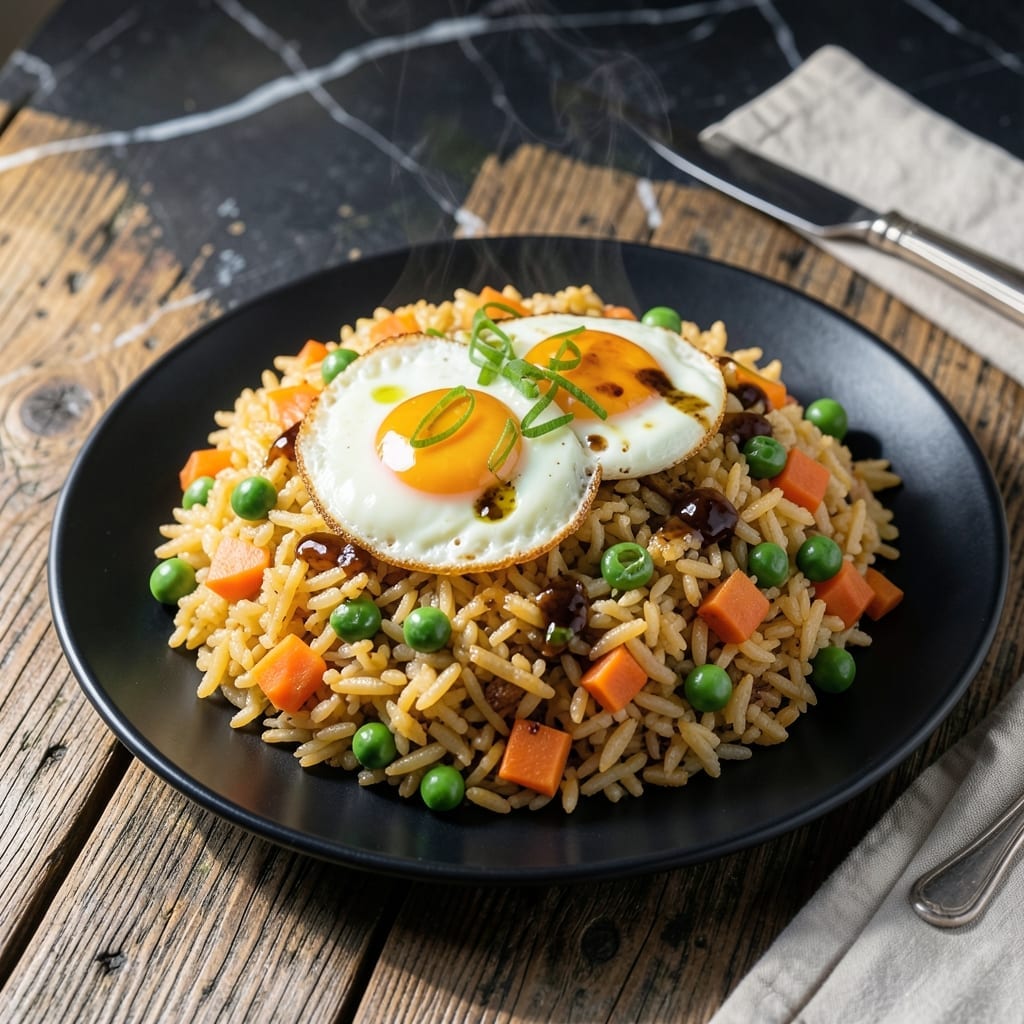
I’ve discovered a way to transform a classic boxed side into a restaurant-quality fried rice that’s both simple and satisfying. This approach builds on familiar flavors while adding depth and texture.
The secret lies in treating the seasoned rice mix as a base, then enhancing it with fresh vegetables, scrambled eggs, and a touch of soy sauce. The result is a dish that feels homemade yet retains the convenience of the original.
You’ll achieve perfectly cooked grains with a slight crispness, balanced by tender veggies and a savory, umami-rich profile. It’s a quick solution for a flavorful meal.
Ready in under 20 minutes, this reinvented dish proves that boxed mixes can be elevated with minimal effort.
Ingredients for Rice a Roni Fried Rice
Pantry staples plus fresh veggies turn this boxed side into something special.
| Ingredient | Amount | Notes |
|---|---|---|
| Rice a Roni Seasoned Rice Mix 🍚 | 1 box | Any flavor variety works |
| Large Eggs 🥚 | 4 whole | Beaten for scrambling |
| Carrots 🥕 | 1 cup | Diced into small cubes |
| Frozen Peas 🌱 | 1 cup | Thawed under cold water |
| Green Onions 🧅 | ½ cup | Thinly sliced, whites and greens separated |
| Soy Sauce 🫙 | 3 tbsp | Low-sodium preferred |
| Sesame Oil 🫒 | 1 tbsp | Toasted for depth |
| Vegetable Oil 🛢️ | 2 tbsp | Neutral flavor for frying |
| Garlic Cloves 🧄 | 3 cloves | Minced for maximum flavor |
| Fresh Ginger 🌿 | 1 tbsp | Finely grated or minced |
| Salt 🧂 | ½ tsp | Adjust to taste after cooking |
| Black Pepper 🌶️ | ¼ tsp | Freshly ground preferred |
The Rice a Roni box is your foundation here. Any flavor works, but chicken or beef varieties give the best depth. Grab it from the rice aisle at any major grocery store—no specialty shopping needed. The eggs should be fresh (check the date on the carton), and for the veggies, I always reach for bright orange carrots and sweet frozen peas (the petite kind if available).
No green onions? Regular onion diced fine works in a pinch. Swap soy sauce for tamari for gluten-free or coconut aminos for a milder taste. Missing ginger? Ground ginger at one-quarter the amount in a pinch. The sesame oil adds a ton of flavor, but if you’re out, a dash of toasted sesame seeds stirred in at the end gets you close.
This comes together so fast you’ll eat it all in one sitting. Leftovers (if any) keep 3-4 days in the fridge. Reheat in a skillet with a splash of water to bring the rice back to life. Honestly, it’s even better the next day (the flavors meld more).
Why You’ll Love This Recipe
- One Pan Magic: I love that this comes together in a single skillet—just brown the rice mix, scramble the eggs, and toss in the peas and carrots.
- Ridiculously Good: The Rice a Roni seasoning gives it that savory depth, and the green onions add a fresh pop that makes it irresistible.
- Weeknight Hero: Between us, this is my Tuesday night lifesaver—ready before the kids start asking what’s for dinner.
- Budget Stretcher: One box of Rice a Roni feeds my family of four with leftovers, and the frozen peas keep it cheap.
Step-by-Step Instructions for Rice a Roni Fried Rice
Here’s my tested method for transforming this pantry staple into a flavor-packed meal.
Step 1: Prepare and Cook the Rice a Roni Base
Prepare the Rice a Roni Seasoned Rice Mix according to package instructions, but use only 2 cups water instead of the usual amount. This creates a slightly firmer texture perfect for fried rice. Cook until all liquid is absorbed and the rice is tender but not mushy.
Spread the cooked rice on a baking sheet and let it cool completely. I like to refrigerate it for 30 minutes to dry it out further—this prevents the fried rice from becoming soggy when it hits the hot wok. The grains should be separate and slightly firm to the touch.
Step 2: Scramble the Eggs with Aromatics
Heat 1 tablespoon Vegetable Oil in a large skillet or wok over medium-high heat. Add the beaten Large Eggs and scramble until just set but still slightly runny. Remove the eggs to a plate and set aside—they’ll finish cooking when added back later.
In the same pan, add the remaining 1 tablespoon Vegetable Oil. Sauté the minced Garlic Cloves and finely grated Fresh Ginger for 30-45 seconds until fragrant but not browned. The aroma should be intense and inviting at this stage.
Step 3: Stir-Fry Vegetables and Rice
Increase heat to high and add the diced Carrots. Stir-fry for 2-3 minutes until they begin to soften. Add the thawed Frozen Peas and cook for another 1 minute—they just need to heat through.
Add the cooled Rice a Roni and break up any clumps with your spatula. Drizzle the Soy Sauce and Sesame Oil over the rice. Stir-fry for 3-4 minutes until everything is evenly coated and the rice starts to develop a slight crispness.
Step 4: Combine All Elements and Finish
Return the scrambled Large Eggs to the pan along with the thinly sliced Green Onions (reserve some greens for garnish). Sprinkle with Salt and Black Pepper. Toss everything together for 1-2 minutes until heated through.
Taste and adjust seasoning if needed. The rice should have a uniform color with bits of egg and vegetables distributed throughout. The texture should be slightly crispy with each grain distinct, not clumped together.
Garnish with the reserved green onion tops and serve immediately while hot. This dish comes together quickly once you start cooking, so have all your ingredients prepped and ready to go before you begin.
Pro Tips For Making Rice A Roni Fried Rice
- Use Day-Old Rice: Cook the Rice a Roni the day before and refrigerate it—fresh rice is too moist and will turn mushy when stir-fried. I learned this the hard way after my first batch turned into a sticky mess.
- Prep Veggies Small: Dice the carrots into tiny cubes and thaw the peas under cold water so they heat evenly. Sounds tedious, but it keeps everything from steaming instead of frying.
- Scramble Eggs First: Push the scrambled eggs to one side of the pan before adding the rice and veggies—this prevents them from overcooking and keeps the texture distinct. My grandmother swore by this, and she was right.
- High Heat Only: Crank the burner to medium-high and resist the urge to stir constantly. After burning three batches, I finally figured out that letting the rice sit for 30 seconds between stirs gives it that golden, crispy color.
Storing and Reheating This Recipe
Refrigerator Storage
Let your fried rice cool completely before transferring to airtight containers. I use glass containers because they don’t absorb odors. It’ll keep in the fridge for 3-4 days without losing texture or flavor. ❄️
Freezer Storage
For longer storage, freeze portions in ziplock bags with excess air removed. Lay flat to save space. This dish freezes well for up to 2 months—just thaw overnight in the fridge before reheating.
Skillet Reheating
My preferred method: heat 1 tbsp Vegetable Oil in a skillet over medium heat. Add the fried rice and 2 tbsp water, stirring occasionally. This restores moisture and prevents drying out. 🔥
Microwave Reheating
For quick meals, spread rice on a microwave-safe plate and cover with a damp paper towel. Heat on 50% power for 2-3 minutes, stirring halfway. This prevents the eggs from turning rubbery.
Reviving Leftovers
If the rice seems dry after storage, sprinkle 1-2 tsp water and cover while reheating. The steam will refresh the grains beautifully. I often add a drizzle of Sesame Oil to bring back the aroma.
Nutrition Facts
Frequently Asked Questions
Can I use a different rice mix?
Yes! Any flavored rice mix works, but chicken or beef varieties add the best depth. The seasoning packet provides the base flavor, so stick to similar profiles for best results.
Why cool the rice first?
Cooling dries the grains, preventing soggy fried rice. Refrigerating for 30 minutes creates the ideal texture for stir-frying. This step is key for that perfect slightly crispy finish.
How do I prevent clumping?
Break up clumps with your spatula before adding to the pan. Use high heat and keep stirring vigorously. The rice should be loose and separate, not stuck together.
Can I add other vegetables?
Try bell peppers, broccoli, or corn. Just ensure they’re cut small for even cooking and add them with the carrots. Keep the total veggie amount around 2 cups.

- Jollof Rice Sauce Recipe: West African Tomato and Spice Infusion - September 25, 2026
- Japanese Rice Soup Recipe: Umami-Rich Comfort in a Bowl - September 25, 2026
- Homemade Cream Of Rice Recipe: Silk-Smooth Breakfast in Minutes - September 25, 2026