
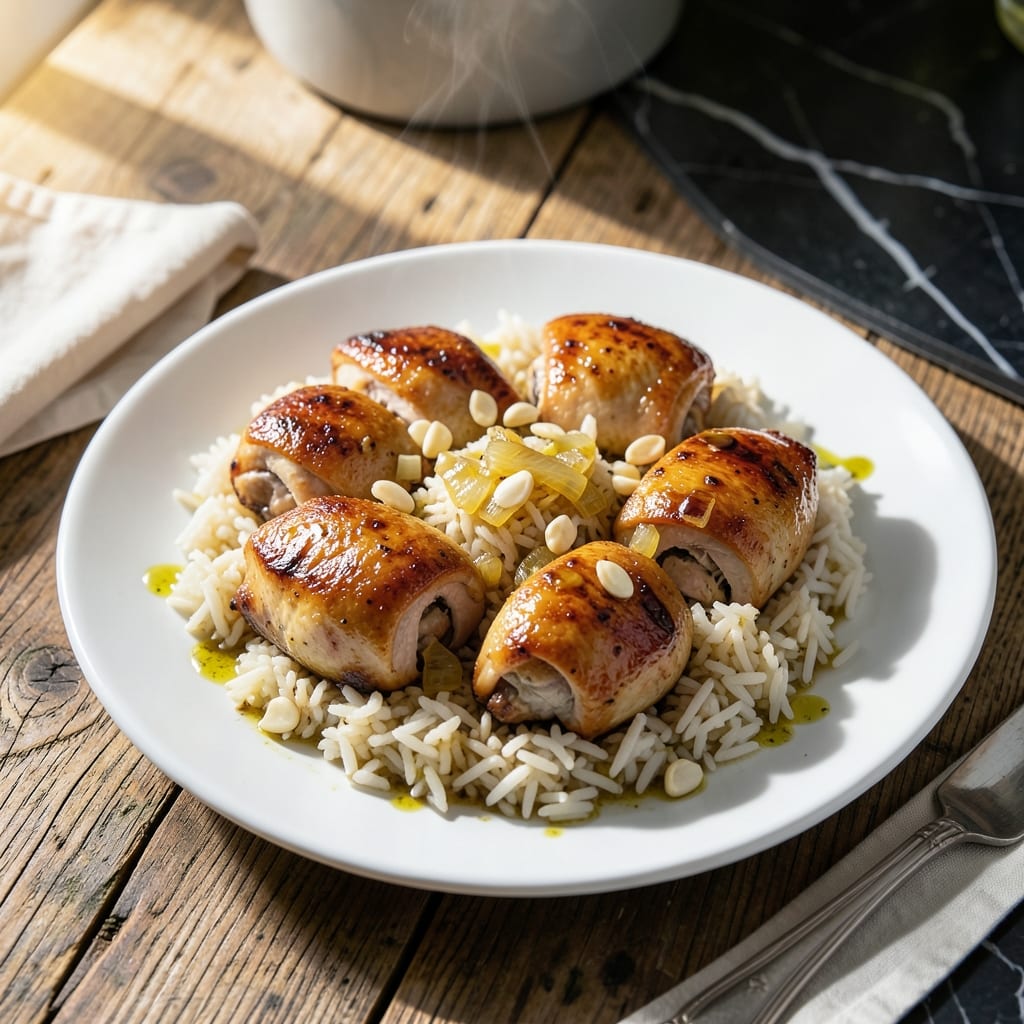
This pressure cooker method delivers restaurant-quality chicken and rice with minimal effort. I developed this technique for busy weeknights when I needed a complete meal fast.
The key is layering the ingredients properly and using the cooker’s natural pressure to infuse flavors. The chicken stays tender while the rice absorbs all the savory juices, creating a one-pot dish that’s both hearty and balanced.
What you’ll have in 30 minutes is perfectly cooked chicken nestled in fluffy, flavorful rice. The pressure cooker locks in moisture and distributes seasoning evenly, so every bite is packed with taste.
This method is foolproof for beginners yet impressive enough for seasoned cooks. The hands-off approach means you can focus on other tasks while dinner practically cooks itself.
Ingredients for Rice and Chicken Pressure Cooker
Restaurant-quality results require layered flavors and precise ingredient selection for this one-pot wonder.
| Ingredient | Amount | Notes |
|---|---|---|
| Boneless Skinless Chicken Thighs 🍗 | 1 ½ lb | Trimmed of excess fat |
| Long-Grain White Rice 🍚 | 1 ½ cups | Uncooked, rinsed until clear |
| Chicken Broth 🥣 | 2 cups | Low-sodium preferred |
| Yellow Onion 🧅 | 1 whole | Medium, finely diced |
| Garlic Cloves 🧄 | 4 cloves | Minced for depth of flavor |
| Olive Oil 🫒 | 2 tbsp | Divided for sautéing and finishing |
| Dried Thyme 🌿 | 1 tsp | Rubbed between fingers to release oils |
| Dried Oregano 🍃 | 1 tsp | Mediterranean variety preferred |
| Smoked Paprika 🌶️ | 1 tsp | Adds subtle smoky depth |
| Bay Leaf 🍃 | 1 whole | Removed before serving |
| Kosher Salt 🧂 | 1 ½ tsp | Diamond Crystal preferred for consistency |
| Freshly Ground Black Pepper 🌶️ | ½ tsp | Coarse grind recommended |
| Fresh Parsley 🌿 | ¼ cup | Chopped, for garnish |
| Lemon 🍋 | 1 whole | Zested and juiced for brightness |
Optimal quality requires selecting bone-in, skin-on thighs if available, though boneless works for convenience. Jasmine or basmati rice can substitute for long-grain, but adjust liquid ratios accordingly. Source low-sodium broth from Whole Foods or Trader Joe’s for cleaner flavor control. The onions should be sweet and firm—avoid any with green sprouts forming.
For substitutions, chicken breasts can replace thighs but reduce cook time by 3 minutes to prevent dryness. Vegetable broth works in a pinch, though the depth of flavor will differ. If fresh herbs are unavailable, dried parsley at one-third the amount suffices. The smoked paprika is essential for that signature depth—do not substitute regular paprika.
Store raw chicken in the coldest part of your refrigerator for up to 2 days. The rice absorbs flavors best when cooked immediately after rinsing. Leftovers keep for 4-5 days refrigerated or 3 months frozen. Reheat with a splash of broth to restore moisture.
Why You’ll Love This Recipe
- Dump and Go: I toss everything in the pressure cooker—chicken, rice, broth, onion, garlic—no babysitting required.
- Garlic-Infused Bites: The chicken soaks up the garlic and onion flavor, and the rice? Ridiculously good.
- Meal Prep Hero: I make a big batch Sunday and it’s my lunch all week—still tastes fresh.
- Wallet-Friendly Feast: Boneless thighs and pantry staples stretch far, feeding my family for pennies per serving.
Step-by-Step Instructions for Rice and Chicken Pressure Cooker Meal
This method delivers perfectly tender chicken and fluffy rice with minimal hands-on time.
Step 1: Sauté Aromatics and Brown Chicken
Set your pressure cooker to the sauté function on medium-high heat. Add 1 tbsp Olive Oil and swirl to coat. When the oil shimmers, add the finely diced Yellow Onion and cook for 3-4 minutes until translucent and just beginning to caramelize.
Add the minced Garlic Cloves and cook for 30 seconds until fragrant. Stir in the Dried Thyme, Dried Oregano, and Smoked Paprika, toasting them for 15 seconds to release their oils. Push the aromatics to one side and add the remaining 1 tbsp Olive Oil to the empty space.
Pat the Boneless Skinless Chicken Thighs dry, then season both sides with 1.5 tsp Kosher Salt and 0.5 tsp Freshly Ground Black Pepper. Sear the chicken in batches for 3-4 minutes per side until golden brown, ensuring not to crowd the pot. Remove and set aside.
Step 2: Deglaze and Layer Ingredients
Pour in ½ cup Chicken Broth and use a wooden spoon to scrape up all the browned bits from the bottom of the pot. This deglazing step ensures maximum flavor and prevents burning during pressure cooking.
Add the 1.5 cups Long-Grain White Rice to the pot and stir to coat the grains in the aromatic oil and spices. Pour in the remaining 1.5 cups Chicken Broth, then add the Bay Leaf. Stir once to distribute the rice evenly.
Return the seared chicken to the pot, nestling the pieces into the rice mixture. Add the zest of the Lemon to the pot.
Step 3: Pressure Cook to Perfection
Secure the lid on your pressure cooker and set the valve to sealing. Cook on high pressure for 8 minutes. The cooker will take about 10-15 minutes to come to pressure before the cooking time begins.
Once the cooking time is complete, allow the pressure to release naturally for 10 minutes, then quick-release any remaining pressure. Natural release prevents the rice from becoming mushy while ensuring the chicken remains tender.
Step 4: Rest and Finish
Carefully remove the lid, tilting it away from you to avoid steam. Discard the Bay Leaf. Drizzle the juice of the Lemon over the dish and let it sit covered for 5 minutes to allow the flavors to meld.
Gently fluff the rice with a fork, breaking up any clumps. The rice should be tender and the Chicken Broth fully absorbed. Taste and adjust seasoning if needed, though the initial measurements should provide perfect balance.
Garnish with the 0.25 cup Fresh Parsley before serving. The chicken should reach an internal temperature of at least 165°F and pull apart easily with a fork.
Pro Tips For Making Rice And Chicken Pressure Cooker
- Sear the Chicken: Brown the chicken thighs in the pressure cooker first—3-4 minutes per side—to lock in flavor. I learned this the hard way when my rice tasted bland without that caramelized crust.
- Rinse the Rice: Wash the long-grain white rice until the water runs clear to remove excess starch. My grandmother swore by this, and her rice was never gummy.
- Use Enough Liquid: Stick to the 1:1.25 rice-to-broth ratio (e.g., 1.5 cups rice to 2 cups broth) or you’ll end up with undercooked grains. After burning one batch, I finally measured precisely.
- Natural Release Only: Let the pressure release naturally for 10 minutes before opening the lid—this prevents mushy rice and tough chicken. Sounds tedious, but it actually changes the outcome.
Dietary Considerations for This Recipe
Gluten-Free Friendly
This recipe is naturally gluten-free since it uses only whole ingredients like rice, chicken, and vegetables. Just double-check your chicken broth label—some brands add wheat-based thickeners. I always use Imagine Foods or Pacific Foods for peace of mind.
Dairy-Free Adaptation
The base recipe contains no dairy, making it safe for lactose-intolerant diners. If you’re adding any garnishes, skip the cheese and stick to fresh parsley and lemon zest for that bright finish I love.
Lower Sodium Option
To reduce sodium, use low-sodium chicken broth and cut the Kosher Salt to 1 tsp. The smoked paprika and herbs still pack plenty of flavor. I find this version just as satisfying, especially with a squeeze of fresh lemon juice at the end. 💪
Protein Variations
For a vegetarian twist, swap the chicken for 1.5 lb chickpeas or extra-firm tofu. Reduce the pressure cooking time to 5 minutes to prevent overcooking. The rice absorbs the spices beautifully either way.
Allergen Awareness
This dish is free from the top 8 allergens if you use certified allergen-free broth. Always verify your spices too—some blends contain hidden soy or milk derivatives. I keep McCormick pure spices on hand for safety.
Diabetic Considerations
To make this more diabetes-friendly, use brown rice instead of white and increase the broth to 2.25 cups. The fiber helps slow glucose absorption. A serving of ½ cup rice with 3 oz chicken keeps carbs in check. 💡
Nutrition Facts
Frequently Asked Questions
Can I use chicken breasts instead of thighs?
Yes, but reduce cook time to 5 minutes on high pressure to prevent dryness. Thighs stay juicier, but breasts work in a pinch. Always check internal temp reaches 165°F.
Do I need to rinse the rice first?
Absolutely—rinse until water runs clear to remove excess starch. This prevents gummy rice and ensures fluffy texture. Skipping this step can make your dish pasty.
What if my rice is undercooked?
Add ¼ cup hot broth, seal the lid, and cook on high pressure for 2-3 more minutes. Let it sit 5 minutes off heat before checking again.
Can I double the recipe?
Yes, but don’t exceed your cooker’s ⅔ max capacity. Increase liquid slightly and extend cook time by 2 minutes. Overfilling risks uneven cooking.

- Jollof Rice Sauce Recipe: West African Tomato and Spice Infusion - September 25, 2026
- Japanese Rice Soup Recipe: Umami-Rich Comfort in a Bowl - September 25, 2026
- Homemade Cream Of Rice Recipe: Silk-Smooth Breakfast in Minutes - September 25, 2026