
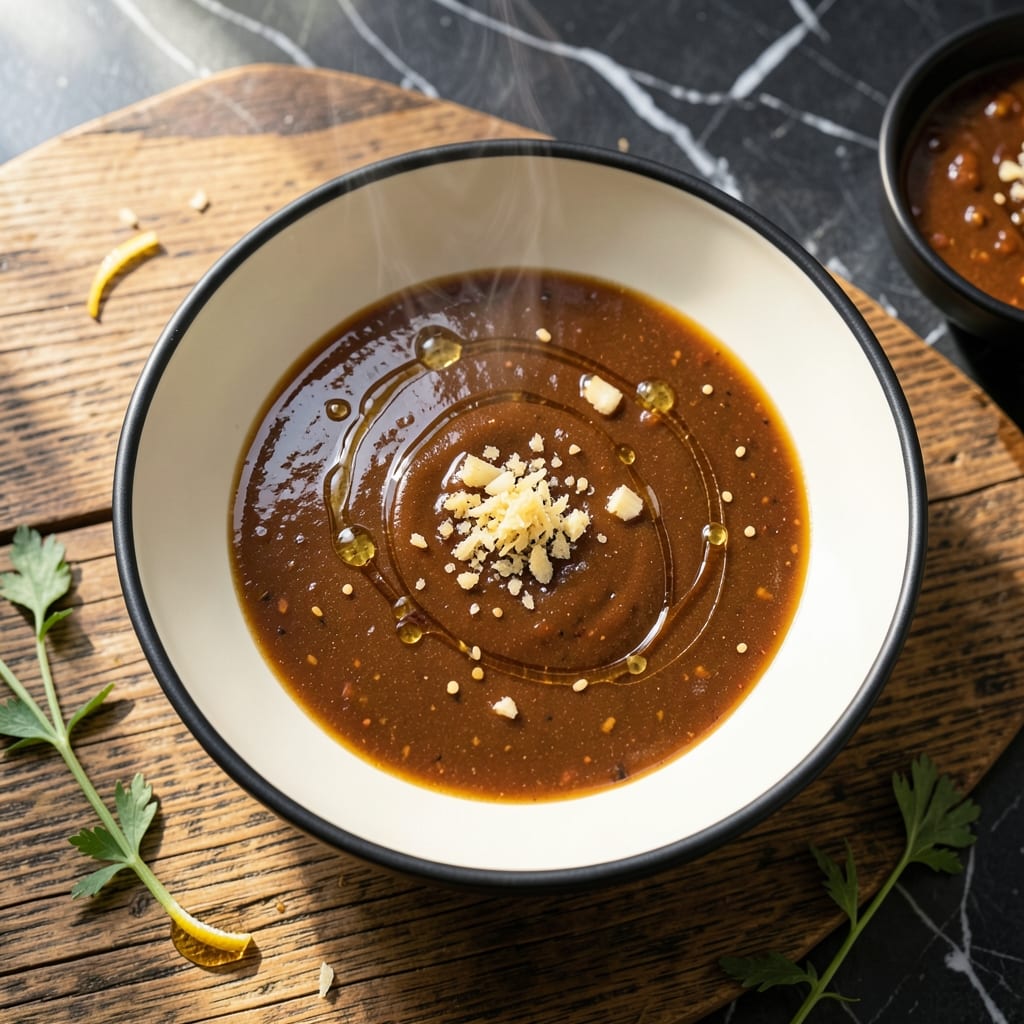
This umami-rich sauce transforms ordinary rice bowls into restaurant-quality meals with minimal effort. A 5-minute blend of savory, sweet, and tangy elements creates depth that elevates every bite.
The secret lies in balancing soy sauce, sesame oil, and a touch of honey for that perfect sticky-savory consistency. No cooking required—just whisk and drizzle for an instant flavor upgrade.
Versatile enough for grain bowls, proteins, or roasted vegetables, this sauce delivers consistent results. Its bold flavor profile works with any combination of ingredients you choose.
Store in an airtight container for up to 2 weeks, and you’ll always have a quick flavor boost on hand. This is the game-changer your kitchen needs.
Ingredients for Rice Bowl Sauce
Eight pantry staples whisk into a bold, sticky sauce ready in minutes.
| Ingredient | Amount | Notes |
|---|---|---|
| Soy Sauce 🫕 | ½ cup | Low-sodium preferred for balance |
| Sesame Oil 🫒 | 2 tbsp | Toasted for nutty depth |
| Honey 🍯 | 3 tbsp | Local or raw variety |
| Rice Vinegar 🍚 | 2 tbsp | Unseasoned for clean tang |
| Fresh Garlic Cloves 🧄 | 3 cloves | Minced finely for even distribution |
| Fresh Ginger 🌿 | 1 tbsp | Peeled and grated |
| Sriracha 🌶️ | 1 tbsp | Adjust to heat preference |
| Toasted Sesame Seeds 🌰 | 1 tsp | For garnish and texture |
The soy sauce is doing most of the heavy lifting here. Kikkoman or San-J tamari are my go-tos—both have that deep umami without tasting harsh. Sesame oil loses potency fast once opened, so store it in the fridge after opening. Fresh ginger and garlic make a huge difference (the jarred stuff just doesn’t have the same punch). I grab mine from Trader Joe’s or the produce section at most markets.
No honey? Maple syrup at a one-to-one ratio works beautifully. Out of rice vinegar? Apple cider vinegar is a fine stand-in, though slightly fruitier. Sriracha too spicy? Swap in gochujang for a milder, fermented heat. The sesame oil is non-negotiable though—it’s what gives that signature nutty aroma. Skip the toasted seeds if you’re in a rush, but they add a nice crunch.
This keeps in the fridge for 2 weeks—the flavors actually deepen over time. Give it a good stir before using since the honey settles. I make a double batch and keep a jar at work for emergency lunch upgrades. Don’t freeze—the texture changes, and it’s so quick to make fresh anyway.
Why You’ll Love This Recipe
- 5-Minute Mix: I just dump soy sauce, honey, and the rest in a jar, shake, and it’s done before the rice finishes cooking.
- Umami Bomb: The garlic and sesame oil hit that sweet-savory balance that makes me want to drink it straight from the spoon.
- Meal Prep Hero: I drizzle this over rice, tofu, or leftover veggies—same sauce, three totally different meals.
- Pantry Staples: Between us, I always have these ingredients on hand, so it’s a lifesaver when I’m staring at an empty fridge.
Step-by-Step Instructions for Rice Bowl Sauce
This method ensures a perfectly balanced, glossy sauce that clings beautifully to every grain.
Step 1: Bloom the Aromatics in Sesame Oil
Heat the 2 tbsp Sesame Oil in a small saucepan over medium-low heat until it shimmers slightly. Add the 3 cloves Fresh Garlic Cloves (minced) and 1 tbsp Fresh Ginger (grated), stirring constantly for 45-60 seconds until fragrant.
Watch for the garlic to turn just barely golden at the edges—this signals the flavors have developed without burning. The ginger will soften and release its pungent oils, creating a fragrant base for the sauce. Don’t let the mixture darken, or it’ll turn bitter.
Step 2: Combine Liquid Ingredients and Simmer
Pour in the 0.5 cup Soy Sauce, 3 tbsp Honey, 2 tbsp Rice Vinegar, and 1 tbsp Sriracha. Whisk vigorously until the honey dissolves completely and the mixture becomes smooth. Bring to a gentle simmer over medium heat.
Once simmering, reduce heat to low and let it cook for 3-4 minutes until the sauce thickens slightly. You’ll notice it develops a glossy sheen and coats the back of a spoon. This step melds the sweet, tangy, and umami elements into harmony.
Step 3: Adjust Consistency and Finish
Remove the saucepan from heat and let the mixture cool for 2-3 minutes. The sauce will thicken further as it cools. Taste and adjust the balance if needed—though the proportions here are carefully calibrated for that perfect umami-sweet-tangy profile.
Stir in the 1 tsp Toasted Sesame Seeds just before serving. This preserves their crunch and nutty aroma, adding texture to the velvety sauce. The seeds should be evenly distributed throughout, visible as tiny specks in the deep amber liquid.
Step 4: Serve Warm or at Room Temperature
Transfer the sauce to a small pitcher or bowl. It’ll keep at room temperature for up to 2 hours or can be refrigerated for up to 5 days. Reheat gently over low heat or microwave in 10-second bursts to avoid overheating.
Drizzle generously over rice bowls while warm—the heat helps it soak into the grains. Each bite should deliver layers of savory depth from the soy, brightness from the vinegar, warmth from the sriracha, and a subtle nutty finish from the sesame. The sauce should pool slightly at the bottom of the bowl, ready to be mixed in.
Pro Tips For Making Rice Bowl Sauce
- Mince Garlic Fine: After burning a few batches, I learned that finely mincing the garlic prevents bitter, burnt bits in the sauce. Aim for almost a paste-like consistency.
- Bloom the Garlic: Cook the minced garlic in sesame oil for 30 seconds on medium-low heat until fragrant but not brown—this builds depth without bitterness.
- Balance the Honey: Honey can overpower, so start with half the amount you think you need, taste, then adjust. I learned this the hard way with a cloyingly sweet sauce.
- Whisk While Warm: Whisk the honey into the warm soy sauce mixture first—it dissolves faster and blends evenly, skipping the sticky clumps I used to fight.
Dietary Considerations for This rice bowl sauce
Gluten-Free Adaptation
Swap regular soy sauce for tamari—it’s naturally gluten-free while keeping that deep umami flavor. I use San-J tamari for its rich, balanced taste. Always check labels, as some brands may have cross-contamination.
Vegan Version
Replace honey with maple syrup at a 1:1 ratio. It adds the same sweetness and thickness without animal products. I prefer Grade A amber maple syrup for its smooth, caramel-like notes. 🌱
Low-Sodium Option
Use low-sodium soy sauce or coconut aminos to reduce salt content by up to 40%. Coconut aminos also bring a slightly sweeter, more mellow profile. Taste as you go—you may need a pinch of salt to balance flavors.
Nut-Free Alternative
If sesame allergies are a concern, substitute toasted sunflower oil for sesame oil. It won’t have the same nutty depth but still adds richness. Skip the sesame seeds as well—try poppy seeds for texture instead.
Sugar-Free Adjustments
Replace honey with sugar-free maple syrup or a monk fruit sweetener blend. I’ve found Lakanto Maple Syrup works well. Start with 2 tbsp and adjust to taste, as sugar substitutes can vary in sweetness.
Spice Control
For a milder sauce, omit the sriracha entirely or replace it with ½ tsp gochugaru (Korean chili flakes) for heat without vinegar. For extra kick, add 1½ tbsp sriracha or a dash of chili crisp. 🔥
Nutrition Facts
Frequently Asked Questions
Can I use this sauce on other dishes?
This works beautifully on noodle bowls, grilled proteins, or as a salad dressing. The bold flavors complement everything from tofu to chicken to roasted vegetables.
How do I adjust the sweetness?
Start with 2 tbsp honey instead of 3, then taste and add more as needed. For less sweetness, increase rice vinegar by 1 tsp to balance.
What if my sauce separates in the fridge?
Just whisk or shake vigorously before using. The honey naturally settles, but it reincorporates easily.
Can I make this ahead for meal prep?
Yes! It keeps for up to 2 weeks refrigerated. The flavors actually deepen over time, making it perfect for prep.

- Rice Pudding Recipe With Eggs and Milk: Old-Fashioned Custard-Style Comfort - September 30, 2026
- Rice Noodle Sauce Recipe: Bold Umami Depth for Authentic Stir-Fry - September 30, 2026
- Rice Pilaf Recipe: Fragrant Basmati With Toasted Vermicelli - September 30, 2026