
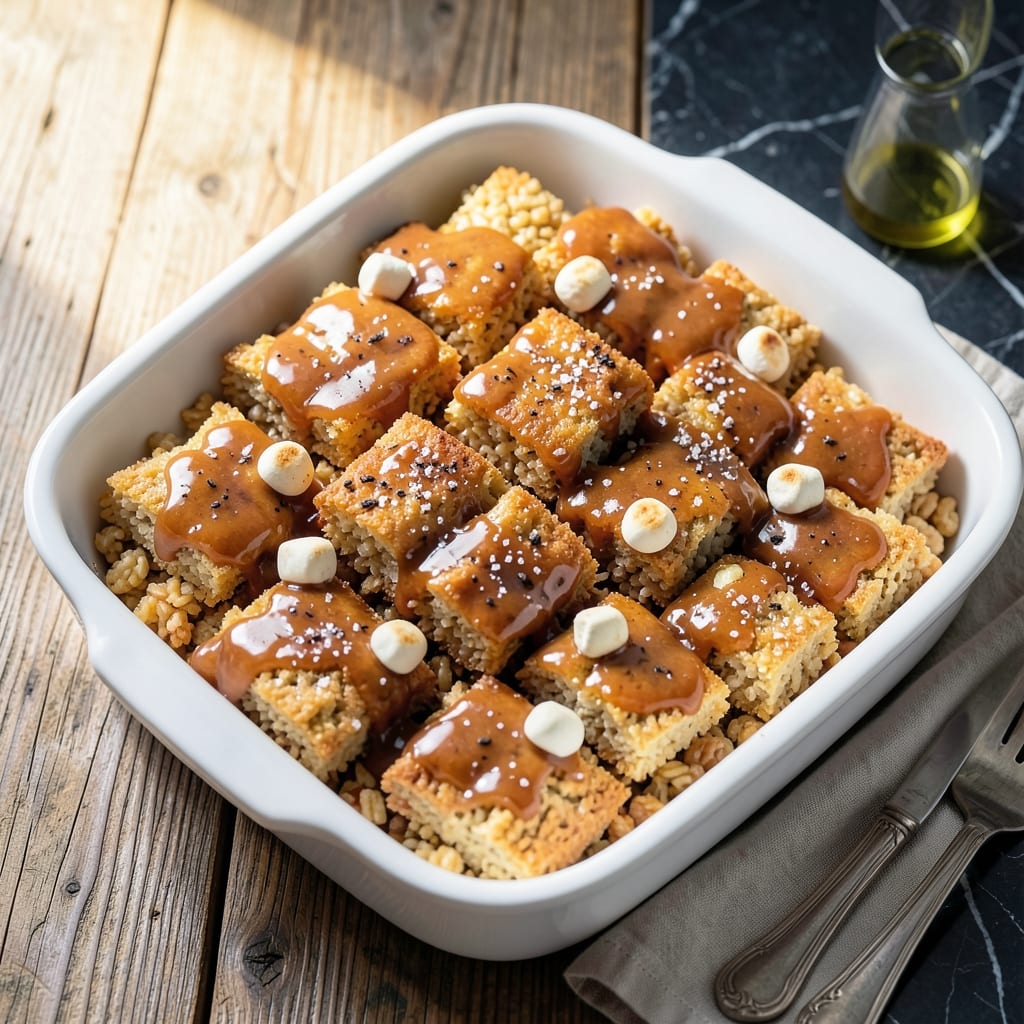
This homemade rice candy delivers chewy texture and sweet marshmallow flavor that brings back childhood nostalgia. I perfected this recipe after testing multiple versions in my small kitchen.
The secret lies in melting marshmallows with butter to create a binding syrup that coats the rice cereal perfectly. Each batch comes together in 15 minutes with minimal effort and basic pantry ingredients.
What emerges is a treat with that signature crispy-chewy contrast—sweet, buttery, and impossible to resist. The cereal stays light while the marshmallow mixture creates a glossy, stretchy coating.
Perfect for parties, gifts, or satisfying that sweet tooth. This method guarantees consistent results every time.
Ingredients for Rice Candy
Basic pantry staples create this nostalgic treat with signature chewy texture and sweet marshmallow flavor.
| Ingredient | Amount | Notes |
|---|---|---|
| Vegan Butter 🧈 | ¼ cup | Unsalted, for binding syrup |
| Vegan Mini Marshmallows 🍬 | 4 cups | Dandies or Trader Joe's brand |
| Rice Cereal 🌾 | 6 cups | Crispy rice cereal, unsweetened |
| Vanilla Extract 🌿 | 1 tsp | Pure vanilla, not imitation |
| Sea Salt 🧂 | ¼ tsp | Fine grain for even distribution |
| Coconut Oil 🥥 | 1 tsp | Optional, for greasing pan |
| Maple Syrup 🍁 | 2 tbsp | For enhanced sweetness |
| Almond Extract 🌰 | ¼ tsp | Optional, for depth of flavor |
| Pinch of Turmeric 🌼 | 1 pinch | Optional, for golden color |
The vegan marshmallows are non-negotiable here—Dandies or Trader Joe’s are the most reliable brands for melt and texture. Vegan butter needs to be unsalted; Miyoko’s or Earth Balance work perfectly. Rice cereal should be plain, unsweetened; generic brands are identical to name brands (the good stuff, not the flavored varieties).
No vegan marshmallows? Homemade marshmallow fluff with aquafaba can work but texture varies. Out of vegan butter? Coconut oil at 1:1 ratio substitutes well. For extra chew, add 1 tbsp corn syrup to the melt. Rice cereal can be gluten-free if needed—Nature’s Path makes a great option.
Store in airtight container at room temp for 3-4 days (if they last that long). For longer storage, freeze for up to 1 month. Press parchment paper on top before sealing to prevent sticking. Best served fresh when the coating is still glossy.
Why You’ll Love This Recipe
- One Pot Wonder: I melt the vegan butter and marshmallows in a single pot, then stir in the cereal—hardly any cleanup.
- Sweet & Salty Magic: The vanilla and sea salt turn those puffed rice bits into little flavor bombs.
- Party or Midnight Snack: I’ve served these at kids’ birthdays and sneaked a handful at 11 p.m. on a Tuesday night.
- Stays Fresh for Days: They keep in an airtight container for a week, so I can double the batch and forget about dessert for a while.
Step-by-Step Instructions for Rice Candy
This method ensures perfect texture and flavor with every batch you prepare.
Step 1: Prepare the Pan and Melt the Base
Lightly grease a 9×13-inch baking dish with the 1 tsp Coconut Oil to prevent sticking. In a large saucepan, melt the 0.25 cup Vegan Butter over low heat until just liquefied—this prevents scorching and ensures even melting.
Add the 4 cups Vegan Mini Marshmallows and stir constantly with a silicone spatula. The marshmallows will begin to collapse and melt into a smooth, glossy mixture. This process should take 5-7 minutes—be patient, as rushing can cause burning.
Step 2: Incorporate Flavor Enhancers
Once the marshmallow mixture is fully melted, remove the saucepan from heat. Stir in the 1 tsp Vanilla Extract, 2 tbsp Maple Syrup, 0.25 tsp Sea Salt, 0.25 tsp Almond Extract, and 1 pinch Pinch of Turmeric until fully combined.
The vanilla and almond extracts should be added off heat to preserve their aromatic qualities. The turmeric adds a subtle golden hue without altering the flavor profile. Taste the mixture at this stage—it should be sweet with a hint of saltiness to balance the richness.
Step 3: Combine with Rice Cereal
Working quickly, add the 6 cups Rice Cereal to the marshmallow mixture. Use a spatula to fold everything together gently but thoroughly, ensuring every piece of cereal is evenly coated. The mixture will thicken as the cereal absorbs the marshmallow syrup.
The cereal should glisten slightly but not be soggy. If the mixture seems too stiff, place the saucepan back over low heat for 30 seconds to loosen it slightly before continuing to mix.
Step 4: Press and Set in the Pan
Transfer the coated cereal mixture to the prepared baking dish. Use the spatula or lightly greased hands to press it evenly into the pan, applying firm pressure to create a compact layer. The surface should be smooth and uniform.
Let the mixture cool at room temperature for 30 minutes before cutting. This allows the marshmallow to set properly, ensuring clean slices. For faster results, refrigerate for 15 minutes, but avoid over-chilling, as this can make the candy too firm.
Step 5: Cut and Serve
Once fully set, use a sharp knife to cut into 16 equal squares. For clean cuts, dip the knife in warm water and wipe it between slices. The candy should hold its shape without crumbling.
Serve immediately or store in an airtight container at room temperature for up to 3 days. The texture remains chewy, with a slight crispness from the rice cereal. Each piece should have a consistent golden color from the turmeric, if used.
Pro Tips For Making Rice Candy
- Melt Slowly: Use low heat when melting the vegan butter and marshmallows—I learned this the hard way after scorching two batches. It takes about 5-7 minutes, but it prevents that bitter burnt taste.
- Fresh Marshmallows: Check the date on your vegan mini marshmallows; old ones get dry and won’t melt smoothly. Sounds obvious, but I’ve ruined a batch by assuming they’d still be soft.
- Skip the Overmixing: Stir just until the cereal is coated, then stop. Mixing too long makes the rice cereal soggy and the final treats dense instead of light and crispy.
- Press Lightly: When shaping, press the mixture into the pan just enough to hold together—don’t compact it. A gentle hand keeps the texture airy rather than rock-hard.
Creative Variations of These Flavors
Chocolate Lovers
Add ½ cup vegan chocolate chips to the marshmallow mixture in Step 2. The chocolate melts beautifully with the marshmallows, creating a rich cocoa flavor. I like using Enjoy Life brand for reliable melting and taste.
Fruity Twist
Mix in 1 cup dried cranberries or raisins with the rice cereal in Step 3. The chewy fruit adds a tangy contrast to the sweet marshmallow. Soak the dried fruit in warm water for 10 minutes first to soften.
Nutty Crunch
Stir in ½ cup chopped almonds or pecans along with the rice cereal. Toast the nuts first in a dry pan over medium heat for 3-4 minutes to enhance their crunch. This version reminds me of my Nonna’s nutty desserts. 💛
Coconut Delight
Replace 1 cup rice cereal with 1 cup unsweetened shredded coconut. The coconut adds tropical flair and extra chewiness. Press the mixture firmly into the pan to help it hold together.
Peanut Butter Swirl
Swirl ¼ cup creamy peanut butter into the melted marshmallow mixture before adding the cereal. Use a natural peanut butter without added sugar for the best texture. The result is a nutty, sweet treat.
Holiday Spice
Add ½ tsp cinnamon and ¼ tsp nutmeg to the marshmallow mixture for a warm, spiced flavor. These spices pair beautifully with the vanilla and maple syrup, making it perfect for winter gatherings. ✨
Nutrition Facts
Frequently Asked Questions
Can I use regular marshmallows instead of vegan ones?
Regular marshmallows contain gelatin, so they won’t be vegan. For authentic results, stick with brands like Dandies or Trader Joe’s. The texture and melt will be identical to traditional ones.
How do I prevent the mixture from sticking to my hands?
Lightly coat your hands with coconut oil or wear plastic gloves. This creates a barrier so the sticky marshmallow doesn’t cling. Press firmly but gently for even squares.
Why did my candy turn out hard instead of chewy?
Overcooking the marshmallow mixture or pressing too hard in the pan can cause this. Keep heat at low and avoid compacting too tightly. Let it set at room temperature for best texture.
Can I make this without a saucepan?
A microwave works in 30-second bursts, stirring between each. Use a large microwave-safe bowl and watch closely to prevent burning. The method is faster but requires careful attention.

- Jollof Rice Sauce Recipe: West African Tomato and Spice Infusion - September 25, 2026
- Japanese Rice Soup Recipe: Umami-Rich Comfort in a Bowl - September 25, 2026
- Homemade Cream Of Rice Recipe: Silk-Smooth Breakfast in Minutes - September 25, 2026