
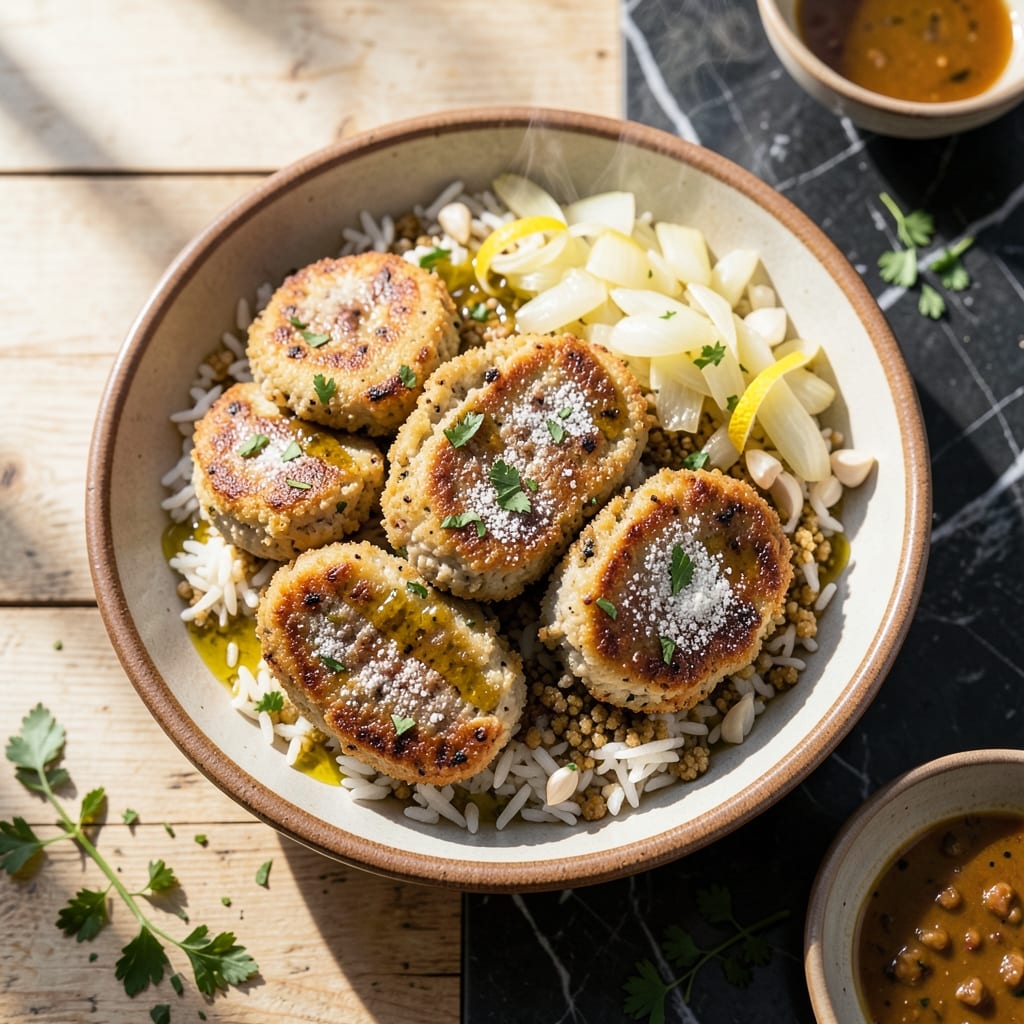
This recipe delivers a crispy exterior with a perfectly seasoned meat filling, creating a dish that’s both traditional and impressive. The rice shell forms the ideal contrast to the savory center.
I developed this method to ensure the shell stays shatteringly crispy while the filling remains moist and flavorful. The spice blend is what makes this dish truly special.
You’ll achieve professional results with this straightforward approach. The technique is simple but requires attention to detail for the best texture.
Serve warm for the ultimate experience. The combination of textures and flavors will make this a new favorite.
Ingredients for Rice Kibbeh
Traditional ingredients transformed into a vegetarian showstopper with crispy rice shell and spiced filling.
| Ingredient | Amount | Notes |
|---|---|---|
| Long-Grain White Rice 🍚 | 2 cups | Rinsed and drained thoroughly |
| Fine Bulgur Wheat 🌾 | ½ cup | Rinsed and soaked |
| All-Purpose Flour 🌾 | ¼ cup | For binding shell |
| Vegetable Stock 🥣 | 1 ½ cups | Low-sodium preferred for control |
| Yellow Onion 🧅 | 1 whole | Finely diced for filling |
| Garlic Cloves 🧄 | 4 cloves | Minced for depth of flavor |
| Mushrooms 🍄 | 8 oz | Cremini or white, finely chopped |
| Walnuts 🥜 | ½ cup | Toasted and finely ground |
| Ground Cumin 🌿 | 1 ½ tsp | Freshly toasted for aroma |
| Ground Coriander 🌿 | 1 tsp | Complements the cumin perfectly |
| Ground Cinnamon 🌿 | ½ tsp | Adds warm depth to spice blend |
| Ground Allspice 🌿 | ½ tsp | Essential for authentic flavor |
| Salt 🧂 | 1 ½ tsp | Divided between shell and filling |
| Black Pepper 🌶️ | ½ tsp | Freshly ground preferred |
| Olive Oil 🫒 | ½ cup | For frying kibbeh shells |
The rice shell requires long-grain white rice—jasmine or basmati work best for that shatteringly crisp texture. Bulgur wheat adds structure; find it in the international aisle at Whole Foods or Middle Eastern markets. For the filling, cremini mushrooms provide meaty texture without animal products. Toast the walnuts yourself—pre-toasted from Trader Joe’s saves time without sacrificing flavor.
No bulgur? Fine couscous at half the amount works in a pinch. Swap walnuts for pecans or almonds—toast them first. The spice blend is non-negotiable for authenticity, but freshly ground spices make a noticeable difference. For mushroom haters, finely chopped eggplant (salted and drained) offers a similar texture. Use vegetable broth with low sodium to control seasoning.
Kibbeh shells fry best fresh but can be shaped and refrigerated for 1 day before cooking. Store leftovers in an airtight container for up to 3 days. Reheat in a 350°F oven to restore crispness. The spice blend keeps for 6 months in a sealed jar.
Why You’ll Love This Recipe
- One-Pot Wonder: I love that everything—rice, bulgur, onions—simmers together in one pot with the stock. No extra pans, no fuss.
- Crave-Worthy Crisp: The bulgur gives it this nutty, toasty flavor that pairs perfectly with the soft rice inside. Honestly, I make extra just for the leftovers.
- Feeds a Crowd: It’s my go-to for family gatherings since it stretches easily with rice as the base. Even picky eaters clean their plates.
- Pantry Staples: Between us, I always have rice, bulgur, and flour on hand, so this comes together without a last-minute grocery run.
Step-by-Step Instructions for Rice Kibbeh
Master the technique for achieving a crispy exterior with a perfectly seasoned filling.
Step 1: Prepare the Rice and Bulgur Shell
Combine the 2 cups Long-Grain White Rice and 0.5 cup Fine Bulgur Wheat in a large bowl. I rinse both thoroughly first to remove excess starch, which prevents gummy shells. Add the 0.25 cup All-Purpose Flour, 1 tsp Salt, and 0.5 cup Olive Oil, then mix until fully incorporated.
The mixture should hold together when pressed—this is your shell base. If it feels too dry, add a splash of Vegetable Stock, but avoid excess moisture. The flour binds everything, creating that signature crispy texture when fried.
Step 2: Craft the Spiced Filling
In a skillet over medium heat, sauté the finely diced Yellow Onion in 1 tablespoon Olive Oil until translucent. Add the minced Garlic Cloves, 8 oz Mushrooms, and 0.5 cup Walnuts, stirring for 5-6 minutes until the mushrooms release their moisture.
Stir in the 1.5 tsp Ground Cumin, 1 tsp Ground Coriander, 0.5 tsp Ground Cinnamon, 0.5 tsp Ground Allspice, remaining 0.5 tsp Salt, and 0.5 tsp Black Pepper. Cook for 2 minutes until fragrant. The spices should coat every ingredient evenly.
Step 3: Shape and Fill the Kibbeh
Take a golf ball-sized portion of the rice mixture and press it into a thin cup in your palm. This creates the shell. Add 1 tablespoon of the cooled filling to the center, then fold the rice mixture over to seal completely. Gently shape into an oval or torpedo form.
Ensure the seal is tight—any gaps will cause the filling to leak during frying. The shell should be uniform in thickness, about ¼ inch, to ensure even cooking. Repeat until all mixture and filling are used, yielding approximately 12 pieces.
Step 4: Fry to Crispy Perfection
Heat 2 inches of Olive Oil in a deep pot to 350°F. Fry the kibbeh in batches to avoid crowding, turning occasionally, for 4-5 minutes until deep golden brown and crispy. The oil should bubble steadily but not violently.
Drain on a paper towel-lined plate. The shell should crackle slightly when bitten, revealing the aromatic filling within. If the oil temperature drops below 325°F, allow it to recover before adding the next batch to maintain consistent crispiness.
Pro Tips For Making Rice Kibbeh
- Soak the Bulgur: Cover fine bulgur with hot vegetable stock and let it sit for 30 minutes—I learned this the hard way after my first few batches turned out dry and crumbly.
- Rinse the Rice: Wash the long-grain white rice until the water runs clear to remove excess starch, or your kibbeh will turn out gummy instead of light.
- Chill Before Shaping: Pop the rice and bulgur mixture in the fridge for 20 minutes before shaping; it holds together much better and won’t fall apart when frying.
- Use Cold Onions: Grate the yellow onion and squeeze out all the moisture—sounds weird, but it works to keep the kibbeh from getting soggy inside.
Essential Equipment for This Recipe
Deep Fryer Setup
For perfect results, I use a 5-quart Dutch oven—it provides enough depth for safe frying while maintaining consistent heat. The Lodge Enameled Cast Iron model is my go-to for even heat distribution. Fill it no more than halfway with oil to prevent spills when adding kibbeh. 🔥
Temperature Control
A candy thermometer is essential for monitoring oil temperature. I recommend the Taylor Classic for its accuracy and durability. Maintain 350°F throughout frying—any lower and your shells will absorb oil, any higher and they’ll burn before cooking through.
Shaping Tools
While your hands work fine, I love using a kibbeh mold for consistent shaping. The Middle Eastern specialty stores often carry these, or order online. A small ice cream scoop helps portion the rice mixture evenly. The filling should be exactly 1 tablespoon per piece.
Draining Station
Set up a wire rack over a baking sheet lined with paper towels. This allows air circulation on all sides, keeping your kibbeh crispy. Avoid stacking fresh batches—they’ll steam and lose that perfect crunch you worked so hard to achieve.
Safety Essentials
Keep a fire extinguisher rated for grease fires nearby—never use water on an oil fire. I also wear a long apron and use tongs for turning to protect from splatters. Frying requires your full attention, so clear your workspace of distractions.
Alternative Frying
If deep frying feels daunting, an air fryer works in a pinch. Spray kibbeh lightly with oil and cook at 375°F for 12-15 minutes, flipping halfway. The texture won’t be identical, but it’s a healthier option with less mess.
Nutrition Facts
Frequently Asked Questions
Can I make this ahead of time?
Yes! Shape and fill the kibbeh, then refrigerate on a tray for up to 24 hours. Cover with plastic wrap to prevent drying. Fry just before serving for the crispiest results.
What if my shell cracks while shaping?
Dip your fingers in cold water while working to prevent sticking and tearing. If it cracks, patch with extra rice mixture and smooth the surface. Maintain even thickness for consistent cooking.
Can I bake instead of frying?
Brush with oil and bake at 400°F for 20-25 minutes, flipping halfway. The texture will be less crispy but still delicious. Use a wire rack for even air circulation.

- Authentic Greek Lemon Rice Soup Recipe: Bright Citrus and Silky Texture - September 26, 2026
- Beef Tomato Rice Chinese Recipe: Wok-Seared Savory Delight with Fragrant Aromatics - September 26, 2026
- Mango Sticky Rice Sauce Recipe: Sweet Coconut Infusion for Dessert - September 26, 2026