
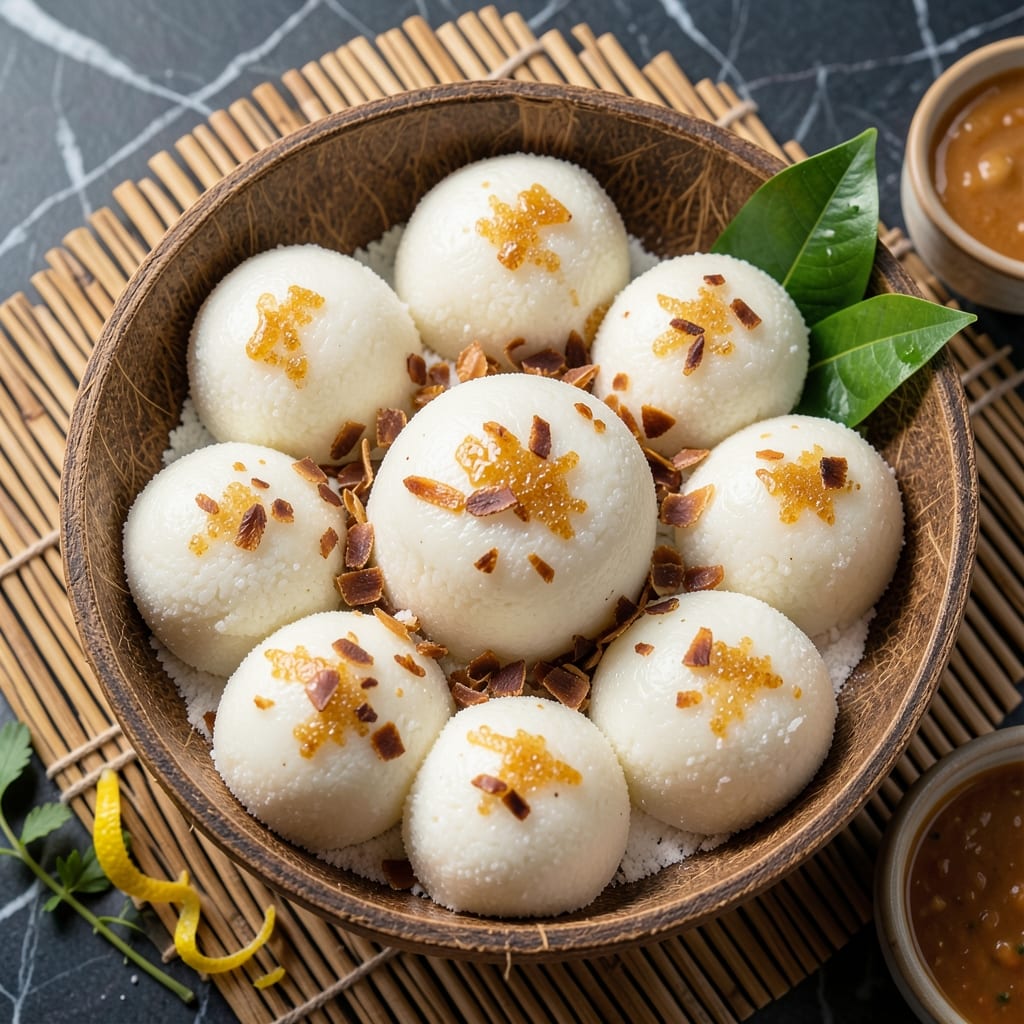
This Filipino steamed cake delivers a soft pillowy texture that melts in your mouth, with just the right hint of sweetness. I’ve refined this traditional method over years of trial and error to ensure consistent results every time.
The secret lies in the rice flour base, which gives these little cakes their signature fine, slightly chewy crumb. Proper steaming at the right temperature ensures they rise evenly and stay moist without collapsing.
What you’ll get are delicate, snow-white cakes that are light yet satisfying, perfect for breakfast or an afternoon snack. Their subtle sweetness pairs beautifully with salty dishes like dinuguan or simply a cup of coffee.
This version stays true to the classic while offering foolproof techniques for home cooks. The process is straightforward, but timing and steam control are everything.
Ingredients for Rice Puto
Simple ingredients, traditional technique, pillowy soft results every time.
| Ingredient | Amount | Notes |
|---|---|---|
| Rice Flour 🌾 | 2 cups | Fine grind for best texture |
| Granulated Sugar 🍚 | ¾ cup | Adjust to taste preference |
| Baking Powder 🧂 | 2 tsp | Ensures proper rise |
| Salt 🧂 | ¼ tsp | Fine sea salt preferred |
| Large Eggs 🥚 | 3 whole | Room temperature for best results |
| Coconut Milk 🥥 | 1 cup | Full-fat for creaminess |
| Vanilla Extract 💧 | 1 tsp | Pure extract for best flavor |
| Pandan Extract 🌿 | ½ tsp | Optional for fragrance |
| Ube Halaya 🟪 | ½ cup | Optional for purple color |
| Butter 🧈 | 2 tbsp | Melted for greasing molds |
| Grated Cheese 🧀 | ¼ cup | Edam or cheddar for topping |
The rice flour is non-negotiable here—Bob’s Red Mill or Asian markets carry the fine grind you need. Don’t sub regular flour; the texture won’t be the same (trust me, I’ve tried). Coconut milk adds moisture and richness—full-fat cans from Thai Kitchen or Chaokoh work perfectly. Eggs at room temp whip up better, so take them out an hour before starting.
No pandan extract? Skip it—the vanilla carries the flavor. Want purple puto? Swap ube halaya for a bit of the coconut milk (the jarred kind from Filipino stores saves time). No cheese? They’re still delicious plain. Baking powder losing its oomph? Check the expiration date—old leaveners won’t give you that rise.
Store cooled puto in an airtight container at room temp for 2 days, or freeze for 1 month. Reheat by steaming briefly—microwaving makes them rubbery. Best eaten fresh, but they’ll still taste great later (just lose a bit of that cloud-like fluff).
Why You’ll Love This Recipe
- Mix and Bake: I toss the rice flour, sugar, and eggs in one bowl, mix, and pop them in the molds—no fancy steps.
- Sweet Pillowy Bites: That subtle sweetness from the sugar with the light, airy texture from the whipped eggs? Pure comfort.
- Breakfast or Snack: We eat these warm for breakfast with butter, or pack them for an afternoon pick-me-up.
- Pantry Staples Only: Rice flour and eggs are always in my cupboard, so I can make these on a whim without a store run.
Step-by-Step Instructions for Rice Puto
Here’s my tested method for achieving that signature soft, pillowy texture every time.
Step 1: Combine Dry Ingredients for Perfect Rise
In a large bowl, whisk together the 2 cups Rice Flour, 0.75 cup Granulated Sugar, 2 tsp Baking Powder, and 0.25 tsp Salt until completely homogeneous. I sift the rice flour first to break up any lumps and ensure a silky-smooth batter.
This dry mix forms the structural foundation of your puto. The fine grind of rice flour creates that delicate, almost cloud-like texture that distinguishes this from wheat-based cakes. Don’t skip this whisking step—proper aeration helps create those air pockets we’re after.
Step 2: Incorporate Wet Ingredients for Creamy Batter
In a separate bowl, beat the 3 whole Large Eggs lightly, then add the 1 cup Coconut Milk, 1 tsp Vanilla Extract, and 0.5 tsp Pandan Extract. Whisk until the mixture is smooth and slightly frothy on top.
Create a well in the center of your dry ingredients and gradually pour in the wet mixture. Gently fold them together using a spatula, making sure to incorporate all the dry pockets at the bottom of the bowl. The batter should be thick but pourable—about the consistency of pancake batter.
If you’re making ube puto, fold in the 0.5 cup Ube Halaya at this stage. This not only adds that vibrant purple color but also contributes to the moist texture.
Step 3: Prepare Molds and Steam to Fluffy Perfection
Brush your puto molds or small ramekins with the 2 tbsp Butter melted, making sure to coat the bottoms and sides thoroughly. This prevents sticking and adds a subtle richness to the finished cakes.
Fill each mold about ¾ full with batter—this leaves enough room for the puto to rise without spilling over. Place the molds in a steamer basket lined with parchment paper. Bring water to a boil in your steamer pot, then reduce to medium heat before placing the basket on top.
Cover with a lid and steam for 20-25 minutes. You’ll know they’re done when a toothpick inserted in the center comes out clean and the tops spring back when lightly pressed.
Step 4: Add Cheese Topping and Finish
When the puto are about 80% cooked (after approximately 15-18 minutes of steaming), carefully sprinkle the 0.25 cup Grated Cheese evenly over the tops. This timing ensures the cheese melts beautifully without burning or sinking into the batter.
Continue steaming until fully cooked. The cheese will form a delicate, slightly crispy layer that contrasts perfectly with the soft cake beneath. Remove from the steamer and let cool in the molds for 5 minutes before transferring to a wire rack.
Serve warm for the best texture—they’ll be at their most pillowy and moist right out of the steamer. The cheese topping should be just set, with some strands stretching slightly as you pull them apart.
Pro Tips For Making Rice Puto
- Preheat the Steamer: Make sure your steamer is at a rolling boil before adding the puto batter—this prevents dense, gummy texture. I learned this the hard way after my first three batches came out flat.
- Sift the Rice Flour: Sounds tedious, but sifting the rice flour and baking powder together guarantees a lighter, fluffier crumb. My grandmother swore by this, and she was right.
- Skip Cold Eggs: Use room-temperature eggs—about 2 per cup of rice flour—to ensure even mixing and better rise. Cold eggs can make the batter clumpy and uneven.
- Fill Molds 3/4 Full: Resist the urge to overfill the molds; the puto will rise and spill over if you do. 3/4 full is the sweet spot for perfect domed tops.
Perfect Pairings for This Recipe
Traditional Pairings
These delicate cakes pair perfectly with salabat (ginger tea) or kapeng barako (Filipino coffee). The slight sweetness of puto balances the bold, earthy flavors of these traditional drinks. I love the contrast with my morning coffee. 💛
Savory Companions
For a classic Filipino merienda, serve with dinuguan (blood stew) or pork adobo. The salty, savory flavors cut through the sweetness beautifully. Even simple butter and salt on warm puto makes a satisfying snack.
Sweet Toppings
Drizzle with latik (coconut curds) or leche flan sauce for extra richness. A sprinkle of toasted coconut flakes adds texture. For ube puto, a dollop of macapuno (coconut sport) takes it to dessert level.
Breakfast Platter
Create a Filipino breakfast spread with tocino (sweet cured pork), longganisa (sausage), and fried eggs. The puto’s softness complements the savory meats perfectly. I often make this for weekend family brunches.
Beverage Pairings
Beyond coffee, try chocolate tablea (thick hot chocolate) or calamansi juice. The citrus in calamansi refreshes your palate between bites. For adults, a light lambanog (coconut vodka) cocktail works surprisingly well. ✨
Nutrition Facts
Frequently Asked Questions
Why use rice flour instead of regular flour?
Rice flour creates the signature soft, pillowy texture that makes puto unique. Regular flour would make them dense and chewy. The fine grind of rice flour gives that delicate, cloud-like crumb we love.
Can I make these without a steamer?
Use a large pot with a rack and lid instead. Add 1-2 inches of water, bring to boil, then place molds on the rack. Cover tightly and steam for 20-25 minutes on medium heat.
How do I prevent my puto from collapsing?
Avoid opening the steamer during cooking. Sudden temperature changes cause collapse. Also, don’t overmix the batter—fold just until combined. Let them cool 5 minutes in molds after steaming.

- Jollof Rice Sauce Recipe: West African Tomato and Spice Infusion - September 25, 2026
- Japanese Rice Soup Recipe: Umami-Rich Comfort in a Bowl - September 25, 2026
- Homemade Cream Of Rice Recipe: Silk-Smooth Breakfast in Minutes - September 25, 2026