
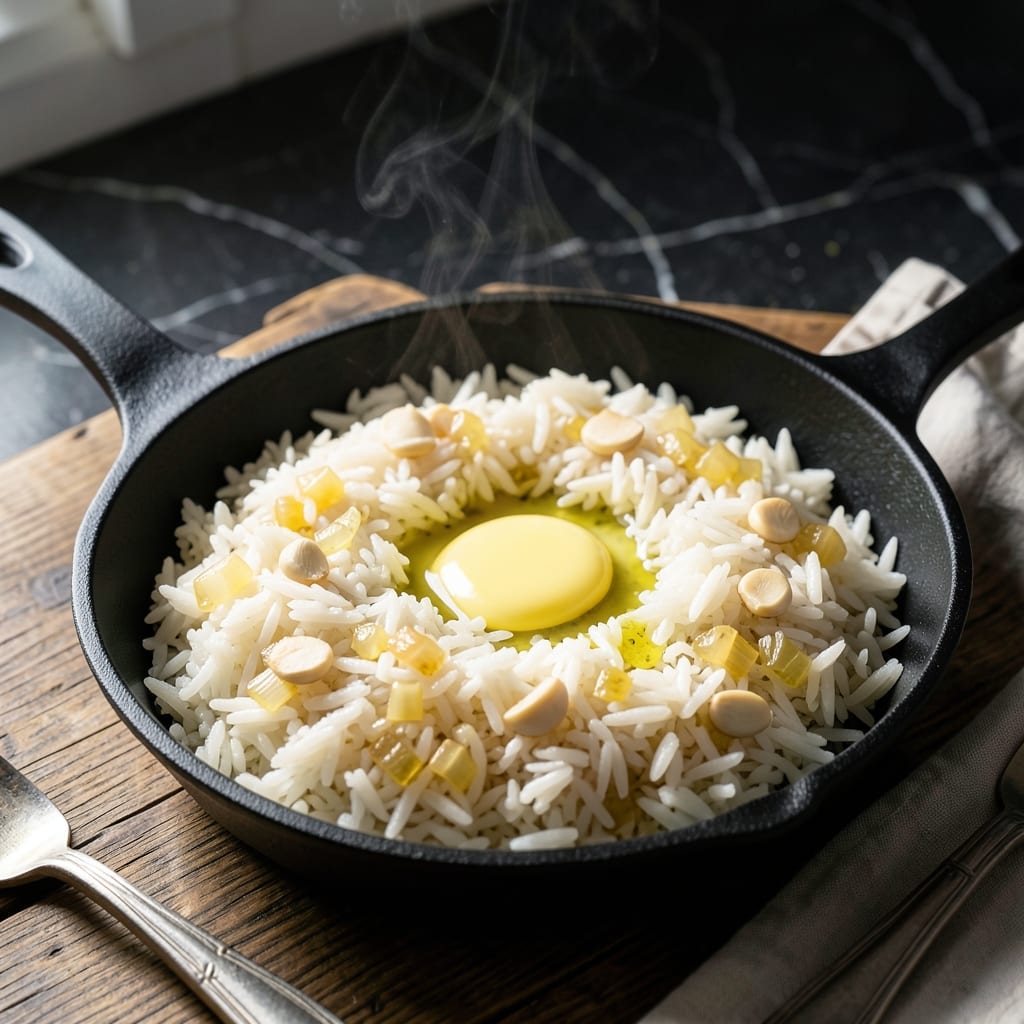
I’ve perfected a method for cooking rice that delivers fluffy grains packed with extra flavor. This approach doubles down on taste without complicating the process, making it ideal for both everyday meals and special occasions.
The technique relies on a precise water-to-rice ratio and a few simple yet effective steps. By toasting the grains briefly before adding liquid, you unlock a deeper, nuttier flavor that elevates the dish from basic to exceptional.
What you’ll get is perfectly tender rice with distinct, separate grains and a rich aroma. The texture is light and airy, never mushy, and the taste is far more satisfying than standard preparations.
Whether you prefer traditional white rice or a more modern twist, this method adapts easily. It’s a reliable way to achieve restaurant-quality results every time.
Ingredients for Rice Rice
Nine simple ingredients transform into rice with restaurant-quality results every time.
| Ingredient | Amount | Notes |
|---|---|---|
| Long-Grain White Rice 🍚 | 2 cups | Rinsed until water runs clear |
| Water 💧 | 3 ½ cups | Or use chicken broth |
| Unsalted Butter 🧈 | 2 tbsp | Or substitute olive oil |
| Garlic Cloves 🧄 | 3 cloves | Minced for toasting |
| Yellow Onion 🧅 | ½ whole | Finely diced |
| Salt 🧂 | 1 ½ tsp | Divided for toasting and cooking |
| Bay Leaf 🍃 | 1 whole | Optional for aroma |
| Fresh Parsley 🌿 | 2 tbsp | Chopped, for garnish |
| Lemon Juice 🍋 | 1 tsp | Freshly squeezed |
| Black Pepper 🌶️ | ½ tsp | Freshly ground |
The rice is the star here. Long-grain white rice (like Jasmine or Basmati) gives you those separate, fluffy grains. I grab mine in bulk at Costco—it’s cheap and stays fresh for ages. Don’t skip rinsing the rice (the water runs cloudy at first, then clear). This removes excess starch so grains don’t clump together. For extra richness, swap the water for chicken or vegetable broth.
No butter? Olive oil or coconut oil work just as well for toasting. Garlic and onion can be shallots or green onions if that’s what you’ve got. The bay leaf is optional but adds a subtle depth—dried bay works the same as fresh. Want more flavor? Toss in a pinch of turmeric or cumin with the rice while toasting. It’s a great way to customize.
Cooked rice keeps in the fridge for 4-5 days in an airtight container. Reheat with a splash of water to keep it from drying out. This dish actually tastes better the next day once flavors meld. Freeze for up to 3 months if you’re meal prepping (portion it first for easy grab-and-go).
Why You’ll Love This Recipe
- I’ll be real: it reheats even better the next day, and my wallet loves how cheap it is to make a big batch.
- One-Pot Magic: I toss everything in, cover it, and let the rice soak up all that garlicky, buttery goodness with zero babysitting.
- Rich Aroma: The sizzle of onion and garlic in butter fills my kitchen before the rice even starts cooking—it’s half the reason I make this.
- Endless Pairings: Honestly, it’s my blank canvas for everything from grilled chicken to a fried egg on top.
Step-by-Step Instructions for Rice Rice
Here’s the straightforward method to build layers of flavor in every bite.
Step 1: Toast Aromatics in Butter
Melt the 2 tbsp unsalted butter in a medium saucepan over medium heat. I let it foam up slightly before adding the finely diced 0.5 whole yellow onion and minced 3 cloves garlic cloves. Stir frequently for 2-3 minutes until the onion turns translucent and the garlic releases its fragrance.
Watch the heat carefully—you want the onion to soften, not brown. Add ½ tsp salt here to draw out moisture and prevent burning. The butter should remain golden, not dark brown. This base layer is where all the flavor starts building.
Step 2: Bloom Rice and Seasonings
Add all 2 cups long-grain white rice to the pan along with the 1 whole bay leaf, remaining 1 tsp salt, and ½ tsp black pepper. Stir constantly for 1-2 minutes to toast the rice lightly—you’ll notice it turning from opaque to slightly translucent at the edges.
This toasting step is crucial; it creates a nutty depth that plain steamed rice lacks. The grains should look dry and separate, not clumping together. You’ll smell a warm, buttery aroma that means you’re on the right track.
Step 3: Add Liquid and Simmer
Pour in all 3.5 cups water and bring to a boil. I use a wooden spoon to scrape up any browned bits from the bottom—they’ll dissolve into the cooking liquid and add even more flavor. Once boiling, immediately reduce heat to low, cover with a tight-fitting lid, and let it simmer undisturbed.
Cook for 15-18 minutes until all liquid is absorbed and the rice is tender. Don’t peek during this time—every time you lift the lid, you release steam that’s essential for even cooking. You’ll know it’s done when you see tiny steam holes in the surface and the grains are fluffy, not sticky.
Step 4: Rest and Fluff
Turn off the heat and let the rice sit covered for 5-10 minutes. This resting period allows the grains to steam in their own moisture, becoming perfectly fluffy. I set a timer because it’s easy to rush this step when you’re hungry.
After resting, remove the bay leaf and fluff the rice with a fork. This separates the grains and prevents clumping. The texture should be light and airy, with each grain distinct but tender.
Step 5: Finish and Garnish
Drizzle the 1 tsp lemon juice over the rice and fold in gently with the fork. The acidity brightens all the flavors. Finally, sprinkle with the 2 tbsp chopped fresh parsley for a pop of color and freshness.
Give it one last gentle toss to distribute everything evenly. The parsley should look vibrant against the white rice, and the lemon aroma should be noticeable but not overpowering. Serve immediately while hot and fluffy.
Pro Tips For Making Rice Rice
- Toast the Rice: Cook the rice in the butter for 2-3 minutes before adding liquid—I learned this the hard way, but it removes the raw starch taste and adds a nutty depth.
- Use Cold Water: Rinse the long-grain rice under cold water until it runs clear, then give it one final soak for 5 minutes to remove excess starch and prevent gummy clumps.
- Don’t Skip the Aromatics: Sauté the garlic and onion in the butter until soft and just starting to brown—about 4-5 minutes—before adding the rice, or the flavor stays flat.
- Rest Off Heat: Once the water’s absorbed, turn off the heat and let it sit covered for 10 minutes; I used to rush this and wondered why my rice was always sticky instead of fluffy.
Dietary Considerations for This rice rice
Gluten-Free Naturally
This dish is inherently gluten-free since rice contains no gluten proteins. I’ve served it to friends with celiac disease without any concerns. Just ensure your broth (if using) is certified gluten-free, as some brands add wheat-based thickeners. 💪
Vegetarian and Vegan
Easily adapt this for plant-based diets by swapping butter for olive oil or coconut oil and using vegetable broth instead of chicken broth. The toasting technique works the same, delivering that rich, nutty flavor without animal products.
Low-Sodium Option
Cut the salt in half or omit it entirely if you’re watching sodium intake. The toasting process still builds flavor through caramelization. I often use low-sodium broth and boost taste with extra lemon juice or fresh herbs. 🌿
Diabetic-Friendly
White rice has a high glycemic index, but you can make this more blood-sugar-friendly. Swap long-grain white rice for brown rice or cauliflower rice. Note that brown rice needs 4 cups liquid and 40-45 minutes to cook fully.
Allergy Considerations
This recipe avoids common allergens like dairy (if using oil), nuts, and soy. Always check labels on broth and butter substitutes for hidden allergens. For severe dairy allergies, confirm your butter is lactose-free or use a plant-based alternative.
Meal Prep Friendly
Cooked rice stores exceptionally well, making it perfect for weekly prep. Portion into airtight containers and refrigerate for 4-5 days or freeze for 3 months. Reheat with a splash of water to restore moisture. ✨
Nutrition Facts
Frequently Asked Questions
What’s the ideal water-to-rice ratio?
Use 1.75 cups liquid per 1 cup rice. This ensures fluffy, separate grains without mushiness. For this recipe, that’s 3.5 cups water for 2 cups rice.
Can I skip toasting the rice?
Don’t skip it! Toasting for 1-2 minutes develops a nutty flavor that plain steamed rice lacks. It’s the secret to the “double flavor” in this method.
How do I fix undercooked rice?
Add 2-3 tbsp water, cover, and cook on low heat for another 5 minutes. If still firm, repeat until tender. Never add too much liquid at once.
Can I make this in a rice cooker?
Yes, but sauté aromatics in a pan first. Then transfer to your cooker with rice and liquid. Use the standard white rice setting. The toasting step is key!

- Jollof Rice Sauce Recipe: West African Tomato and Spice Infusion - September 25, 2026
- Japanese Rice Soup Recipe: Umami-Rich Comfort in a Bowl - September 25, 2026
- Homemade Cream Of Rice Recipe: Silk-Smooth Breakfast in Minutes - September 25, 2026