
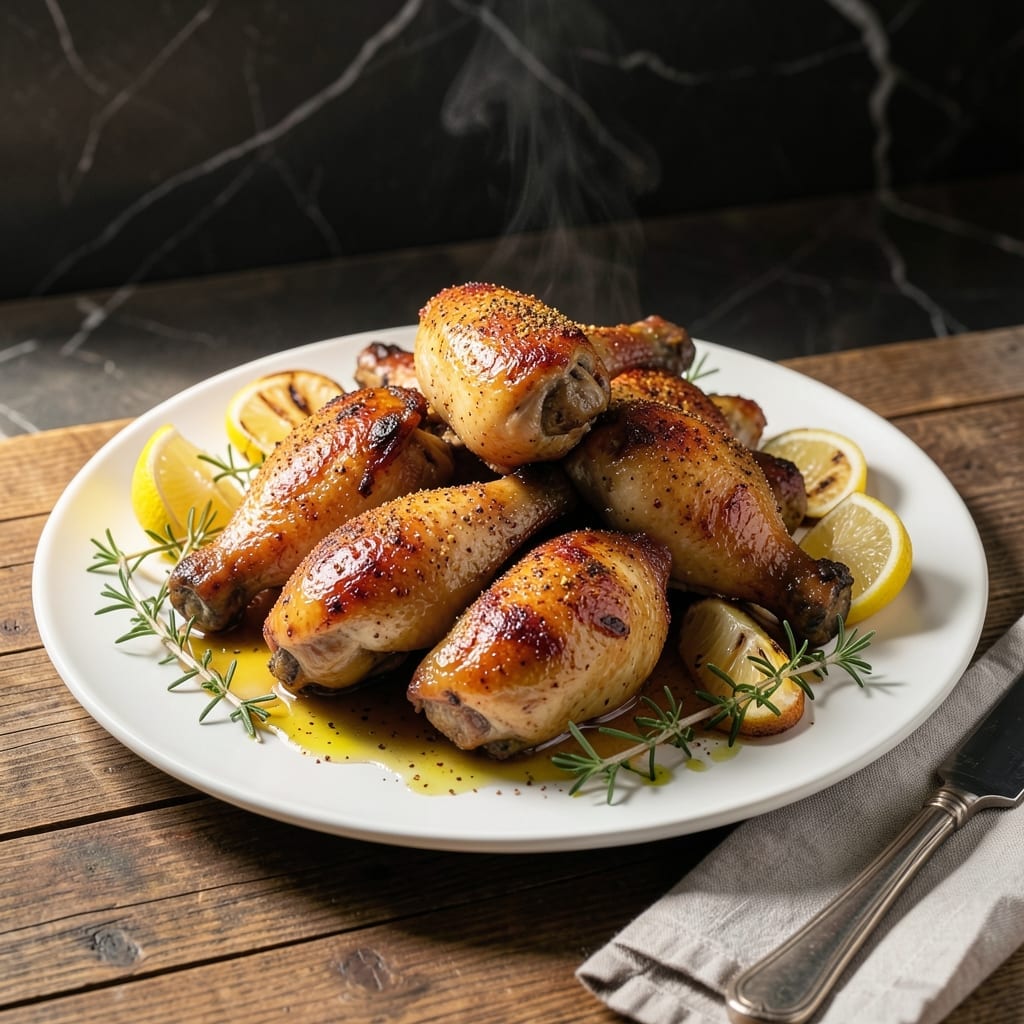
Achieving crispy skin and juicy meat with chicken parts is simpler than you think. This method delivers consistent results without complicated techniques.
The secret lies in proper seasoning and high heat roasting. Pat the pieces dry, season generously, and let them roast undisturbed to develop that perfect golden crust.
You’ll get chicken with shatteringly crispy skin encasing tender, juicy meat that falls off the bone. The high oven temperature ensures even cooking while creating beautiful caramelization.
This approach works with any chicken parts you prefer. The results speak for themselves every time.
Ingredients for Roast Chicken Parts
Simple ingredients, extraordinary results. Crispy skin and juicy meat every time.
| Ingredient | Amount | Notes |
|---|---|---|
| Chicken Parts 🍗 | 3 ½ lb | Legs, thighs, wings, or breasts |
| Kosher Salt 🧂 | 1 ½ tbsp | Diamond Crystal preferred |
| Freshly Ground Black Pepper 🌶️ | 1 tsp | Coarse grind for texture |
| Garlic Powder 🧄 | 1 tsp | Not garlic salt |
| Onion Powder 🧅 | 1 tsp | Balances the seasoning |
| Paprika 🌶️ | 1 tsp | Sweet or smoked variety |
| Dried Thyme 🌿 | ½ tsp | Crushed between fingers |
| Dried Rosemary 🌿 | ½ tsp | Crushed between fingers |
| Olive Oil 🫒 | 2 tbsp | Extra-virgin for richness |
| Lemon 🍋 | 1 whole | Zest and juice for brightness |
| Fresh Parsley 🌿 | ¼ cup | Chopped, for garnish |
| Unsalted Butter 🧈 | 2 tbsp | Melted, for basting |
The chicken is everything here. Mix and match parts—thighs stay juicier, breasts cook faster. Pat them bone-dry before seasoning (paper towels work, but air-drying uncovered in the fridge for an hour is even better). I grab mine from Whole Foods or Costco—look for pieces with skin intact, no bruising. The salt needs to be kosher; table salt will make it taste harsh.
No garlic powder? Fresh minced garlic at double the amount. Swap thyme or rosemary for dried sage or oregano. The paprika is mostly for color—skip it if you don’t have it, but don’t skip the salt. If you’re out of lemon, a splash of vinegar (white wine or apple cider) adds the same brightness. Butter can be olive oil if you’re avoiding dairy, but it won’t brown the same way.
Seasoned chicken keeps 2 days in the fridge before cooking. Leftovers? Still great after 4 days, though the skin softens. Reheat in a skillet to crisp it back up. Or freeze raw, seasoned pieces for up to 3 months.
Why You’ll Love This Recipe
- Minimal Effort: I toss the chicken parts with salt, pepper, and those two powders, then roast—no marinating, no fuss.
- Crispy and Juicy: The high heat gives the skin that crackle while keeping the meat tender inside.
- Feeds Everyone: I’ve served this for Sunday dinner and packed leftovers for lunch all week.
- Budget Stretcher: A pack of chicken parts costs less than whole breasts, and honestly, it tastes richer.
Step-by-Step Instructions for Roast Chicken Parts
Here’s my method for achieving perfectly crispy skin and juicy meat every single time.
Step 1: Season the Chicken Parts Aggressively
Pat the 3.5 lb chicken parts completely dry with paper towels. Any moisture on the surface will steam the skin instead of crisping it. I press down firmly to absorb as much liquid as possible, especially on thighs and wings where moisture tends to collect.
In a small bowl, combine the 1.5 tbsp kosher salt, 1 tsp freshly ground black pepper, 1 tsp garlic powder, 1 tsp onion powder, 1 tsp paprika, 0.5 tsp dried thyme, and 0.5 tsp dried rosemary. Rub this mixture all over the chicken, making sure to coat every surface. Don’t be shy—this is what creates that flavorful crust.
Step 2: Prep for Roasting with Aromatics
Preheat your oven to 425°F. While it heats, zest the 1 whole lemon and sprinkle the zest over the chicken. Then cut the lemon in half and set aside. The zest adds bright, citrusy notes that cut through the richness of the meat.
Drizzle the 2 tbsp olive oil over the chicken and rub it in to help the seasoning adhere and promote even browning. Arrange the chicken on a wire rack set over a rimmed baking sheet, leaving space between pieces so hot air can circulate. This setup ensures crispy skin on all sides, not just the top.
Step 3: Roast Until Golden and Crispy
Place the baking sheet in the preheated oven and roast for 25 minutes. Then flip each piece using tongs and roast for another 20-25 minutes until the skin is deep golden brown and the juices run clear when pierced with a knife.
During the last 10 minutes of cooking, squeeze the lemon halves over the chicken and melt the 2 tbsp unsalted butter. Brush the melted butter over the chicken to add an extra layer of richness and encourage even more browning. The butter also helps the skin develop that irresistible crispy texture.
Step 4: Rest and Garnish Before Serving
Transfer the chicken to a serving platter and let it rest for 5-10 minutes. This allows the juices to redistribute throughout the meat, ensuring every bite is moist and flavorful. If you cut into it too soon, all those precious juices will end up on your cutting board instead of in the meat.
While the chicken rests, chop the 0.25 cup fresh parsley and sprinkle it over the top. The parsley adds a pop of color and a fresh, herbal note that balances the richness of the dish. Serve immediately while the skin is still crispy and the meat is at its juiciest.
Pro Tips For Making Roast Chicken Parts
- Pat Dry First: I learned this the hard way—wet chicken steams instead of roasts. Blot the parts thoroughly with paper towels before seasoning so the skin actually gets crispy.
- Season Overnight: Sounds like overkill, but salting the chicken the night before (even just 1-2 hours early if you’re short on time) makes the meat juicier and the flavor deeper.
- Don’t Crowd the Pan: After burning a few batches, I finally figured out that giving each piece space means they brown instead of boil in their own juices. Use two pans if needed.
- Start Hot, Finish Low: Crank the oven to 425°F for the first 20 minutes to get that golden crust, then drop it to 375°F to cook through without drying out.
Health Benefits of This roast chicken parts
High-Protein Power
This dish packs a serious protein punch—about 40 grams per serving from the 3.5 lb chicken parts. Protein is essential for muscle repair and growth, making this a great option for active lifestyles. I love how satisfying it is without feeling heavy. 💪
Rich in B Vitamins
Chicken is loaded with B vitamins, especially B6 and B12, which support energy metabolism and brain health. The dark meat pieces (thighs and legs) tend to have even higher concentrations of these nutrients compared to white meat.
Iron Boost
You’ll get a healthy dose of heme iron from this recipe, the type your body absorbs most easily. A single serving provides about 15% of your daily iron needs, which is crucial for maintaining energy levels and preventing fatigue.
Bone Health Support
This meal is a natural source of phosphorus and calcium, both vital for strong bones and teeth. The combination of these minerals helps maintain bone density, especially important as we age.
Low in Saturated Fat
Unlike red meat, chicken—especially skinless pieces—contains relatively low levels of saturated fat. Even with the skin on for crispiness, this dish remains a heart-healthier protein choice. Just be mindful of portion sizes. 💛
Essential Minerals
Beyond iron, this provides zinc and selenium, which support immune function and act as powerful antioxidants. The lemon zest adds a boost of vitamin C, helping your body absorb these minerals more effectively.
Nutrition Facts
Frequently Asked Questions
What temperature should I roast chicken parts at?
Use 425°F for the best results. This high heat ensures crispy skin while cooking the meat through evenly.
How do I keep the skin from getting soggy?
Pat pieces completely dry before seasoning and use a wire rack over a baking sheet. This allows air to circulate under the chicken.
Can I use boneless chicken parts?
Yes, but reduce cooking time by about 5-10 minutes. Bone-in pieces take longer to cook through and stay juicier.
How can I tell when it’s done?
Look for deep golden brown skin and clear juices when pierced. Internal temp should reach 165°F.

- Jollof Rice Sauce Recipe: West African Tomato and Spice Infusion - September 25, 2026
- Japanese Rice Soup Recipe: Umami-Rich Comfort in a Bowl - September 25, 2026
- Homemade Cream Of Rice Recipe: Silk-Smooth Breakfast in Minutes - September 25, 2026