
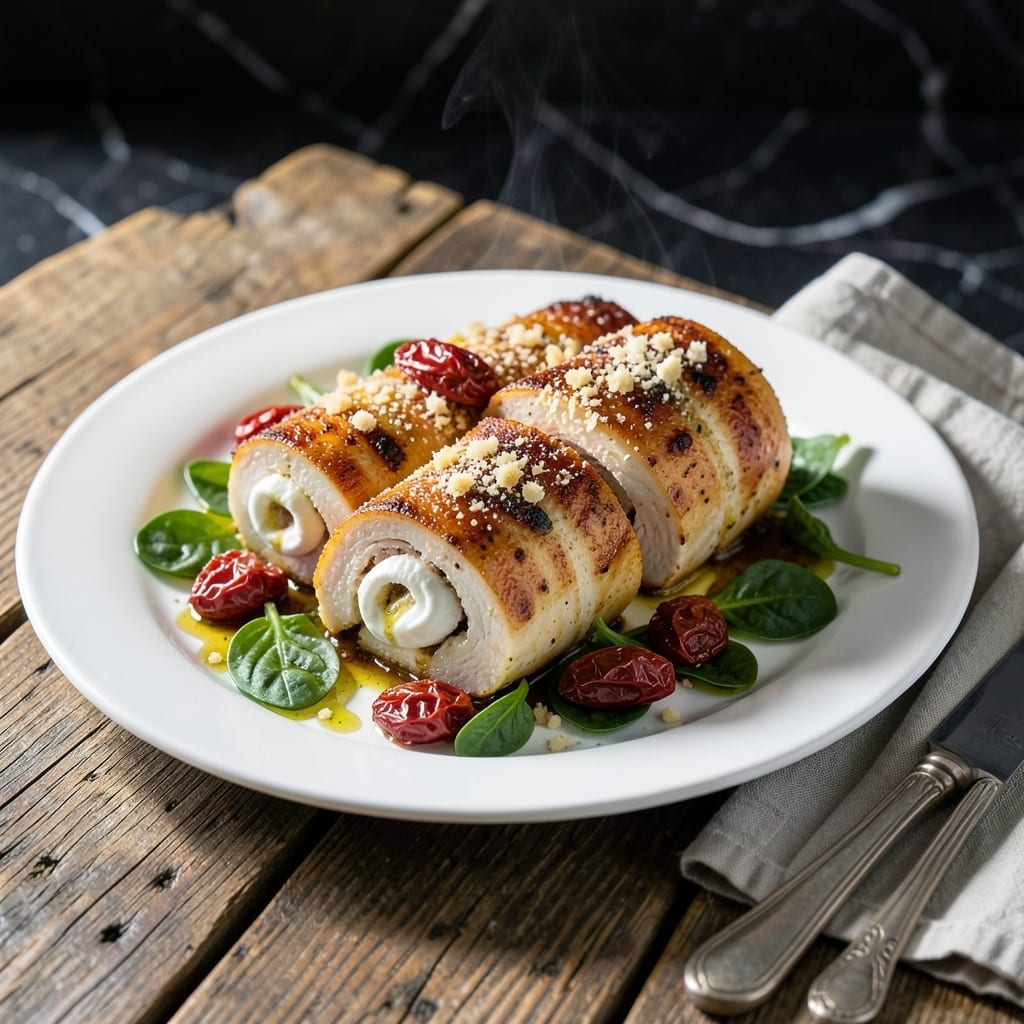
This technique transforms plain chicken into an impressive centerpiece without complicated steps. The secret lies in proper pounding and tight rolling to lock in moisture and flavor.
I developed this method for restaurant service, where timing and consistency matter most. By keeping the filling simple and the cooking precise, you ensure juicy results every time.
At 375°F, the chicken cooks evenly while the outside browns beautifully. The stuffing stays contained, creating perfect slices with every serving.
Serve with roasted vegetables or a light salad to complete the meal. This approach delivers restaurant-quality results at home.
Ingredients for Rolled Chicken Breast
Transform simple chicken breasts into an elegant dish with these carefully selected components.
| Ingredient | Amount | Notes |
|---|---|---|
| Boneless Skinless Chicken Breasts 🍗 | 4 whole | Pounded to 1/4-inch thickness |
| Cream Cheese 🧀 | 8 oz | Room temperature, full-fat |
| Fresh Spinach Leaves 🥬 | 2 cups | Blanched and drained thoroughly |
| Sun-Dried Tomatoes 🍅 | ½ cup | Chopped finely, oil-packed |
| Garlic Cloves 🧄 | 3 cloves | Minced finely |
| Grated Parmesan Cheese 🧀 | ½ cup | Freshly grated preferred |
| Dried Basil 🌿 | 1 tsp | Crushed for best flavor |
| Dried Oregano 🍃 | 1 tsp | Crushed for best flavor |
| Olive Oil 🫒 | 2 tbsp | Divided for searing and filling |
| Kosher Salt 🧂 | 1 tsp | Divided for seasoning |
| Freshly Ground Black Pepper 🌶️ | ½ tsp | Divided for seasoning |
| Toothpicks or Kitchen Twine 🧵 | 12 pieces | For securing rolls |
| Chicken Broth 🥣 | ½ cup | Low-sodium preferred |
The chicken breast quality is paramount for this preparation. Opt for uniformly sized breasts (about 6-8 oz each) to ensure even cooking. Air-chilled chicken (available at Whole Foods or Trader Joe’s) offers superior texture and moisture retention compared to water-chilled varieties. Proper pounding to an even 1/4-inch thickness is non-negotiable for consistent results and even rolling.
Substitutions must maintain moisture balance. Goat cheese can replace cream cheese at a 1:1 ratio for tangier filling. Fresh kale (blanched and chopped) works as a spinach alternative. If avoiding dairy, vegan cream cheese provides similar texture. For the sun-dried tomatoes, roasted red peppers (patted dry) offer comparable sweetness and color without altering the dish’s structural integrity.
Store raw stuffed breasts in the refrigerator for up to 24 hours before cooking. Cooked leftovers keep well for 3-4 days in airtight containers. For freezing, wrap cooked portions individually in plastic and foil—they maintain quality for 2-3 months. Always thaw frozen cooked chicken in the refrigerator overnight before reheating.
Why You’ll Love This Recipe
- No-Fuss Rolling: I pound the chicken thin, spread the cream cheese, and roll—no fancy techniques, just simple assembly.
- Garlic & Sun-Dried Pop: The garlic cloves and sun-dried tomatoes pack each bite with bold, savory flavor that feels restaurant-worthy.
- Weeknight Hero: I make a double batch on Sunday and reheat for lunches—still juicy, never dry.
- Stretches Further: One pack of chicken breasts feeds my family of four with leftovers for sandwiches the next day.
Step-by-Step Instructions for Rolled Chicken Breast
Master this technique for perfectly juicy, flavorful chicken every time with minimal effort.
Step 1: Prepare and Season the Chicken
Place each boneless skinless chicken breast between plastic wrap and pound to an even 1/4-inch thickness using a meat mallet. This ensures even cooking and prevents dry spots. Season both sides with 1/2 teaspoon kosher salt and 1/4 teaspoon freshly ground black pepper, dividing evenly among the four pieces.
The uniform thickness is crucial—it guarantees the chicken cooks through without overcooking the thinner parts. I always check for an even surface by running my fingers over the meat after pounding. This step sets the foundation for juicy, tender results.
Step 2: Create the Creamy Spinach Filling
In a bowl, combine the 8 oz cream cheese, 2 cups fresh spinach leaves, 1/2 cup sun-dried tomatoes, 3 cloves minced garlic, 1/2 cup grated parmesan cheese, 1 teaspoon dried basil, and 1 teaspoon dried oregano. Mix thoroughly until all ingredients are evenly distributed.
The filling should be thick but spreadable. I like to taste it at this stage to ensure the flavors are balanced—the sun-dried tomatoes add a tangy depth, while the parmesan provides a salty sharpness. Spread about 1/4 of the mixture evenly over each chicken breast, leaving a 1/2-inch border on all sides.
Step 3: Roll and Secure the Chicken
Starting from one long end, tightly roll each chicken breast into a log, tucking in the sides as you go to prevent the filling from escaping. Secure each roll with 3 pieces of toothpicks or kitchen twine spaced evenly along the length. This keeps the rolls intact during cooking.
Here’s the thing—tight rolls mean better contact with the pan, which translates to even browning and juicier meat. If any filling squeezes out, simply tuck it back in before securing. The toothpicks or twine need to be snug but not so tight that they deform the shape.
Step 4: Sear and Finish with Broth
Heat 1 tablespoon olive oil in a large oven-safe skillet over medium-high heat. Once shimmering, add the rolls seam-side down first. Sear for 3-4 minutes per side until the chicken is golden brown and releases easily from the pan.
Reduce heat to medium, pour in the 1/2 cup chicken broth, cover, and cook for an additional 8-10 minutes. The broth steams the chicken, ensuring it stays moist while finishing the cooking process. The internal temperature should reach 165°F before serving.
Step 5: Rest and Serve
Transfer the chicken rolls to a cutting board and tent loosely with foil. Let them rest for 5 minutes—this allows the juices to redistribute, keeping the meat tender. Remove the toothpicks or twine before slicing into 1-inch thick pieces.
Serve immediately while warm. The filling should be creamy and the chicken perfectly juicy, with a golden crust from the sear. Any remaining pan juices can be drizzled over the top for extra flavor.
Pro Tips For Making Rolled Chicken Breast
- Pound the Chicken: Use a meat mallet to pound the breasts to an even 1/4-inch thickness—this guarantees even cooking and prevents dry, chewy edges. I learned this the hard way after pulling undercooked centers out of otherwise perfect rolls.
- Drain the Spinach: Squeeze every last drop of water from the spinach leaves before layering, or your filling will turn soggy and leak out during baking. Sounds tedious, but it actually changes the outcome.
- Secure with Toothpicks: Use 2-3 toothpicks per roll to hold everything together—skip this and your cream cheese will ooze out, leaving a messy pan and bare chicken. My grandmother swore by this, and she was right.
- Sear First: Give each roll a quick 2-minute sear in a hot pan before baking to lock in juices and add a golden crust. After burning three batches, I finally figured out this is the thing that matters most.
Wine and Beer Pairings for This Recipe
White Wine Pairings
A crisp Sauvignon Blanc from New Zealand cuts through the richness of the cream cheese filling beautifully. Its citrus notes complement the sun-dried tomatoes while cleansing your palate. I always have a bottle of Kim Crawford on hand for dishes like this. 🍷
Red Wine Options
For red wine lovers, a light-bodied Pinot Noir works surprisingly well. Try Meiomi from California—its bright acidity and red fruit flavors won’t overpower the chicken. Serve slightly chilled for best results.
Craft Beer Pairings
A Belgian witbier like Hoegaarden offers citrus and spice notes that harmonize with the herbs in the filling. The effervescence helps cut through the creamy texture, making each bite feel fresh. 🍺
Light Lager Choices
For simpler pairings, a clean pilsner such as Stella Artois provides refreshing contrast without competing flavors. Its crisp finish balances the dish’s richness without overwhelming it.
Sparkling Options
Prosecco or another dry sparkling wine works wonderfully if you want bubbles. The acidity and light body complement the chicken while adding a celebratory touch to your meal. I often reach for La Marca for its consistent quality.
Nutrition Facts
Frequently Asked Questions
How do I prevent the filling from leaking out?
Tight rolling is key! Leave a 1/2-inch border and tuck in the sides as you roll. Secure with toothpicks every 1-2 inches for best results.
Can I make this ahead of time?
Yes! Assemble rolls up to 24 hours ahead and refrigerate. Bake just before serving for freshest flavor.
What if my chicken is too thick to roll?
Pound to exactly 1/4-inch thickness between plastic wrap. Use even pressure for uniform results every time.
How do I know when it’s fully cooked?
Use a meat thermometer—the internal temp must reach 165°F in the thickest part. The juices should run clear.

- Rice Mix Recipe: Fluffy Grains With Customizable Flavor Boost - September 25, 2026
- Soupy Rice Recipe: Broth-Soaked Grains With Rustic Depth - September 25, 2026
- Rice Paper Pancakes Recipe: Crispy Vietnamese Breakfast Delight - September 25, 2026