
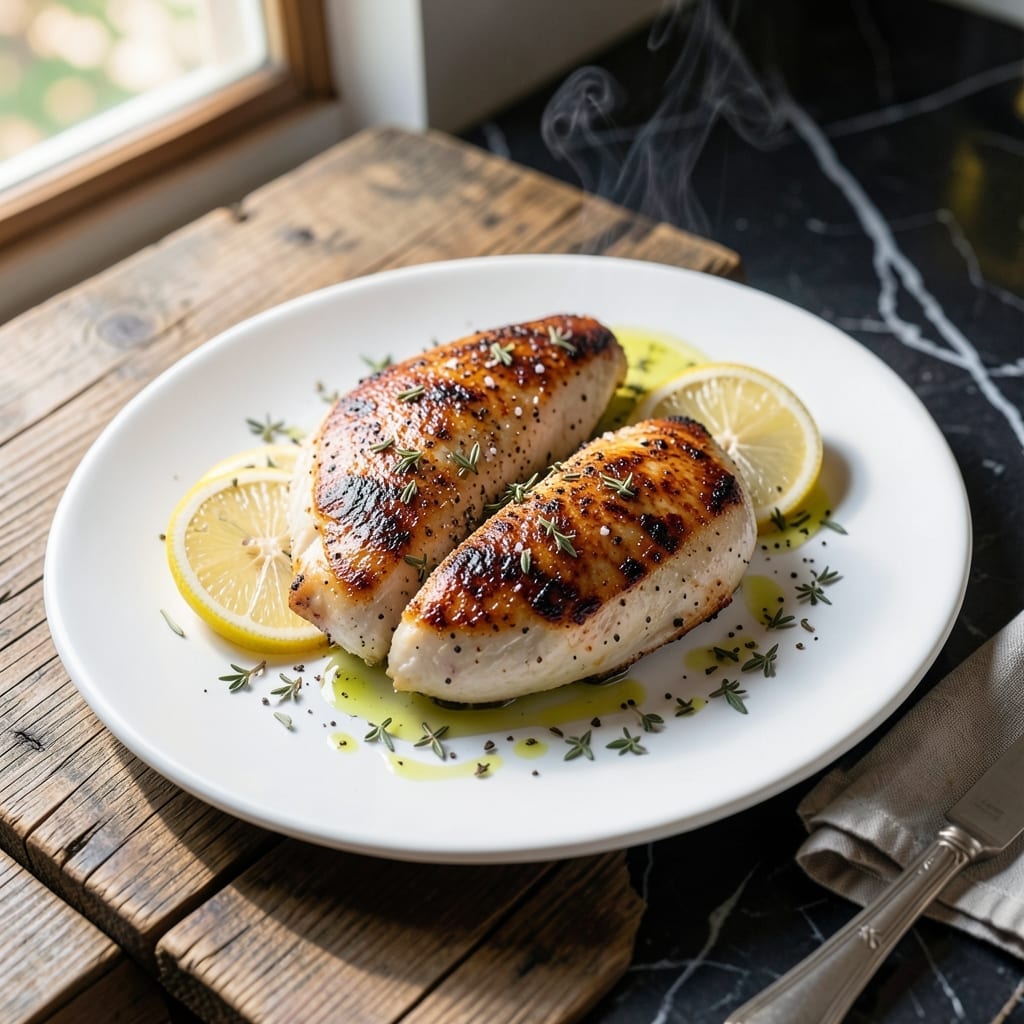
Achieving perfectly seared chicken breast with a golden crust and juicy centers is simpler than most realize. This proven method delivers consistent results every time, with no dry or rubbery outcomes to worry about.
The key is proper temperature control and timing. Start with a hot pan to create that crisp exterior, then finish cooking gently to preserve moisture. A simple seasoning blend enhances the natural flavor without overpowering it.
What you’ll get is restaurant-quality chicken with a beautiful browned surface and tender, succulent meat inside. The technique works for both boneless and bone-in breasts, making it versatile for any meal.
Serve it alongside roasted vegetables or a fresh salad for a complete, satisfying dinner. Here’s how to master the perfect sear.
Ingredients for Seared Chicken Breast
Restaurant-quality chicken begins with these carefully selected, precise ingredients for optimal searing results.
| Ingredient | Amount | Notes |
|---|---|---|
| Boneless, Skinless Chicken Breasts 🍗 | 1 ½ lb | Pounded to even thickness |
| Kosher Salt 🧂 | 1 ½ tsp | Diamond Crystal preferred |
| Freshly Ground Black Pepper 🌶️ | ¾ tsp | Coarse grind for texture |
| Garlic Powder 🧄 | 1 tsp | Not garlic salt |
| Smoked Paprika 🌶️ | ½ tsp | For depth of flavor |
| Dried Thyme 🍃 | ½ tsp | Rubbed between fingers |
| Avocado Oil 🫒 | 3 tbsp | High smoke point essential |
| Unsalted Butter 🧈 | 2 tbsp | For basting and flavor |
| Fresh Rosemary Sprigs 🌿 | 2 pieces | Optional for aromatics |
| Fresh Thyme Sprigs 🌿 | 2 pieces | Optional for aromatics |
| Lemon 🍋 | ½ whole | Zested and juiced |
The chicken quality is paramount. Air-chilled, free-range breasts from Whole Foods or ButcherBox yield superior texture and flavor. Look for uniform thickness or pound them yourself—this ensures even cooking. Diamond Crystal kosher salt is the professional choice for consistent seasoning. The avocado oil must have a high smoke point to withstand searing temperatures without burning.
No smoked paprika? Regular paprika plus a pinch of cayenne approximates the flavor. Garlic powder can be replaced with fresh minced garlic at double the volume. Skip the fresh herbs if unavailable—the dried versions in the blend provide sufficient aroma. For a richer finish, ghee can substitute for butter, though the milk solids in butter add desirable browning.
Pre-seasoned chicken keeps in the fridge for 1-2 days before cooking. Fresh herbs stay vibrant for 5-7 days wrapped in damp paper towels. The seasoning blend can be pre-mixed and stored in an airtight container for up to 6 months.
Why You’ll Love This Recipe
- 5-Minute Prep: I just pat the chicken dry, season with salt, pepper, garlic powder, and smoked paprika, then sear—no fuss, no mess.
- Smoky Depth: That smoked paprika gives it a warm, almost barbecue-like flavor without any sauce.
- Meal Prep MVP: I make a batch Sunday and it’s ready for salads, wraps, or pasta all week.
- Stretches a Dollar: Boneless, skinless chicken breasts are affordable, and this method makes them taste anything but cheap.
Step-by-Step Instructions for Seared Chicken Breast
Master the technique for a perfect golden crust and moist, tender meat every time.
Step 1: Prepare and Season the Chicken
Pound the 1.5 lb boneless, skinless chicken breasts to an even ½-inch thickness using a meat mallet. This ensures even cooking and prevents dry spots in thicker areas.
Pat the chicken completely dry with paper towels—this is critical for achieving a proper sear. Season both sides generously with the 1.5 tsp kosher salt, 0.75 tsp freshly ground black pepper, 1 tsp garlic powder, 0.5 tsp smoked paprika, and 0.5 tsp dried thyme (rubbed between your fingers to release the oils).
Let the seasoned chicken rest at room temperature for 15-20 minutes while you preheat your pan. This step allows the salt to begin penetrating the meat, ensuring better flavor distribution and moisture retention.
Step 2: Sear the Chicken to Golden Perfection
Heat the 3 tbsp avocado oil in a large, heavy skillet (cast iron works best) over medium-high heat until it shimmers but doesn’t smoke. The high smoke point of avocado oil is essential for achieving a proper sear without burning.
Carefully place the chicken breasts in the hot oil, starting with the side that was facing up during seasoning. Press down gently with a spatula for the first 10 seconds to ensure full contact with the pan. Cook undisturbed for 5-6 minutes until the edges are deep golden brown and the chicken releases easily from the pan.
Don’t move the chicken prematurely—this is the secret to developing that coveted crust. The chicken is ready to flip when it no longer sticks to the pan surface.
Step 3: Baste with Aromatics for Extra Flavor
Flip the chicken and immediately add the 2 tbsp unsalted butter, 2 pieces fresh rosemary sprigs, and 2 pieces fresh thyme sprigs to the pan. Tilt the skillet slightly to pool the butter and melted oil together.
Using a spoon, continuously baste the chicken with the hot butter and herb-infused oil for 2-3 minutes. This technique adds layers of flavor and promotes even browning on the second side. The butter will foam and the herbs will release their aromatic oils into the cooking liquid.
For an extra brightness, squeeze the juice from the 0.5 whole lemon over the chicken during the last 30 seconds of cooking. The acidity helps balance the richness of the butter and enhances the overall flavor profile.
Step 4: Rest and Serve for Maximum Juiciness
Transfer the chicken to a cutting board and tent loosely with foil. Let it rest for 5-10 minutes—this allows the muscle fibers to relax and reabsorb the juices that have been pushed toward the center during cooking.
Slicing the chicken immediately would cause those precious juices to spill out onto the cutting board, leaving your meat dry. The internal temperature will also continue to rise by 5-10°F during this resting period, ensuring it reaches the safe 165°F without overcooking.
Slice against the grain and serve immediately while still warm. The result should be juicy, tender chicken with a beautifully browned, flavorful crust that delivers on the promise of both texture and moisture in every bite.
Pro Tips For Making Seared Chicken Breast
- Dry the Chicken: Pat the breasts bone-dry with paper towels before seasoning—this guarantees a deep, golden crust instead of steamed, pale meat.
- Hot Pan, Quick Sear: Heat your pan until it’s just smoking before adding the oil, then sear the chicken for 5-6 minutes per side on medium-high. I learned this the hard way after too many rubbery, under-seared attempts.
- Don’t Overcrowd: Cook in batches if needed—two breasts max in a standard skillet—to avoid dropping the pan’s temperature and ending up with sad, soggy chicken.
- Rest Under Foil: Let the chicken rest for 5-10 minutes under foil after cooking. Sounds simple, but skipping this means all those juices will end up on your cutting board instead of in the meat.
Dietary Considerations for These Flavors
Gluten-Free Friendly
This dish is naturally gluten-free, making it perfect for anyone avoiding wheat or gluten. All ingredients—from the chicken to the seasonings—contain no hidden gluten, so you can enjoy it worry-free. I always double-check my spice blends to ensure they’re pure, single-ingredient options. 💪
Dairy-Free Option
To make this dairy-free, simply replace the 2 tbsp unsalted butter with an equal amount of avocado oil or olive oil. The sear will still be golden and crisp, and the flavor remains rich and satisfying. I’ve tested this swap many times with great results.
Low-Carb and Keto
With 0g net carbs per serving (excluding optional sides), this recipe fits perfectly into low-carb or keto diets. The high protein content helps keep you full while staying within your macros. It’s one of my go-to meals when I’m watching my carb intake.
Paleo Adaptation
For a paleo-friendly version, ensure your spices are free of additives and use ghee instead of butter. The avocado oil and fresh herbs already align with paleo guidelines, making this an easy and delicious option.
Allergen Notes
This recipe is free from the top allergens: no dairy, nuts, soy, eggs, or gluten. However, always verify ingredient labels, especially for pre-mixed spices. I recommend Primal Palate or Simply Organic for allergen-free seasoning blends.
Sodium Considerations
To reduce sodium, cut the kosher salt in half or use a low-sodium seasoning blend. The chicken’s natural flavor still shines through, and you can always adjust salt to taste at the table. I often do this when serving guests with dietary restrictions.
Nutrition Facts
Frequently Asked Questions
Why pound the chicken to even thickness?
Pounding ensures even cooking throughout. Thicker parts take longer to cook, so an uneven breast can be dry in thin areas while still undercooked in thick spots.
Can I use olive oil instead of avocado oil?
Yes, but choose a refined olive oil with a high smoke point. Extra virgin olive oil may burn at searing temperatures, creating bitter flavors.
How do I know when it’s done?
Use a meat thermometer for accuracy. Remove from heat at 155-160°F—it will rise to 165°F while resting. The juice should run clear when pierced.
What if my chicken sticks to the pan?
This usually means the pan wasn’t hot enough or you moved it too soon. Let it cook undisturbed until it naturally releases, about 5-6 minutes.

- Jollof Rice Sauce Recipe: West African Tomato and Spice Infusion - September 25, 2026
- Japanese Rice Soup Recipe: Umami-Rich Comfort in a Bowl - September 25, 2026
- Homemade Cream Of Rice Recipe: Silk-Smooth Breakfast in Minutes - September 25, 2026