
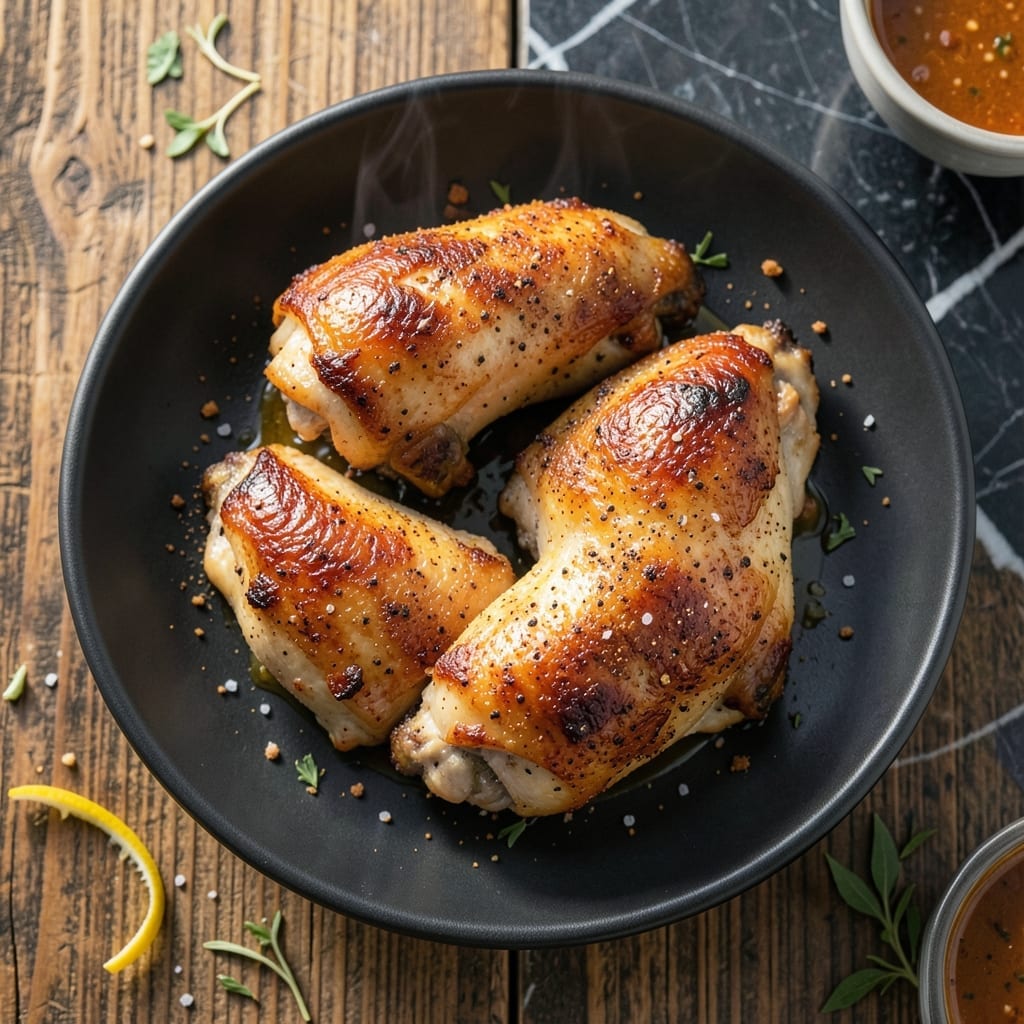
Achieving perfectly crispy chicken skin while keeping the meat juicy is easier than you think. This proven method delivers golden-brown skin that shatters with every bite, without sacrificing tenderness.
The key is starting with dry skin and using the right cooking temperature. I’ve tested this technique repeatedly to ensure consistent results every time, whether you’re roasting, pan-searing, or grilling.
You’ll be rewarded with succulent meat under that irresistibly crispy exterior. The seasoning penetrates deeply, creating layers of flavor that elevate this dish beyond ordinary.
Serve it as the star of a weeknight dinner or a special weekend meal. Here’s how to get it right.
Ingredients for Skin on Chicken
Bone-in thighs, bold seasonings, and a secret to that perfect crackling skin.
| Ingredient | Amount | Notes |
|---|---|---|
| Chicken Thighs 🍗 | 2 lb | Bone-in, skin-on, patted dry |
| Kosher Salt 🧂 | 1 ½ tsp | Diamond Crystal preferred for texture |
| Black Pepper 🌶️ | 1 tsp | Freshly ground for best flavor |
| Garlic Powder 🧄 | 1 tsp | Not garlic salt |
| Onion Powder 🧅 | 1 tsp | Balances savory depth |
| Smoked Paprika 🌶️ | 1 tsp | Adds subtle smokiness |
| Dried Thyme 🍃 | ½ tsp | Crushed between fingers |
| Dried Rosemary 🍃 | ½ tsp | Crushed between fingers |
| Olive Oil 🫒 | 2 tbsp | For high-heat searing |
| Unsalted Butter 🧈 | 2 tbsp | For basting crispy skin |
| Fresh Lemon 🍋 | 1 whole | Zested and juiced for brightness |
| Fresh Parsley 🌿 | ¼ cup | Chopped, for garnish |
| Fresh Thyme Sprigs 🍃 | 4 sprigs | Optional for aromatic basting |
The chicken matters most here. Bone-in, skin-on thighs stay juicier than breasts and crisp up beautifully—look for plump pieces with taut skin at Whole Foods or your butcher. Pat them bone-dry with paper towels before seasoning (this is non-negotiable for crispiness). I always buy organic when possible; the fat renders better and the flavor is deeper.
No smoked paprika? Regular paprika plus a pinch of cayenne gets you close. Out of fresh herbs? Dried work at one-third the amount. If you don’t have a cast-iron skillet, a heavy stainless steel pan works too—just avoid nonstick. The butter can be swapped for ghee if that’s what you’ve got (it’s got a higher smoke point).
Leftovers keep 3-4 days in the fridge—reheat in a skillet to revive the skin. Freeze cooked thighs for up to 3 months (thaw overnight before reheating). The crispiness is best fresh, but even leftovers beat sad desk lunches.
Why You’ll Love This Recipe
- One Pan Wonder: I toss the thighs with salt, pepper, and those powders, then let the oven do the work—one sheet pan, minimal mess.
- Crispy & Juicy: That skin gets so golden and crackly while the meat stays tender. Honestly, the garlic and onion powders make it irresistible.
- Weeknight Hero: I’ve served this for quick dinners, meal prep lunches, and even last-minute guest meals. Between us, it always disappears.
- Budget Friendly: Chicken thighs are cheap, and this recipe stretches them into something special. Leftovers? They reheat beautifully for sandwiches.
Step-by-Step Instructions for Skin On Chicken
Here’s the method. Straightforward, tested, works every time.
Step 1: Season the Chicken Thighs Thoroughly
Pat the 2 lb Chicken Thighs completely dry with paper towels—this is non-negotiable for crispy skin. I press down firmly to absorb every bit of moisture. Then, in a small bowl, mix together the 1.5 tsp Kosher Salt, 1 tsp Black Pepper, 1 tsp Garlic Powder, 1 tsp Onion Powder, 1 tsp Smoked Paprika, 0.5 tsp Dried Thyme, and 0.5 tsp Dried Rosemary.
Rub this spice blend all over the chicken, making sure to get it under the skin and into every crevice. Don’t be shy—the bold seasoning is what makes this dish sing. Let the seasoned thighs sit at room temperature for 15-20 minutes while you preheat your pan.
Step 2: Sear the Chicken Skin-Side Down
Heat the 2 tbsp Olive Oil in a large, heavy skillet over medium-high heat until it shimmers. Carefully place the chicken in the pan, skin-side down. I use tongs to avoid any splatters. The skin should sizzle immediately—if it doesn’t, your pan isn’t hot enough.
Let the chicken cook undisturbed for 8-10 minutes until the skin is deep golden brown and crispy. You’ll know it’s ready to flip when the edges start to look opaque and the skin easily releases from the pan. Resist the urge to peek or move the pieces—patience here is the secret to that perfect crunch.
Step 3: Finish Cooking with Butter and Aromatics
Flip the chicken and add the 2 tbsp Unsalted Butter, 4 sprigs Fresh Thyme Sprigs, and the zest of 1 whole Fresh Lemon to the pan. Tilt the skillet slightly and use a spoon to baste the chicken with the foaming butter continuously for 5-7 minutes until the internal temperature reaches 165°F.
The butter carries the aromatic thyme and zesty lemon flavors right into the meat, while also crisping up the skin even more. If your pan starts to brown too quickly, lower the heat slightly. You want a steady sizzle, not a furious burn.
Step 4: Rest and Garnish for Serving
Transfer the chicken to a plate and let it rest for 5-10 minutes—this ensures the juices redistribute, keeping the meat succulent. Meanwhile, squeeze the juice from the Fresh Lemon into the pan, swirl it around to pick up all those flavorful browned bits, then drizzle it over the chicken.
Garnish with the 0.25 cup Fresh Parsley and serve immediately. The skin should stay crispy for at least 10 minutes after cooking if you’ve done it right. I always serve this with a side that can soak up any leftover pan juices—waste not, want not.
Pro Tips For Making Skin On Chicken
- Dry the Skin: Pat the chicken thighs completely dry with paper towels before seasoning—I learned this the hard way after ending up with soggy skin more times than I’d like to admit.
- Start Hot: Sear the chicken skin-side down in a screaming hot pan for 5-6 minutes to render the fat and guarantee crispy results.
- Season Twice: Salt the chicken at least 30 minutes before cooking, then again right before it hits the pan—garlic and onion powder stick better to damp meat.
- Skip the Crowding: Cook the thighs in batches if needed; overcrowding drops the pan temp and steams the skin instead of crisping it.
Troubleshooting Perfect Results
Soggy Skin Fix
If your skin isn’t crispy, the chicken likely wasn’t dry enough before cooking. Pat it bone-dry with paper towels and let it air-dry in the fridge uncovered for 1 hour before seasoning. This removes surface moisture that steams instead of crisps. 💡
Uneven Cooking
For pieces that cook unevenly, flatten thicker parts gently with your palm before cooking. This ensures even heat distribution. Also, use a meat thermometer to check internal temp in multiple spots—165°F is your target.
Burnt Butter
If your butter burns during basting, lower the heat immediately. Add a splash of water or chicken broth to deglaze and prevent further burning. Clean the pan between batches if needed to avoid bitter flavors.
Sticking Skin
When skin sticks to the pan, don’t force it. Let it cook longer until it releases naturally—usually after 8-10 minutes. If it’s truly stuck, your pan may not be hot enough or you need more oil.
Dry Meat
Overcooked meat happens when the internal temp exceeds 170°F. Pull the chicken at 165°F and let it rest for 5-10 minutes. The carryover cooking will finish it perfectly without drying out. 🔥
Seasoning Issues
If the flavor seems bland, you may have undereasoned. Don’t be shy with the spice rub—press it into the meat and under the skin. Taste a small piece before serving and adjust with flaky salt if needed.
Nutrition Facts
Frequently Asked Questions
Why pat the chicken skin dry?
Dry skin ensures maximum crispiness. Moisture on the surface creates steam, which softens the skin instead of allowing it to brown and crisp. Use paper towels and press firmly.
Can I use boneless thighs?
Yes, but bone-in stays juicier and crisps better. If using boneless, reduce cooking time by 2-3 minutes per side and monitor internal temp closely. 165°F remains your target.
How do I prevent the skin from sticking?
Ensure your pan is very hot before adding the chicken. Use medium-high heat and enough oil to coat the pan. Don’t move the chicken for 8-10 minutes to allow a crust to form.
What if my butter starts to burn?
Lower the heat immediately and add a splash of water to stop the burning. Clean the pan between batches if needed. Butter burns at 300°F, so keep the heat steady.

- Jollof Rice Sauce Recipe: West African Tomato and Spice Infusion - September 25, 2026
- Japanese Rice Soup Recipe: Umami-Rich Comfort in a Bowl - September 25, 2026
- Homemade Cream Of Rice Recipe: Silk-Smooth Breakfast in Minutes - September 25, 2026