
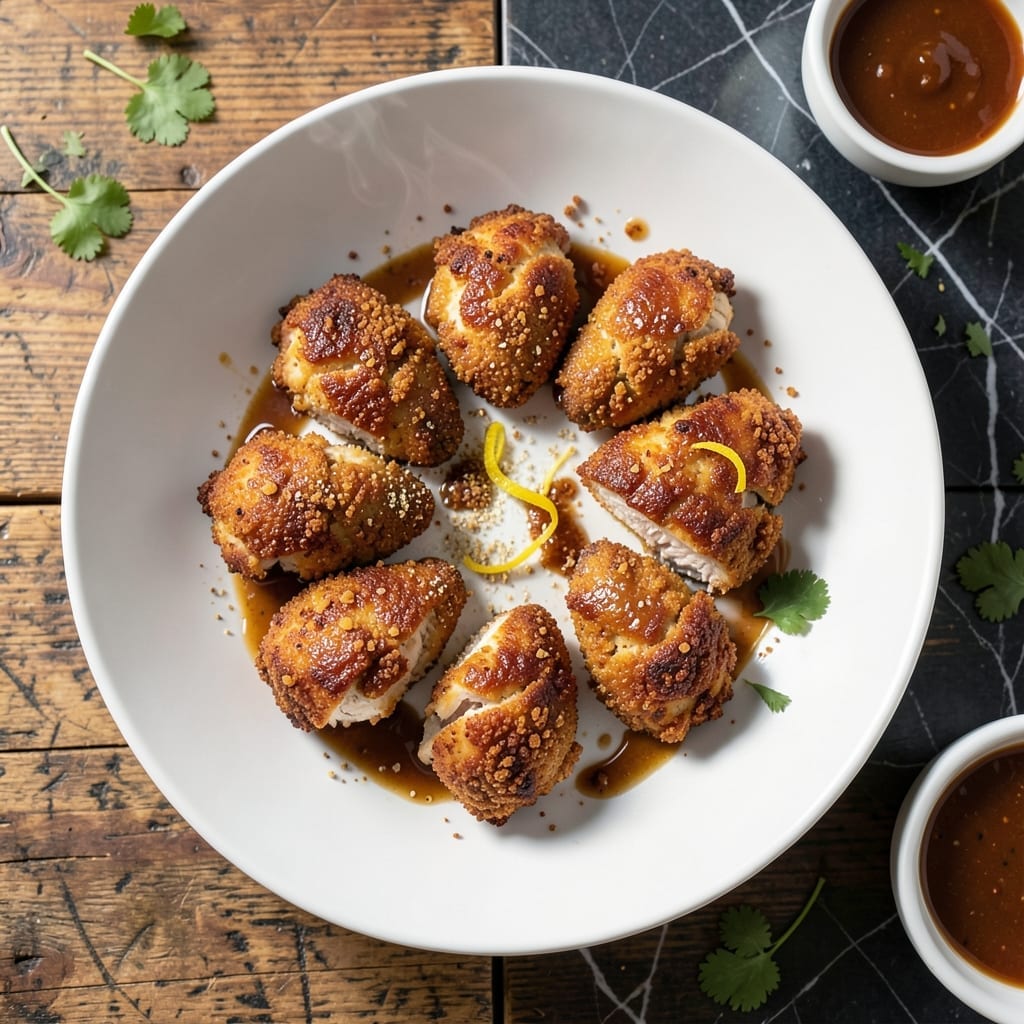
This vegan soy chicken delivers crispy perfection with every bite, combining plant-based protein with umami-rich flavors that satisfy even the most devoted meat lovers.
I’ve refined this method to achieve golden, shatteringly crispy exteriors while keeping the inside tender and juicy. The secret lies in pressing the soy chicken before cooking and using a two-step breading process.
What emerges is a dish that rivals traditional fried chicken in texture and depth. The soy base absorbs marinades beautifully, creating layers of savory, slightly sweet flavor in each piece.
The result is a plant-based dish that doesn’t compromise on taste or texture. Serve with your favorite dipping sauces for a meal that will impress everyone at the table.
Ingredients for Soy Chicken
Press, bread, and fry your way to plant-based crispy perfection with these ingredients.
| Ingredient | Amount | Notes |
|---|---|---|
| Soy Chicken 🍗 | 1 lb | Plant-based, pressed and cubed |
| All-Purpose Flour 🌾 | 1 cup | For initial dredging step |
| Cornstarch 🌾 | ½ cup | Creates extra crispiness |
| Unsweetened Soy Milk 🥛 | 1 cup | For egg-free wash |
| Panko Breadcrumbs 🍞 | 2 cups | Japanese-style for crunch |
| Nutritional Yeast 🧀 | 2 tbsp | Adds cheesy umami depth |
| Garlic Powder 🧄 | 1 tbsp | Enhances savory flavor |
| Onion Powder 🧅 | 1 tbsp | Balances the seasoning |
| Smoked Paprika 🌶️ | 1 tsp | For subtle smoky note |
| Salt 🧂 | 1 tsp | Kosher or sea salt |
| Black Pepper 🌶️ | ½ tsp | Freshly ground preferred |
| Neutral Oil 🫒 | 2 cups | For frying (avocado or vegetable) |
| Soy Sauce 🍶 | 2 tbsp | For marinating soy chicken |
| Maple Syrup 🍁 | 1 tbsp | Balances salt and umami |
| Liquid Smoke 🔥 | ½ tsp | Optional for smoky depth |
The soy chicken is the foundation—Beyond Meat or Daring brands work best (I grab mine at Whole Foods or Target). Pressing removes excess moisture so the breading sticks. Panko is non-negotiable for that shatteringly crisp texture. If you can only find regular breadcrumbs, pulse them in a food processor first. The nutritional yeast might seem like a small addition, but it packs a serious umami punch.
No soy milk? Unsweetened almond or oat milk works just as well for the wash. Out of cornstarch? Arrowroot powder at the same amount gives similar crunch. For extra flavor, add one teaspoon of mushroom powder to the flour mixture. Skip the liquid smoke if you don’t love smoky flavors—it’s totally optional. The maple syrup might seem odd in a savory dish, but trust me (it balances everything).
Best eaten fresh, but leftovers keep in the fridge for 3-4 days. Reheat in the oven or air fryer to revive the crispiness. Freezes well for up to 2 months—just thaw in the fridge before reheating. Pro tip: place reheated pieces on a wire rack to keep them crispy all around.
Why You’ll Love This Recipe
- One Bowl Wonder: I just mix flour, cornstarch, soy milk, and panko—no fancy prep, no extra dishes.
- Crispy Outside, Juicy Inside: The panko gives that perfect crunch while the soy chicken stays tender and flavorful.
- Weeknight Hero: I’ve served this for quick dinners, packed it for lunch, and even made it for potlucks.
- Budget Stretcher: A bag of soy chicken and a few pantry staples feed my family for days—leftovers reheat beautifully.
Step-by-Step Instructions for Soy Chicken
Here’s the method I use to achieve that perfect crispy exterior with tender, flavorful results.
Step 1: Marinate the Soy Chicken
In a bowl, combine the 1 lb Soy Chicken with 2 tbsp soy sauce, 1 tbsp maple syrup, and 0.5 tsp liquid smoke. I like to press the pieces gently to ensure they’re fully coated. This step adds depth and balances the umami with a touch of sweetness.
Let the soy chicken marinate for 10-15 minutes at room temperature. This short rest allows the flavors to penetrate without making the pieces too soft. You’ll notice the liquid is mostly absorbed when it’s ready for the next step.
Step 2: Set Up the Dredging Station
In a shallow dish, whisk together 1 cup all-purpose flour, 0.5 cup cornstarch, 2 tbsp nutritional yeast, 1 tbsp garlic powder, 1 tbsp onion powder, 1 tsp smoked paprika, 1 tsp salt, and 0.5 tsp black pepper. This blend creates a flavorful, crispy coating.
In another dish, pour the 1 cup unsweetened soy milk. For the final layer, place 2 cups panko breadcrumbs in a third dish. This three-step dredging ensures maximum crunch and even coverage.
Step 3: Dredge and Coat the Soy Chicken
Dip each piece of marinated soy chicken into the soy milk, letting any excess drip off. Then, coat it thoroughly in the flour mixture, pressing gently so the seasoning sticks. Shake off any excess flour before moving to the panko breadcrumbs.
Press the soy chicken into the panko, turning to coat all sides evenly. The breadcrumbs should adhere well, creating a thick, textured layer. Place the coated pieces on a plate and let them rest for 5 minutes while you heat the oil.
Step 4: Fry to Crispy Perfection
In a deep, heavy-bottomed pot, heat the 2 cups neutral oil to 350°F. To test the temperature, drop in a small piece of panko—if it sizzles immediately and floats to the top, the oil is ready.
Carefully place a few pieces of soy chicken into the hot oil, avoiding overcrowding. Fry for 3-4 minutes per side until the coating is golden brown and crispy. Use a slotted spoon to transfer the fried soy chicken to a wire rack or paper towels to drain excess oil.
Repeat with the remaining pieces, allowing the oil to return to temperature between batches. The result should be a perfectly crispy exterior with a tender, flavorful interior.
Pro Tips For Making Soy Chicken
- Double Dredge: Dip the chicken in soy milk, then flour, then soy milk again, then panko—this double coat gives that extra-crispy crust that doesn’t fall off when baking.
- Rest Before Frying: After breading, let the chicken rest for 10 minutes on a wire rack. I learned this the hard way—it keeps the coating from sliding off in the oil.
- Skip Cold Soy Milk: Use room-temperature soy milk for dredging. Cold milk can make the coating clump and pull away from the chicken during cooking.
- Press the Panko: After coating, press the panko firmly into the chicken with your palms—sounds obvious, but it’s the only way to get that thick, crunchy layer.
Common Mistakes When Making Great soy chicken
Skipping the Press
Many first-timers forget to press their soy chicken before breading, resulting in soggy coating. I always press mine between paper towels for 5-10 minutes to remove excess moisture. This step ensures your breading sticks properly and crisps up beautifully. 💡
Rushing the Dredge
Don’t rush the three-step dredging process. Each layer serves a purpose: the flour creates a base, the soy milk acts as glue, and panko provides texture. I let each piece rest 5 minutes after coating to set the breading before frying.
Overcrowding the Pot
Frying too many pieces at once lowers the oil temperature, leading to greasy results. I cook in batches, leaving at least 1 inch between pieces. Maintain 350°F oil temperature for that perfect golden crisp.
Skipping the Rest
After frying, resist the urge to dig in immediately. Let your soy chicken rest on a wire rack for 2-3 minutes. This allows the coating to set and keeps it crispy longer. I transfer to paper towels first to blot excess oil.
Wrong Oil Temperature
Oil that’s too cool makes for greasy chicken, while too hot burns the outside before cooking through. I use a kitchen thermometer to verify 350°F before frying. Test with a panko piece—it should sizzle immediately and float. 🌡️
Neglecting to Season
Nutrition Facts
Frequently Asked Questions
What’s the best oil for frying?
Use a neutral oil with a high smoke point like avocado or vegetable oil. These handle 350°F without burning and won’t overpower the flavor. Avoid olive oil as it can impart a bitter taste.
Can I bake instead of frying?
Yes! Bake at 400°F for 20-25 minutes, flipping halfway. Spray with oil before baking for extra crispiness. The texture won’t be identical to frying but still delicious.
How do I keep it crispy after cooking?
Place fried pieces on a wire rack, not paper towels. This allows air circulation to prevent steam from making the coating soggy. Reheat in an air fryer at 375°F for 3-4 minutes.

- Jollof Rice Sauce Recipe: West African Tomato and Spice Infusion - September 25, 2026
- Japanese Rice Soup Recipe: Umami-Rich Comfort in a Bowl - September 25, 2026
- Homemade Cream Of Rice Recipe: Silk-Smooth Breakfast in Minutes - September 25, 2026