
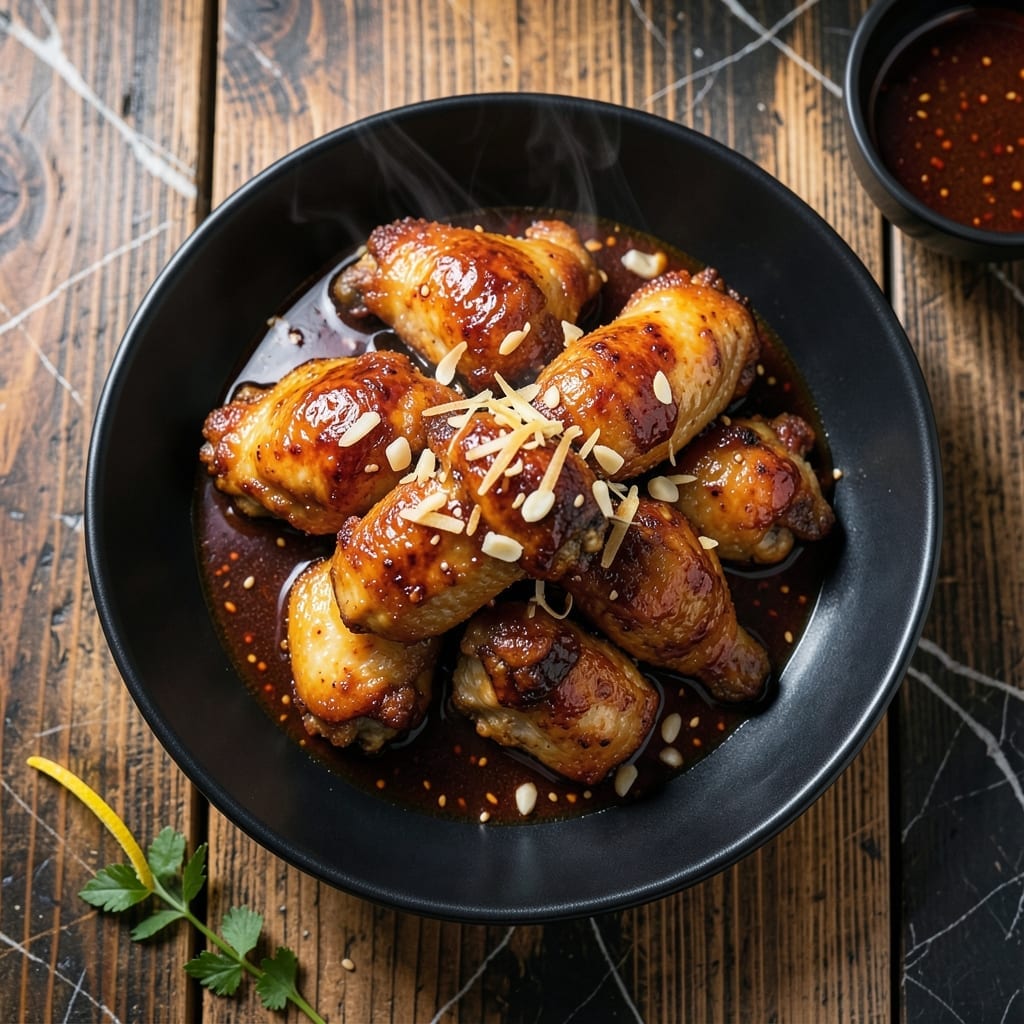
There’s a secret to achieving that double crispy texture in Korean-style soy fried chicken that most recipes miss. The key lies in a two-step frying process that creates an ultra-crunchy exterior while keeping the meat juicy inside.
I developed this method after testing countless variations to perfect the balance between crispiness and flavor. The soy marinade infuses the chicken with depth, while the double fry ensures every bite delivers that satisfying crunch.
What you’ll get is golden-brown chicken with a shatteringly crispy coating that stays crunchy long after frying. The soy glaze adds a savory-sweet finish that makes these pieces impossible to resist.
Serve with pickled radish and cold beer for the full Korean fried chicken experience. Here’s how to make it at home.
Ingredients for Soy Fried Chicken
Double crispy magic starts with these bold, simple ingredients. Nothing fancy, just flavor.
| Ingredient | Amount | Notes |
|---|---|---|
| Chicken Thighs 🍗 | 2 lb | Boneless, skin-on, cut into bite-sized pieces |
| Soy Sauce 🥫 | ½ cup | Low-sodium preferred for balance |
| Brown Sugar 🍚 | ¼ cup | Packed, for caramelized glaze |
| Garlic Cloves 🧄 | 6 cloves | Minced for marinade depth |
| Fresh Ginger Root 🌿 | 1 tbsp | Grated, for zesty kick |
| Rice Vinegar 🍶 | 2 tbsp | For tangy brightness |
| Sesame Oil 🫒 | 1 tbsp | Toasted, for nutty aroma |
| Gochujang 🌶️ | 2 tbsp | Korean chili paste, optional for heat |
| Cornstarch 🌾 | ¾ cup | For ultra-crispy coating |
| All-Purpose Flour 🌾 | ½ cup | Lightly coats the chicken |
| Baking Powder 🧂 | 1 tsp | Secret for extra crunch |
| Vegetable Oil 🫒 | 4 cups | For deep frying, neutral flavor |
| Sesame Seeds 🌰 | 2 tbsp | Toasted, for garnish |
| Green Onions 🧅 | 4 whole | Thinly sliced, for fresh finish |
The chicken thighs are non-negotiable here—bone-in works but skin-on boneless gives that perfect crunch-to-juice ratio. H-Mart or Asian markets will have gochujang if your regular store doesn’t. Look for soy sauce labeled low-sodium (I use Kikkoman) so the glaze doesn’t get overwhelmingly salty. Fresh ginger and garlic are a must (the jarred stuff just doesn’t hit the same).
No gochujang? Sriracha plus a pinch of sugar gets you close. Swap brown sugar for honey if that’s what you’ve got, but the molasses note in brown sugar really sings here. Vegetable oil is ideal for frying, but peanut or canola oil work too (avoid olive oil—smoke point’s too low). For extra crunch, some folks add crushed cornflakes to the coating (I’ve tried it—surprisingly good).
Fry in batches so the oil temp doesn’t drop—this keeps everything shatteringly crisp. Leftovers reheat in a toaster oven or air fryer (never microwave) for about 5 minutes. The glaze thickens as it cools, so toss the chicken in it right after the second fry.
Why You’ll Love This Recipe
- One Pan Wonder: I just toss the thighs in the soy-garlic-ginger mix and fry—no fancy steps, no extra dishes.
- Sweet-Savory Magic: The brown sugar caramelizes with the soy sauce for that sticky, finger-licking glaze.
- Weeknight Hero: It’s my go-to for busy Tuesdays when I need dinner fast but still want big flavor.
- Budget Stretcher: Chicken thighs stay cheap, and this recipe makes them taste like a million bucks.
Step-by-Step Instructions for Soy Fried Chicken
Here’s the method I use to guarantee that ultra-crispy, double-coated texture with deep Korean flavors.
Step 1: Marinate the Chicken Thighs
In a large bowl, I whisk together the 0.5 cup soy sauce, 0.25 cup brown sugar, minced 6 cloves garlic cloves, grated 1 tbsp fresh ginger root, 2 tbsp rice vinegar, 1 tbsp sesame oil, and 2 tbsp gochujang until the sugar dissolves completely. The mixture should look glossy and smell incredibly aromatic.
Add the 2 lb chicken thighs (cut into bite-sized pieces) and toss to coat evenly. I make sure every piece is thoroughly covered in the marinade. Cover and refrigerate for at least 1 hour—overnight is even better. This marinating time allows the flavors to penetrate deeply and tenderizes the meat.
Step 2: Prepare the Double-Coating Breading
In a shallow dish, combine the 0.75 cup cornstarch, 0.5 cup all-purpose flour, and 1 tsp baking powder. I always stir these dry ingredients together thoroughly to ensure even distribution. The baking powder is the secret to that extra-crunchy texture—it creates tiny air pockets in the coating.
Drain the chicken from the marinade (reserve the marinade for potential dipping sauce), and let any excess drip off. Then, dredge each piece in the flour mixture, pressing gently to adhere. I like to shake off any excess coating so it’s even but not too thick. Place the coated pieces on a wire rack to rest for 10 minutes—this helps the coating set before frying.
Step 3: Double-Coat for Extra Crispiness
For that signature double-crispy texture, I repeat the dredging process. Dip each piece back into the reserved marinade (just enough to moisten the coating, not soak it), then dredge again in the flour mixture. This second coating creates layers that puff and crisp beautifully when fried.
Let the chicken rest for another 5 minutes while you heat the 4 cups vegetable oil in a deep, heavy-bottomed pot to 350°F. Use a thermometer for accuracy—oil that’s too hot will burn the outside before the inside cooks, and oil that’s not hot enough will make the chicken greasy.
Step 4: Deep-Fry to Golden Perfection
Carefully lower a few pieces of chicken into the hot oil—don’t overcrowd the pot, or the temperature will drop too much. Fry in batches for 6-8 minutes, turning occasionally, until the coating is deep golden brown and crispy all over.
As the chicken fries, you’ll notice the coating puff up and turn a beautiful amber color. Use a slotted spoon to transfer the fried chicken to a wire rack set over a baking sheet to drain. This keeps it crispy instead of letting it sit in a pool of oil. I always fry a test piece first to check the timing and adjust the heat if needed.
Increase the oil temperature to 375°F and fry the chicken again for 2-3 minutes for that extra crispy finish. This double-fry technique is what gives this dish its name.
Step 5: Garnish and Serve Immediately
While the chicken is still hot, I sprinkle it with the 2 tbsp sesame seeds and thinly sliced 4 whole green onions. The heat from the chicken helps the sesame seeds toast slightly, releasing their nutty aroma.
Serve immediately while the coating is at its crispest. The contrast between the crunchy exterior and the juicy, flavorful chicken inside is what makes this dish so addictive. I like to serve it with a side of the reserved marinade for dipping or a quick pickled vegetable salad to cut through the richness.
Pro Tips For Making Soy Fried Chicken
- Dry the Thighs: Pat the chicken thighs thoroughly dry with paper towels before frying—this guarantees a crispy exterior instead of a soggy, steamed mess.
- Bloom the Aromatics: Cook the minced garlic and grated ginger in a little oil for 30 seconds before adding the soy sauce to wake up their flavors.
- Skip the Overcrowding: Fry the chicken in batches so each piece has space to brown properly; otherwise, you’ll end up with pale, greasy thighs.
- Reduce the Sauce: After frying, simmer the leftover soy-brown sugar mixture for 2-3 minutes until slightly thickened—it’ll cling better to the chicken and taste more concentrated.
Perfect Pairings for These Flavors
Korean Beer Pairings
Nothing beats an ice-cold Hite or OB beer with this dish—the crisp, clean lager cuts through the richness perfectly. I always serve it in frosted glasses for that authentic Korean chimaek (chicken + beer) experience. 🍺
Refreshing Sidekicks
A pickled radish salad (danmuji) provides the ideal tangy contrast to the crispy chicken. I slice 1 cup Korean radish thinly and soak in ½ cup rice vinegar with 1 tbsp sugar for 30 minutes.
Comforting Sides
Steamed jasmine rice soaks up the delicious soy glaze beautifully. For extra flair, I mix in 1 tbsp toasted sesame oil and 1 tsp furikake before serving. The nutty aroma complements the chicken wonderfully.
Spicy Dipping Sauce
Combine leftover marinade with 1 tbsp gochujang and 1 tsp honey for a quick dipping sauce. I also add 1 tsp toasted sesame seeds for texture. This adds a sweet-spicy kick that enhances the double-fried crunch. 🔥
Light and Fresh
A simple cucumber salad with 1 sliced English cucumber, 1 tsp salt, and 1 tbsp rice vinegar provides a cooling contrast. I let it sit for 15 minutes before serving to draw out excess water.
Dessert Finish
End with Korean strawberry milk (1 cup milk + 3 mashed strawberries + 1 tbsp sugar) for a sweet, creamy finish. It’s the perfect way to balance the savory, crispy main course. ✨
Nutrition Facts
Frequently Asked Questions
Can I use chicken breast instead of thighs?
Thighs work best due to their fat content keeping meat juicy. Chicken breast can dry out but works if brined for 30 minutes in saltwater first. Reduce frying time to 4-5 minutes per batch.
What makes the coating extra crispy?
The double-fry method plus baking powder in the batter creates air pockets. Cornstarch adds more crunch than flour alone. Maintain oil at 350°F then 375°F for perfect results.
How do I keep it crispy after frying?
Drain on a wire rack, never paper towels. Store in a single layer in an open container. Reheat in air fryer or toaster oven at 375°F for 3-4 minutes.
Can I make this gluten-free?
Swap regular soy sauce for tamari and use gluten-free flour. Ensure all ingredients are certified gluten-free. The crispiness remains the same with these substitutions.

- Jollof Rice Sauce Recipe: West African Tomato and Spice Infusion - September 25, 2026
- Japanese Rice Soup Recipe: Umami-Rich Comfort in a Bowl - September 25, 2026
- Homemade Cream Of Rice Recipe: Silk-Smooth Breakfast in Minutes - September 25, 2026