
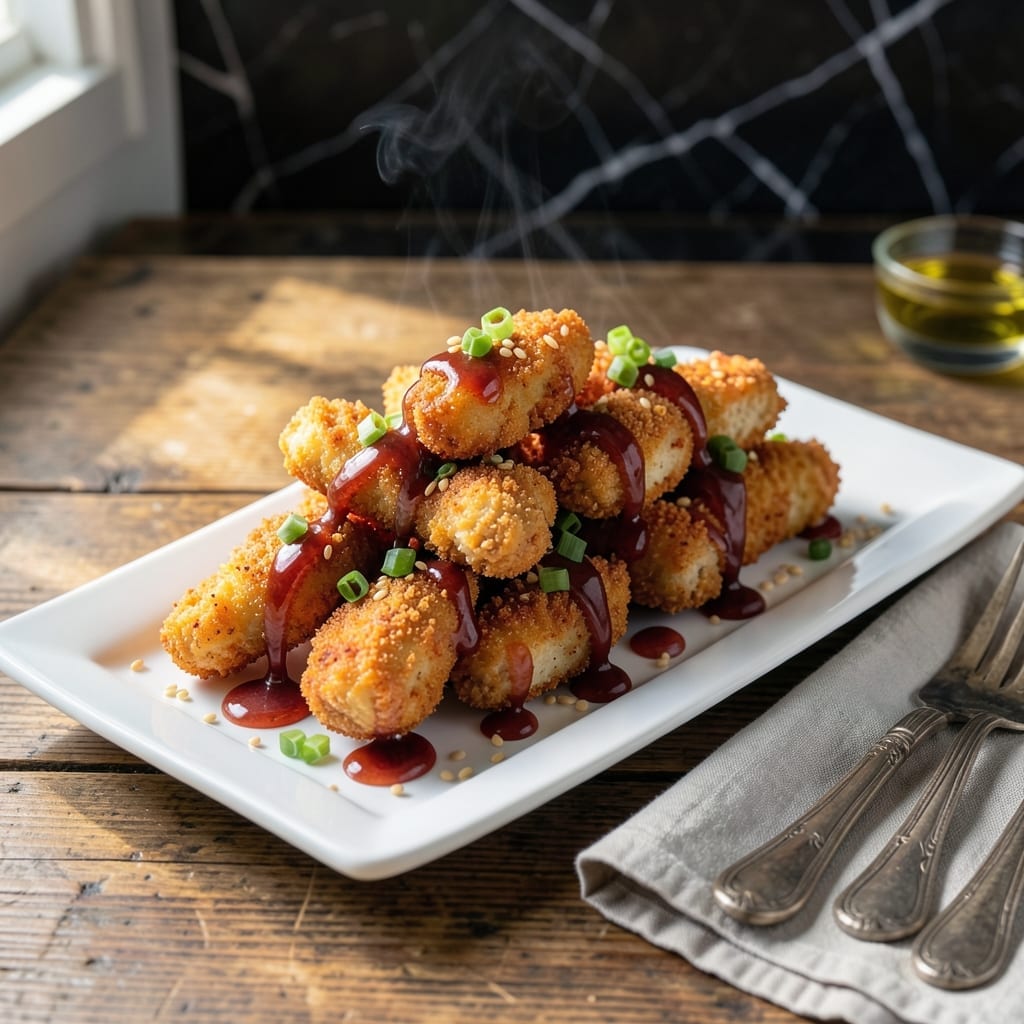
Double-coating is the secret to achieving that crispy, crunchy texture that makes these chicken fingers irresistible. I developed this method after years of testing to ensure every bite delivers maximum flavor and crunch.
The first coating of seasoned flour creates a base layer that helps the second coating adhere perfectly. This double-layer technique locks in moisture while creating an extra-crispy exterior that stays crunchy even after frying.
What you get is tender chicken inside with a golden, spicy crust outside. The heat level is adjustable, but I recommend medium spice for the best balance of flavor and kick.
These work perfectly as an appetizer, snack, or main course. Serve with your favorite dipping sauce for the complete experience.
Ingredients for Spicy Chicken Fingers
Everything you need for that irresistible double-coated crunch and spicy kick.
| Ingredient | Amount | Notes |
|---|---|---|
| Chicken Tenders 🍗 | 1 ½ lb | Boneless, skinless, cut into strips |
| All-Purpose Flour 🌾 | 1 ½ cups | Divided for double coating |
| Cornstarch 🌾 | ½ cup | For extra crispiness |
| Paprika 🌶️ | 2 tbsp | Sweet or smoked variety |
| Garlic Powder 🧄 | 2 tsp | Not garlic salt |
| Onion Powder 🧅 | 2 tsp | Fresh ground preferred |
| Cayenne Pepper 🔥 | 1 tsp | Adjust for heat preference |
| Salt 🧂 | 2 tsp | Kosher or sea salt |
| Black Pepper 🌶️ | 1 tsp | Freshly ground preferred |
| Large Eggs 🥚 | 2 whole | Beaten for egg wash |
| Buttermilk 🥛 | 1 cup | For tenderizing chicken |
| Panko Breadcrumbs 🍞 | 2 cups | For outer crispy coating |
| Vegetable Oil 🫒 | 4 cups | For deep frying |
The chicken is key here—look for uniform tenders so they cook evenly. I grab mine from Costco when I’m making a big batch, but any supermarket works. The buttermilk? Full-fat for the best tenderizing (trust me on this). For the flour, all-purpose is fine, but if you’ve got self-rising, skip the salt in the mix. The cornstarch is what gives that extra crunch, so don’t skip it.
No buttermilk? Whole milk plus a splash of vinegar works in a pinch. Out of panko? Crushed cornflakes or saltines get you close. For less heat, cut the cayenne in half or swap for more paprika. The paprika itself can be sweet or smoked—smoked adds depth. If you’re avoiding eggs, a flax egg (1 tbsp ground flax + 3 tbsp water per egg) binds the coating just fine.
Fry in batches so the oil stays hot—overcrowding drops the temp and makes things greasy. Leftovers? They reheat in the oven at 400°F for 10 minutes (microwave kills the crunch). Best eaten fresh, but they’ll keep 2-3 days in the fridge if needed.
Why You’ll Love This Recipe
- One Pan Wonder: I just toss the chicken in the flour-cornstarch mix, bake, and boom—crispy perfection with barely any cleanup.
- Flavor Explosion: The paprika and garlic powder create that warm, spicy kick that makes these impossible to resist.
- Feeds the Crew: Perfect for picky eaters and game day crowds alike. Honestly, they disappear faster than I can make them.
- Budget Stretch: Chicken tenders are affordable, and this recipe turns them into something restaurant-worthy without the price tag.
Step-by-Step Instructions for Spicy Chicken Fingers
Here’s the method I’ve perfected for maximum crunch and just the right amount of heat.
Step 1: Season and Dredge the Chicken
In a shallow dish, combine 1 cup all-purpose flour, all the cornstarch, paprika, garlic powder, onion powder, cayenne pepper, salt, and black pepper. Mix well so the spices are evenly distributed.
Pat the chicken tenders dry with paper towels. Dredge each piece in the flour mixture, pressing gently to adhere. Shake off any excess—you want a thin, even coating. This first layer creates the foundation for that double-crisp texture we’re after.
Step 2: Apply the Wet and Dry Coating
In another shallow dish, whisk together the 2 whole large eggs and 1 cup buttermilk until smooth. In a third dish, place the 2 cups panko breadcrumbs. Dip each floured tender into the egg mixture, letting any excess drip off.
Then roll it in the panko, pressing firmly so the crumbs stick. For extra crunch, I like to dip it back into the egg mixture and then into the panko one more time. Place the coated tenders on a wire rack set over a baking sheet and let them rest for 10 minutes—this helps the coating set before frying.
Step 3: Heat the Oil and Fry in Batches
In a large, heavy-bottomed pot or Dutch oven, heat the 4 cups vegetable oil to 350°F. Use a deep-fry or candy thermometer to monitor the temperature—it should stay steady between 340°F and 360°F for optimal frying.
Working in batches to avoid crowding the pot, carefully lower 3-4 tenders at a time into the hot oil. Fry for 4-5 minutes, turning halfway through, until they’re golden brown and crispy all over. The oil should bubble steadily but not aggressively—if it’s too hot, the outside will burn before the inside cooks.
Step 4: Drain and Rest for Maximum Crispiness
Transfer the fried tenders to a wire rack set over a paper towel-lined baking sheet. This setup allows air to circulate all around, keeping them crisp instead of soggy. Avoid stacking them on a plate—steam will make the coating soft.
Let them rest for 2-3 minutes before serving. This brief pause lets the juices redistribute inside the chicken, ensuring every bite is tender and flavorful. Serve immediately while they’re at their crispiest, with your favorite dipping sauces on the side.
Pro Tips For Making Spicy Chicken Fingers
- Double Dredge: Coat the tenders in flour once, dip in egg wash, then back in the flour-cornstarch-spice mix. I learned this the hard way—single dredging gives you sad, patchy crust.
- Dry the Chicken: Pat those tenders bone-dry with paper towels before dredging. Sounds weird, but it works: wet chicken makes the coating slide right off.
- Hot Oil, Fast Fry: Get that oil to 350°F before the first tender hits the pan. After burning three batches, I finally figured out that lukewarm oil = greasy, soggy disaster.
- Rest Before Serving: Give them 2-3 minutes on a rack after frying. My grandmother swore by this, and she was right: it keeps the crust crisp instead of steaming itself limp.
Dietary Considerations for These Flavors
Gluten-Free Option
Replace all-purpose flour with a 1:1 gluten-free flour blend like King Arthur Measure for Measure. For the breading, use gluten-free panko—Kikkoman makes a great version. The texture stays remarkably crispy, and honestly, my gluten-sensitive friends can’t tell the difference. 💪
Dairy-Free Swap
Buttermilk is easy to replace: mix 1 cup almond milk with 1 tbsp lemon juice and let it sit for 5 minutes. For the egg wash, use a flax egg (1 tbsp ground flax + 3 tbsp water per egg). The coating binds just as well.
Lower-Carb Version
Swap panko for crushed pork rinds—I use Epic Artisanal brand from my local butcher. They create an incredibly crispy coating with zero carbs. Reduce flour to ½ cup and add 2 tbsp almond flour for extra binding power. 🔥
Mild Heat Adjustment
For kids or sensitive palates, cut the cayenne to ¼ tsp or omit entirely. Boost flavor with an extra 1 tsp smoked paprika and ½ tsp onion powder. The dish stays flavorful without the spicy kick.
Air Fryer Method
Spray coated tenders lightly with avocado oil and air fry at 375°F for 12-14 minutes, flipping halfway. This uses 90% less oil while maintaining great crunch. Works perfectly for a lighter version.
Allergen Note
This recipe contains egg, dairy (buttermilk), and gluten (flour, panko). For nut allergies, ensure your flour and panko are processed in nut-free facilities. Always check labels to be safe.
Nutrition Facts
Frequently Asked Questions
Can I bake these instead of frying?
Yes! Bake at 400°F for 15-20 minutes, flipping halfway. Spray with oil first for extra crispiness. The texture won’t be identical to frying but still delicious.
How do I keep them crispy longer?
Place on a wire rack after cooking to prevent steam buildup. Reheat in a 400°F oven for 5-10 minutes if needed. Microwaving makes them soggy.
What dipping sauces pair best?
Classic ranch or honey mustard work perfectly. For extra heat, try a spicy mayo (mix mayo with 1 tbsp sriracha). Sweet chili sauce adds a nice contrast too.
Can I make these ahead of time?
Coat and refrigerate uncooked tenders up to 4 hours before frying. Don’t freeze coated pieces—they’ll lose texture. Fry from cold for best results.

- Jollof Rice Sauce Recipe: West African Tomato and Spice Infusion - September 25, 2026
- Japanese Rice Soup Recipe: Umami-Rich Comfort in a Bowl - September 25, 2026
- Homemade Cream Of Rice Recipe: Silk-Smooth Breakfast in Minutes - September 25, 2026