
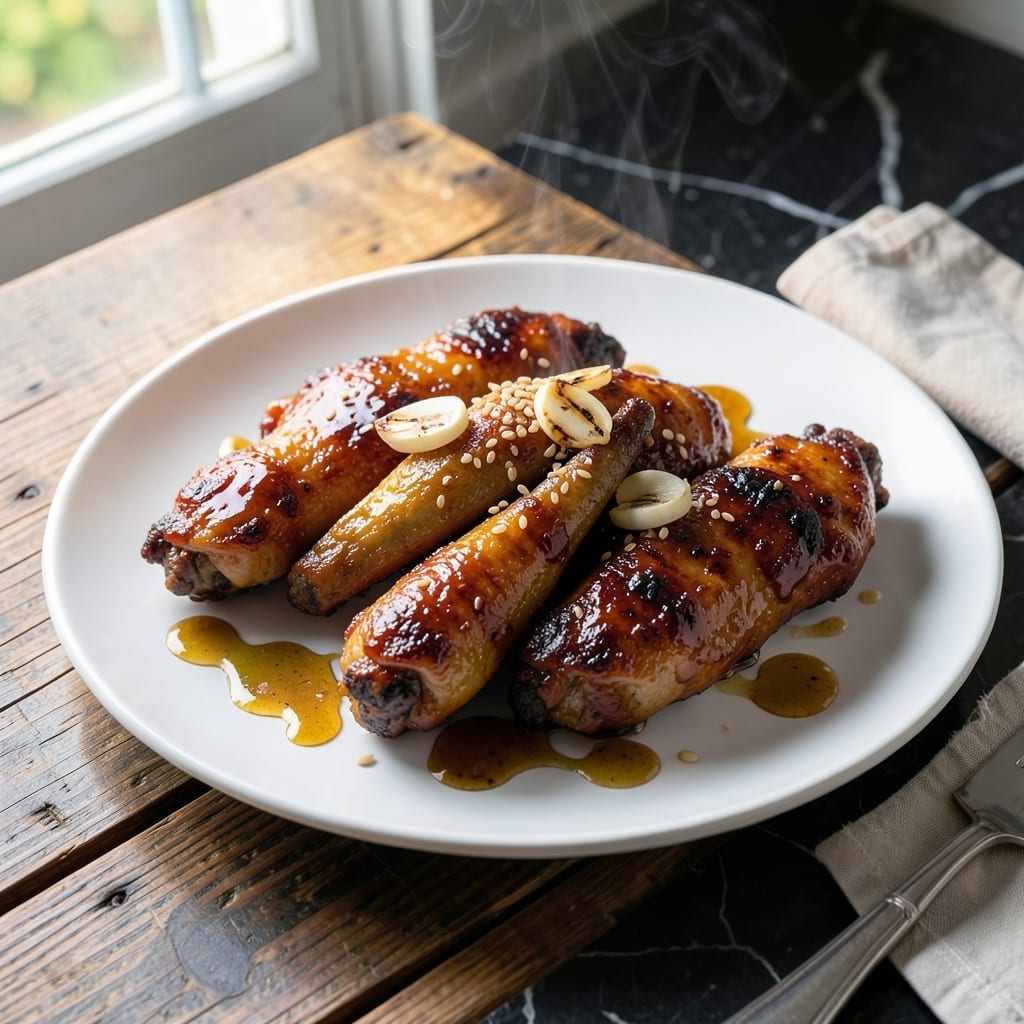
This sticky chicken delivers a perfect balance of sweet and savory, with a glaze that caramelizes beautifully in the oven. The secret lies in the combination of honey, soy sauce, and garlic, which creates a rich, flavorful coating that clings to every bite.
I’ve refined this method to ensure the chicken stays juicy while the glaze transforms into a glossy, finger-licking finish. A quick sear before baking locks in moisture, and a final broil guarantees that signature sticky texture.
What you’ll get is tender, fall-off-the-bone chicken with a glossy, deeply flavored glaze that’s both sweet and garlicky. It’s a dish that impresses without requiring complicated techniques.
Serve it over rice or with roasted vegetables to soak up every last drop of sauce. Here’s how to make it.
Ingredients for Sticky Chicken
A balanced mix of pantry staples and fresh ingredients creates that signature glossy, finger-licking finish.
| Ingredient | Amount | Notes |
|---|---|---|
| Chicken Thighs 🍗 | 2 lb | Boneless, skinless preferred |
| Honey 🍯 | ½ cup | Pure, unprocessed for best flavor |
| Soy Sauce 🫒 | ⅓ cup | Low-sodium if preferred |
| Garlic Cloves 🧄 | 6 cloves | Minced for maximum flavor |
| Olive Oil 🫒 | 2 tbsp | Divided for searing and glaze |
| Rice Vinegar 💧 | 2 tbsp | Balances sweetness in glaze |
| Fresh Ginger 🌿 | 1 tbsp | Grated, for depth |
| Brown Sugar 🍚 | ¼ cup | Packed, enhances caramelization |
| Sesame Oil 🫒 | 1 tsp | Toasted, for finishing |
| Red Pepper Flakes 🌶️ | ½ tsp | Adjust to heat preference |
| Kosher Salt 🧂 | 1 tsp | Diamond Crystal preferred |
| Black Pepper 🌶️ | ½ tsp | Freshly ground for best results |
| Cornstarch 🌾 | 1 tbsp | For thickening glaze |
| Green Onions 🧅 | 3 whole | Thinly sliced for garnish |
| Sesame Seeds 🌰 | 1 tsp | Toasted, for garnish |
The chicken thighs are non-negotiable for juiciness—bone-in, skin-on works too if you prefer crispier skin. Costco and Whole Foods have reliable organic options. For honey, local raw varieties add complexity. Soy sauce should be naturally brewed—Kikkoman or San-J tamari for gluten-free. Fresh ginger and garlic are essential; pre-minced lacks the punch needed here.
No honey? Maple syrup or agave at a 1:1 ratio works. Soy sauce can be swapped for coconut aminos (use one-third less as it’s saltier). Out of rice vinegar? Apple cider vinegar is a fine substitute. For a deeper umami note, add 1 tsp fish sauce (ensure no dietary restrictions). Chicken breasts can be used but tend to dry out—reduce cooking time by 5 minutes.
The glaze thickens as it cools, so serve immediately. Leftovers keep 4-5 days refrigerated—reheat gently to avoid drying. For meal prep, store chicken and glaze separately. Freezes well for up to 3 months.
Why You’ll Love This Recipe
- I’ll be real: this saves me on crazy evenings. Ready in 20, and the kids devour it.
- One Pan Wonder: Honestly, it’s just mix, coat, and bake—no fancy techniques, just toss those thighs with honey and soy.
- Sweet & Savory: That sticky glaze from the honey and soy? Ridiculously good with a garlic kick.
- Weeknight Hero: I’ll be real: this saves me on crazy evenings. Ready in 20, and the kids devour it.
Step-by-Step Instructions for Sticky Chicken
Master the technique for perfectly glazed chicken with balanced sweetness and savory depth.
Step 1: Season and Sear the Chicken Thighs
Pat the 2 lb Chicken Thighs dry with paper towels, then season both sides with 1 tsp Kosher Salt and 0.5 tsp Black Pepper. This ensures even browning and maximum flavor penetration. Heat 1 tbsp Olive Oil in a large skillet over medium-high heat until shimmering.
Add the chicken thighs in a single layer, working in batches if necessary to avoid crowding. Sear undisturbed for 5-6 minutes per side until deep golden brown and crispy. The skin should release easily from the pan when properly seared. Transfer to a plate and set aside.
Step 2: Build the Sticky Glaze Base
In the same skillet, reduce heat to medium and add the remaining 1 tbsp Olive Oil. Sauté the 6 cloves Garlic Cloves and 1 tbsp Fresh Ginger for 30-45 seconds until fragrant but not browned. This aromatics base is crucial for depth of flavor.
Add the 0.5 cup Honey, 0.33 cup Soy Sauce, 2 tbsp Rice Vinegar, and 0.25 cup Brown Sugar. Stir to combine and bring to a gentle simmer. The mixture should bubble lightly at the edges, which indicates the sugars are beginning to dissolve and meld together.
Step 3: Thicken the Glaze and Combine
In a small bowl, whisk the 1 tbsp Cornstarch with 1 tbsp of cold water to create a slurry. Slowly pour this into the simmering glaze while stirring constantly. The mixture will thicken visibly within 1-2 minutes, coating the back of a spoon.
Return the seared chicken thighs to the skillet along with any accumulated juices. Spoon the thickened glaze over the chicken, ensuring each piece is fully coated. Add the 0.5 tsp Red Pepper Flakes for a subtle heat that balances the sweetness.
Step 4: Finish and Garnish
Reduce heat to low and let the chicken simmer in the glaze for 3-4 minutes, turning occasionally to ensure even coating. The glaze should reduce further, becoming sticky and glossy, clinging beautifully to the chicken.
Remove from heat and drizzle with 1 tsp Sesame Oil for an aromatic finish. Garnish with thinly sliced 3 whole Green Onions and 1 tsp Sesame Seeds for texture and visual appeal. Serve immediately while the glaze is still molten and fragrant.
Pro Tips For Making Sticky Chicken
- Sear Skin First: Crisp the chicken thighs skin-side down in hot olive oil for 5-6 minutes before flipping—I learned this the hard way after my first few batches came out soggy.
- Thin the Honey: Warm the honey for 10 seconds in the microwave or mix it with a splash of soy sauce to make it coat the chicken evenly instead of clumping.
- Resist the Stir: Let the sauce reduce undisturbed for 2-3 minutes at a time so it caramelizes properly—stirring too often just makes it watery.
- Slice the Garlic: Mince the garlic cloves instead of crushing them so they infuse the sauce without burning, which gives a milder, sweeter flavor.
Make-Ahead Tips for This sticky chicken
Prep the Glaze Ahead
You can make the glaze 1-2 days in advance. Combine all glaze ingredients except cornstarch in a saucepan, simmer for 5 minutes, then cool and store in an airtight container. This deepens flavors as it rests. 💡
Marinate Chicken Overnight
After searing, let the chicken cool completely, then place in a zip-top bag with half the prepared glaze. Marinate for up to 12 hours in the fridge. The acidity in the vinegar helps tenderize the meat without making it mushy.
Store Cooked Chicken
Once fully cooled, store cooked chicken with glaze in shallow airtight containers for up to 4 days. The flavors will continue to develop, making leftovers even more delicious the next day.
Freeze for Later
This dish freezes beautifully for up to 3 months. Package in freezer-safe bags with as much air removed as possible. Thaw overnight in the fridge before reheating to maintain that perfect sticky texture.
Reheat Gently
Warm leftovers in a skillet over low heat with a splash of water or broth. Cover for 5-7 minutes, stirring occasionally. This prevents the glaze from burning while keeping the chicken moist. 🔥
Garnish Fresh
Always add Green Onions and Sesame Seeds just before serving. Their freshness and crunch are best when added at the last minute, preserving texture and color.
Nutrition Facts
Frequently Asked Questions
Can I use chicken breasts instead of thighs?
Yes, but they tend to dry out faster. Reduce cooking time by 5 minutes and monitor closely. Thighs stay juicier due to higher fat content.
How do I make the glaze thicker?
Simmer the glaze longer before adding chicken, or mix an extra 1 tsp cornstarch with water for a quicker fix. Stir constantly to avoid burning.
Can I bake this instead of stovetop?
Sear first, then bake at 375°F for 20-25 minutes, brushing with glaze halfway through. Finish under broiler for extra stickiness.
What if my glaze is too salty?
Balance it with 1-2 tbsp honey or a splash of vinegar. Taste as you adjust—small amounts make a big difference.

- Jollof Rice Sauce Recipe: West African Tomato and Spice Infusion - September 25, 2026
- Japanese Rice Soup Recipe: Umami-Rich Comfort in a Bowl - September 25, 2026
- Homemade Cream Of Rice Recipe: Silk-Smooth Breakfast in Minutes - September 25, 2026