
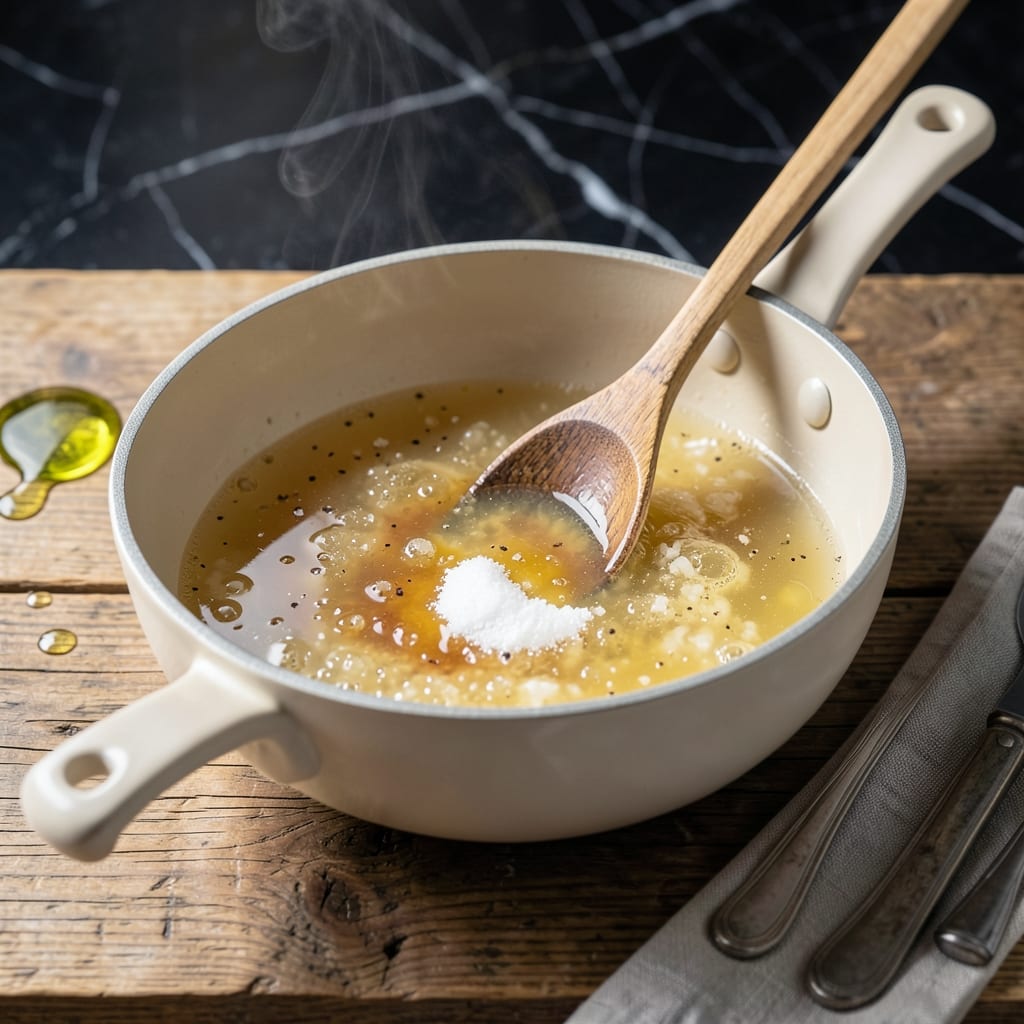
This sauce transforms plain sushi rice into the perfect base for rolls and nigiri. A balanced blend of sweet, tangy, and salty creates authentic flavor without overpowering the fish or fillings.
I developed this recipe after testing countless ratios to achieve the ideal consistency and taste. The combination of rice vinegar, sugar, and salt creates a glaze that coats each grain evenly while maintaining the rice’s texture.
The result is sticky, glossy rice that holds its shape beautifully. This sauce ensures your homemade sushi rivals restaurant quality every time, with no artificial additives or preservatives.
Make a batch and store it in the fridge for up to a month. The flavor deepens over time, making it even better for your next sushi night.
Ingredients for Sushi Rice Sauce
Six ingredients transform plain rice into that signature sticky, glossy sushi base everyone loves.
| Ingredient | Amount | Notes |
|---|---|---|
| Rice Vinegar 🍚 | ½ cup | Unseasoned, for authentic flavor |
| Granulated Sugar 🍚 | 3 tbsp | Dissolves completely in vinegar |
| Sea Salt 🧂 | 1 ½ tsp | Fine grain for even distribution |
| Mirin 🍶 | 2 tbsp | Sweet rice wine, essential |
| Water 💧 | 2 tbsp | Helps dissolve sugar and salt |
| Sake 🍶 | 1 tbsp | Optional, adds depth of flavor |
Rice vinegar is the backbone here. Kikkoman or Marukan are my go-tos—both widely available at any grocery store. The sugar needs to be fine granulated so it dissolves completely in the liquid. For the salt, fine sea salt works better than kosher here since it incorporates more evenly into the small volume. Most Asian markets carry mirin in the vinegar aisle, but Whole Foods has it too if you’re already shopping there.
No mirin? 1 tbsp sugar plus 1 tbsp water gets you close, though the depth won’t be quite the same. Out of sake? Skip it—dry white wine can work in a pinch. The sugar amount can be adjusted to taste (start with less if you prefer less sweetness). For a quicker version, pre-mixed sushi vinegar works, but making it yourself really does taste better.
This keeps beautifully in the fridge for up to 1 month. Store in a glass jar or airtight container. The flavors meld and deepen over time, so it actually tastes better after a few days. Shake before using if it separates.
Why You’ll Love This Recipe
- 5-Minute Mix: I just stir rice vinegar, sugar, and a pinch of salt with mirin—no cooking, no fuss.
- Sweet-Tangy Balance: The mirin and vinegar hit that perfect sweet-sour note every time.
- Roll or Bowl: I use it for sushi rolls, poke bowls, or even as a quick salad dressing.
- Pantry Staples: Rice vinegar, sugar, salt—I always have these on hand, so it’s a last-minute lifesaver.
Step-by-Step Instructions for Sushi Rice Sauce
This simple process delivers the perfect balance of sweet and tangy every time.
Step 1: Combine All Liquids in a Saucepan
In a small saucepan, pour in the 0.5 cup rice vinegar, 2 tbsp mirin, 2 tbsp water, and 1 tbsp sake. I always use a light-colored saucepan so I can see the color changes clearly as the mixture heats.
Gently swirl the pan to combine the liquids—they don’t need vigorous mixing at this stage. Place the saucepan over medium-low heat and let it warm gradually. You’ll see tiny bubbles forming at the edges first, which tells you it’s heating evenly.
Step 2: Dissolve the Sugar and Salt
Add the 3 tbsp granulated sugar and 1.5 tsp sea salt to the warming liquid. Stir continuously with a wooden spoon or silicone spatula until both are completely dissolved. The sugar will disappear first, followed by the salt.
Watch for the moment when the mixture turns from cloudy to clear—that’s your visual cue that everything has fully incorporated. This usually takes 2-3 minutes. Don’t let it come to a boil yet; you want gentle heat for even dissolution.
Step 3: Simmer Briefly to Marry Flavors
Once the sugar and salt are fully dissolved, increase the heat slightly to bring the mixture to a very gentle simmer. You’ll see small, steady bubbles breaking the surface. Let it simmer for just 1-2 minutes.
This brief simmer time is crucial. It mellows the harshness of the vinegar and allows the flavors to blend into that signature sweet-tangy balance. If you smell a sharp vinegar aroma, keep simmering for another 30 seconds—it will soften as it cooks.
Step 4: Cool Completely Before Using
Remove the saucepan from the heat and let the sauce cool to room temperature. I like to transfer it to a heatproof bowl to speed up the process. As it cools, the sauce will thicken slightly and the flavors will continue to develop.
You’ll know it’s ready when it’s no longer warm to the touch, which takes about 20-30 minutes. This cooling step is essential—adding warm sauce to cooked rice would make it mushy. The finished sauce should be glossy and coat the back of a spoon lightly.
Pro Tips For Making Sushi Rice Sauce
- Dissolve Sugar First: Heat the sugar with the water for 30 seconds before adding other ingredients—I learned this the hard way after ending up with gritty sauce.
- Use Real Mirin: Skip the “mirin-fu condiment” and go for true fermented mirin; the depth of flavor is non-negotiable in sushi rice sauce.
- Cool Before Mixing: Always let the sauce cool to room temperature before folding it into rice, or you’ll end up with mushy, sad grains.
- Measure Precisely: sounds tedious, but 1:1:0.5 vinegar to sugar to salt ratio is the only way to get that classic balance—eyeballing it ruins the dish.
Troubleshooting This Dish
Sauce Too Thin
If your sauce is watery, it likely needs more time to reduce. Return it to low heat and simmer for 2-3 additional minutes, stirring frequently. The sugar content means it can burn if left unattended. 🔥
Sauce Too Thick
When the sauce thickens too much during cooling, whisk in 1-2 tsp warm water until it reaches the desired consistency. This often happens if you simmered it too long or used less water than called for.
Grainy Texture
Undissolved sugar or salt creates graininess. To fix, gently rewarm the sauce over low heat while stirring constantly until the grains disappear. Using fine granulated sugar prevents this issue from the start.
Overly Sharp Flavor
If the vinegar taste is too strong, balance it with 1 additional tbsp sugar dissolved in 1 tsp warm water. Stir this into the cooled sauce and taste. Remember, the brief simmer in Step 3 helps mellow the vinegar naturally.
Sauce Separated
After storage, ingredients may separate. Simply shake the container vigorously or whisk for 10-15 seconds to reincorporate. This is normal and doesn’t affect the flavor or quality.
Too Salty
If you over-salted, dilute with 1 tbsp rice vinegar and 1 tsp water, then adjust sweetness as needed. Taste as you go—it’s easier to add than to take away. 💡
Nutrition Facts
Frequently Asked Questions
Can I substitute apple cider vinegar for rice vinegar?
Rice vinegar is milder and more authentic, but apple cider vinegar works in a pinch. Use 25% less to avoid overpowering the flavor, and add an extra 1 tsp sugar to balance the acidity.
How long does homemade sauce last in the fridge?
When stored in an airtight container, it stays fresh for up to 1 month. The flavors deepen over time, making it taste even better after a few days.
Why did my sauce turn cloudy after cooling?
Cloudiness usually means undissolved sugar or salt. Gently rewarm over low heat while stirring until it clears. Using fine granulated sugar prevents this next time.
Can I use honey instead of sugar?
Yes, but reduce the amount by 1/3 since honey is sweeter. Also, add 1 extra tsp water to thin the consistency slightly. The flavor will be richer and more distinct.

- Rice Pudding Recipe With Eggs and Milk: Old-Fashioned Custard-Style Comfort - September 30, 2026
- Rice Noodle Sauce Recipe: Bold Umami Depth for Authentic Stir-Fry - September 30, 2026
- Rice Pilaf Recipe: Fragrant Basmati With Toasted Vermicelli - September 30, 2026