
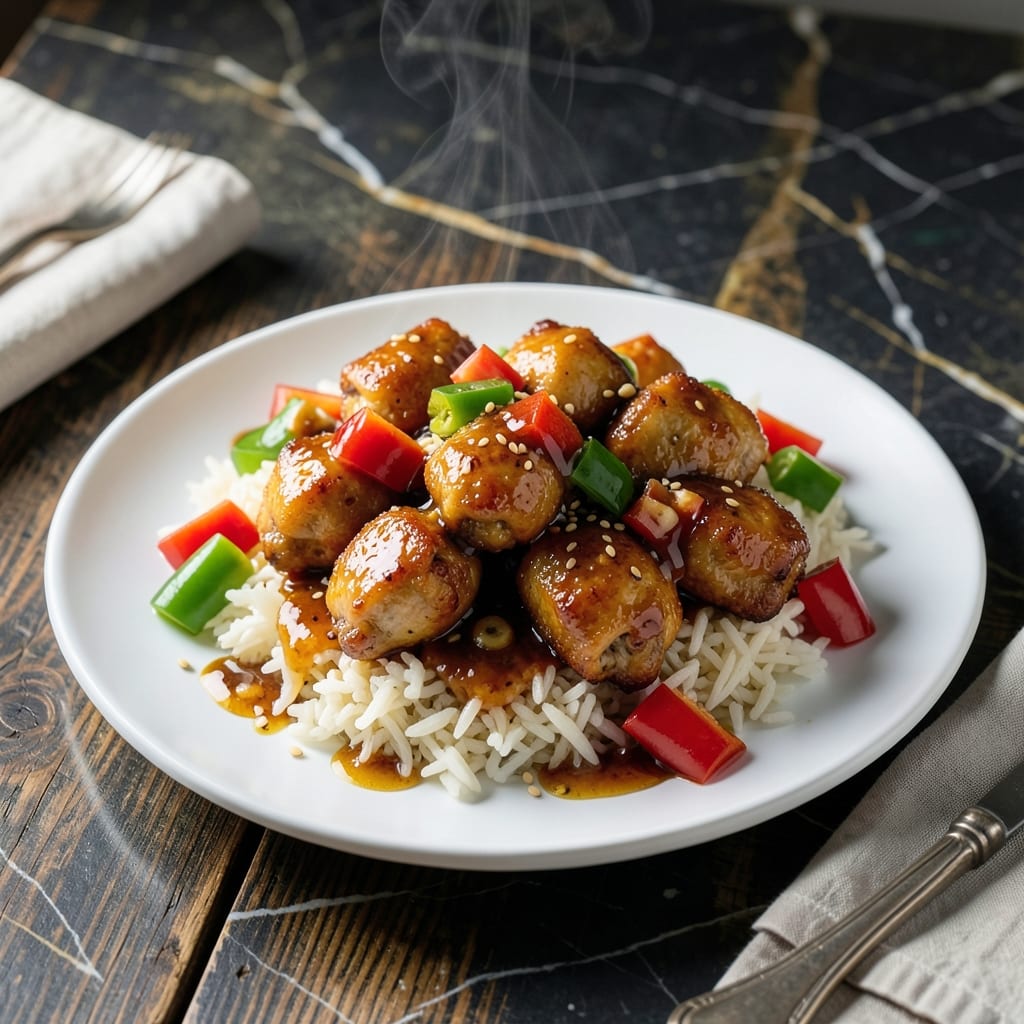
This dish brings together crispy chicken, a tangy-sweet glaze, and perfectly steamed rice for a satisfying meal. The balance of flavors makes it a family favorite in my Georgia kitchen.
I’ve refined this recipe to ensure the chicken stays tender while the sauce achieves that ideal thick, glossy consistency. The rice serves as the perfect neutral base to soak up every bit of the vibrant glaze.
The key is in the timing—cook the chicken first, then use the same pan to build the sauce. This method layers depth into every bite without extra effort.
Serve it hot, with the sauce generously spooned over the chicken and rice. This is comfort food with a bright, flavorful twist.
Ingredients for Sweet and Sour Chicken Over Rice
Crispy chicken, vibrant veggies, and a glossy glaze bring this dish to life over steamed rice.
| Ingredient | Amount | Notes |
|---|---|---|
| Boneless Skinless Chicken Thighs 🍗 | 1 ½ lb | Cut into 1-inch pieces |
| Long-Grain White Rice 🍚 | 1 ½ cups | Uncooked, rinsed before cooking |
| Cornstarch 🌾 | ½ cup | For coating chicken |
| Large Eggs 🥚 | 2 whole | Beaten for egg wash |
| Granulated Sugar 🍚 | ½ cup | For sweet balance in sauce |
| White Vinegar 💧 | ½ cup | For tangy acidity |
| Ketchup 🍅 | ¾ cup | For base of glaze |
| Soy Sauce 🫒 | ¼ cup | Low-sodium preferred |
| Garlic Cloves 🧄 | 3 cloves | Minced for sauce |
| Vegetable Oil 🫒 | ½ cup | For frying chicken |
| Green Bell Pepper 🌶️ | 1 whole | Diced for color and crunch |
| Red Bell Pepper 🌶️ | 1 whole | Diced for color and crunch |
| Onion 🧅 | 1 whole | Diced for aromatic base |
| Salt 🧂 | 1 tsp | For seasoning chicken |
| Black Pepper 🌶️ | ½ tsp | Freshly ground preferred |
The chicken is the foundation. Boneless, skinless thighs stay juicier than breasts during frying—look for air-chilled at Publix or Whole Foods for the best texture. The cornstarch coating is non-negotiable; it creates that crispy shell that holds up to the sauce. For the rice, jasmine or basmati work just as well if you want a little fragrance (rinsing removes excess starch for fluffier grains).
Need to swap the vinegar? Apple cider vinegar or rice vinegar work at a 1:1 ratio. No ketchup? Same amount of tomato paste plus 2 tbsp maple syrup gets you close. The soy sauce can be tamari for gluten-free or coconut aminos for a lighter touch. If you’re skipping the veggies, add an extra bell pepper for color—frozen works in a pinch (just thaw and drain first).
Leftovers keep beautifully. The chicken stays crispy for 2-3 days in the fridge if stored separately from the sauce. Freeze the sauce alone for up to 3 months—reheat gently to avoid breaking the glaze. Rice is best fresh, but it reheats fine with a splash of water (microwave 1 minute, stir, repeat).
Why You’ll Love This Recipe
- I’ll be real: it tastes even better the next day, and the chicken stays tender thanks to the thighs.
- One Pan Wonder: I toss the chicken in cornstarch and egg, fry it up, and the rice cooks while I make the sauce—minimal mess, maximum flavor.
- That Sauce Though: The sweet-tart balance from the sugar and tang hits just right, especially soaking into the rice.
- Feeds the Crew: Between us, it’s my go-to for family dinner—everyone from picky kids to my sauce-loving spouse cleans their plate.
Step-by-Step Instructions for Sweet and Sour Chicken Over Rice
Master the perfect balance of tangy and sweet with this professional method for crispy chicken and glossy sauce.
Step 1: Coat and Fry the Chicken to Crispy Perfection
Cut the 1.5 lb Boneless Skinless Chicken Thighs into 1-inch pieces and pat them dry with paper towels. Season with 1 tsp Salt and 0.5 tsp Black Pepper, then toss in 0.5 cup Cornstarch until each piece is evenly coated.
Heat 0.5 cup Vegetable Oil in a large skillet over medium-high heat. When the oil shimmers, add the chicken in a single layer, working in batches if needed. Fry for 4-5 minutes per side until golden brown and crispy. Transfer to a paper towel-lined plate to drain.
Step 2: Prepare the Vegetables and Aromatics
While the chicken fries, dice the 1 whole Green Bell Pepper, 1 whole Red Bell Pepper, and 1 whole Onion into uniform pieces. Mince the 3 cloves Garlic Cloves. This prep ensures even cooking and a consistent texture in every bite.
In a clean skillet, sauté the diced vegetables over medium heat for 5-6 minutes until they soften and the onion becomes translucent. Add the minced garlic and cook for an additional 30 seconds until fragrant but not browned.
Step 3: Create the Tangy Sweet and Sour Glaze
In a bowl, whisk together 0.5 cup Granulated Sugar, 0.5 cup White Vinegar, 0.75 cup Ketchup, and 0.25 cup Soy Sauce until smooth. Pour this mixture into the skillet with the sautéed vegetables and stir to combine.
Simmer over medium-low heat for 3-4 minutes, stirring occasionally, until the sauce thickens slightly and becomes glossy. The sugar will caramelize, and the vinegar will mellow, creating a perfect balance of sweet and tangy flavors.
Step 4: Combine and Finish the Dish
Return the crispy chicken to the skillet with the sauce, stirring gently to coat each piece evenly. Cook for an additional 2-3 minutes until the chicken is heated through and the sauce clings beautifully to the meat.
While the chicken finishes, cook the 1.5 cups Long-Grain White Rice according to package instructions. Serve the sweet and sour chicken hot over steamed rice, ensuring each serving has a generous portion of the glossy sauce.
Pro Tips For Making Sweet And Sour Chicken Over Rice
- Velvet the Chicken: Toss the chicken thighs with cornstarch and egg before frying—this creates that signature tender, velvety texture that soaks up the sweet and sour sauce perfectly.
- Fry in Batches: Resist the urge to crowd the pan; cook the chicken in two batches so each piece gets crispy instead of steaming in its own juices.
- Balance the Sugar: I learned this the hard way—taste the sauce before adding all the sugar, as the natural sweetness from the chicken and rice can vary.
- Use Day-Old Rice: Sounds weird, but it works: cold, day-old rice stays separate and soaks up the sauce better than fresh, sticky rice.
Serving Suggestions for This sweet and sour chicken over rice
Family-Style Plating
Serve this dish on a large platter with the chicken and veggies arranged over a bed of rice. The vibrant colors of the bell peppers against the golden chicken and white rice make for a stunning presentation that’s perfect for sharing at the table. I love the way the sauce pools around the edges. 💛
Individual Bowls
For a more casual approach, portion the rice into deep bowls and top with chicken and sauce. This method lets everyone customize their serving and ensures the rice soaks up plenty of the glaze. Use shallow pasta bowls for easy mixing.
Garnish Ideas
Sprinkle with thinly sliced green onions or toasted sesame seeds for added texture and visual appeal. A drizzle of sriracha or extra sauce on top adds a professional touch that my Georgia guests always appreciate.
Side Pairings
Steamed broccoli or snap peas add freshness to balance the richness. For a Southern twist, serve with buttermilk biscuits to mop up any extra sauce. I often add a simple cucumber salad for crunch.
Kid-Friendly Serving
Deconstruct the dish for picky eaters by serving the components separately. Let kids assemble their own bowls with just chicken and rice, or add sauce to taste. This approach always works with my younger cousins. ✨
Takeout-Style Boxes
For a fun presentation, serve in parchment-lined takeout containers. This keeps the chicken crispy and makes for easy cleanup. The boxes also make great leftovers for lunch the next day.
Nutrition Facts
Frequently Asked Questions
Can I use chicken breast instead of thighs?
Yes, but thighs stay juicier. If using breast, reduce frying time to 3-4 minutes per side to prevent dryness.
How do I make the sauce thicker?
Mix 1 tablespoon cornstarch with 2 tablespoons water, then stir into simmering sauce. Cook for 1-2 minutes until glossy.
What if my chicken isn’t crispy?
Ensure oil is hot (350°F) before frying and don’t overcrowd the pan. Pat chicken dry first for best results.
Can I make this ahead of time?
Fry chicken and prep sauce separately, then combine and reheat gently before serving. Stores well for 2 days refrigerated.

- Jollof Rice Sauce Recipe: West African Tomato and Spice Infusion - September 25, 2026
- Japanese Rice Soup Recipe: Umami-Rich Comfort in a Bowl - September 25, 2026
- Homemade Cream Of Rice Recipe: Silk-Smooth Breakfast in Minutes - September 25, 2026