
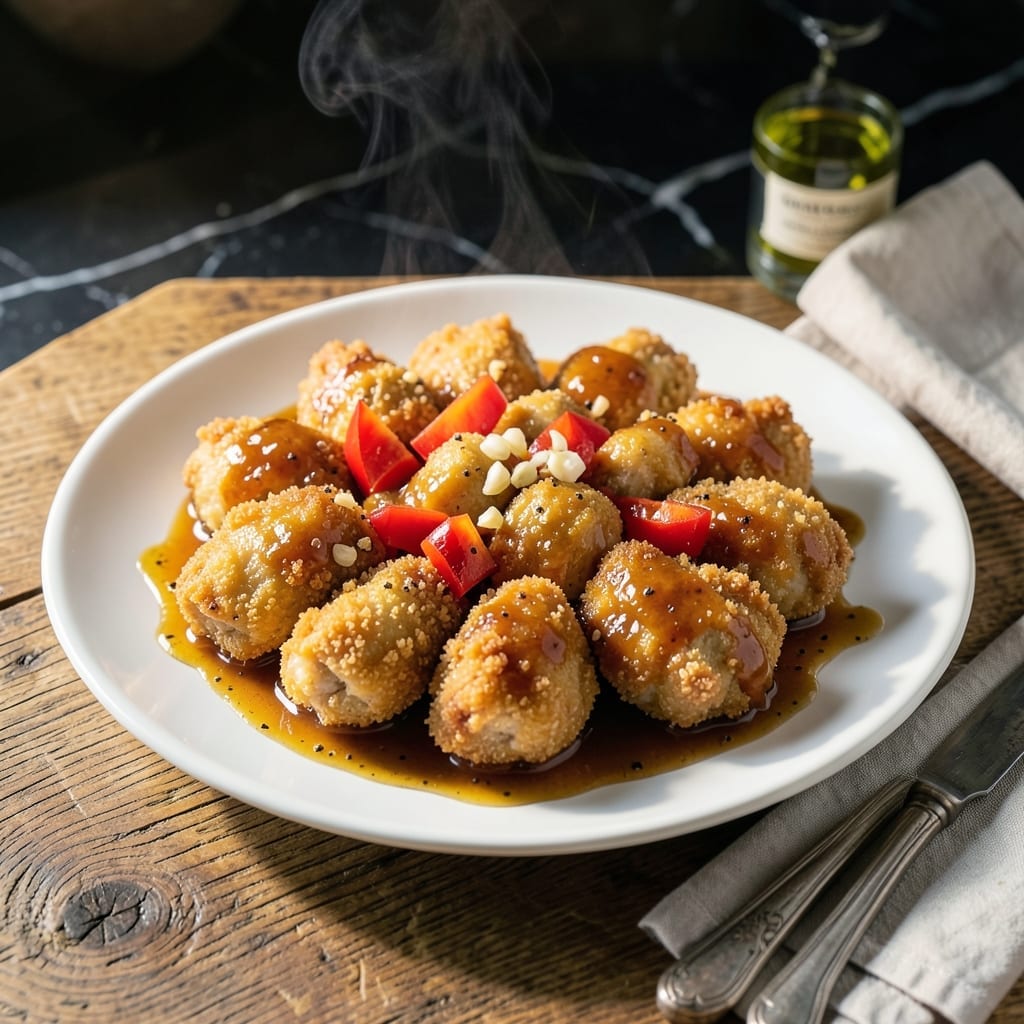
This recipe delivers the crispy texture and tangy-sweet balance that takes sweet and sour chicken to the next level. The secret lies in the double-cooking method that ensures every piece stays perfectly crunchy, even after being coated in sauce.
I developed this technique after years of trial and error, focusing on achieving that ideal contrast between the outer crunch and the tender meat within. The sauce comes together quickly with simple pantry staples, creating a glossy glaze that clings to each bite.
The result is a dish that satisfies both the craving for something indulgent and the desire for homemade quality. Each piece of chicken remains distinctly crispy, while the sauce provides that signature sweet and sour punch.
This version stays true to the classic takeaway flavor while ensuring superior texture and taste. The method guarantees consistent results every time you make it.
Ingredients for Sweet and Sour Chicken Recipe Uk
Simple pantry staples and fresh produce create this takeaway classic at home.
| Ingredient | Amount | Notes |
|---|---|---|
| Boneless Chicken Breast 🍗 | 1 ½ lb | Cut into 1-inch pieces |
| Cornstarch 🌾 | ½ cup | For crispy coating |
| All-Purpose Flour 🌾 | ½ cup | Lightly seasons coating |
| Large Eggs 🥚 | 2 whole | Beaten for binding |
| Vegetable Oil 🫒 | 3 cups | For deep frying |
| Granulated Sugar 🍚 | ¾ cup | Adjust to taste |
| White Vinegar 💧 | ½ cup | For tangy kick |
| Ketchup 🍅 | ½ cup | Base for sauce |
| Soy Sauce 💧 | 2 tbsp | Low-sodium preferred |
| Garlic Cloves 🧄 | 3 cloves | Minced for sauce |
| Bell Pepper 🌶️ | 1 whole | Diced, any color |
| Pineapple Chunks 🍍 | 1 cup | Fresh or canned, drained |
| Green Onions 🧅 | 3 whole | Sliced for garnish |
| Salt 🧂 | 1 tsp | To taste |
| Black Pepper 🌶️ | ½ tsp | Freshly ground |
The chicken is key here—boneless breast stays tender while thigh can get chewy. Sainsbury’s or Tesco have good quality options. For the crispy coating, cornstarch is non-negotiable (it creates that signature crunch). I always use vegetable oil for frying—high smoke point, neutral flavor. If you’re making this often, grab cornstarch in bulk from Asian markets (cheaper and lasts forever).
No pineapple? Mango or peaches work surprisingly well. Swap ketchup for tomato puree plus a dash of sugar if that’s what you’ve got. Rice vinegar is a great substitute for white vinegar—slightly milder. For extra crunch, toss in some water chestnuts with the bell peppers. Short on time? Use pre-cut stir-fry veg from the grocery store.
The sauce keeps in an airtight container for 3-4 days in the fridge. Reheat gently to avoid separating. Best eaten fresh, but leftovers reheat well in a dry pan or air fryer to revive the crisp. Don’t freeze cooked chicken—it loses that all-important crunch.
Why You’ll Love This Recipe
- 30-Minute Marvel: I can get crispy, golden chicken on the table faster than the local takeaway arrives. Honestly, the cornstarch and egg combo works like magic.
- Flavor Explosion: That sticky-sweet glaze clinging to the crunchy coating? I could eat it with a spoon.
- Weeknight Hero: It’s my go-to for picky eaters and last-minute guests alike. Between us, the leftovers taste even better the next day.
- Budget Winner: Boneless chicken breast and pantry staples keep costs low, and it stretches to feed four without breaking the bank.
Step-by-Step Instructions for Sweet and Sour Chicken
This method ensures crispy chicken that stays golden under the glossy, tangy sauce.
Step 1: Coat and Fry the Chicken
Cut the 1.5 lb boneless chicken breast into 1-inch pieces and pat dry with paper towels. Season lightly with 1 tsp salt and 0.5 tsp black pepper. The drier the surface, the crispier the coating will be.
In a bowl, whisk the 2 whole large eggs until smooth. In another shallow dish, combine the 0.5 cup cornstarch and 0.5 cup all-purpose flour. Dip each piece of chicken into the egg, letting any excess drip off, then coat thoroughly in the flour mixture. Press gently to adhere.
Heat the 3 cups vegetable oil in a deep, heavy pot to 350°F. Fry the chicken in batches for 5-6 minutes until golden brown and crispy. Avoid overcrowding the pot, which lowers the oil temperature and results in soggy coating. Drain on a wire rack set over a baking sheet to maintain crispness.
Step 2: Prepare the Vegetables and Pineapple
While the chicken fries, mince the 3 cloves garlic cloves, dice the 1 whole bell pepper into ½-inch pieces, and drain the 1 cup pineapple chunks if using canned. Slice the 3 whole green onions thinly, separating the white and green parts for garnish.
Keeping the ingredients prepped and ready is crucial. The sauce comes together quickly, so having everything measured and chopped beforehand ensures you won’t burn the garlic or overcook the vegetables while scrambling to prep. This step is often overlooked but makes a significant difference in timing and stress levels.
Step 3: Make the Sweet and Sour Sauce
In a large skillet or wok, heat 1 tablespoon of the reserved frying oil over medium-high heat. Add the minced garlic and stir for 10-15 seconds until fragrant but not browned. Immediately add the diced bell pepper and cook for 2-3 minutes until slightly softened but still crisp.
Pour in the 0.5 cup ketchup, 0.5 cup white vinegar, 0.75 cup granulated sugar, and 2 tbsp soy sauce. Stir well to combine and bring to a simmer. Cook for 2-3 minutes until the sugar dissolves and the sauce thickens slightly. Taste and adjust the sweetness or tanginess as needed.
Step 4: Combine and Serve
Add the crispy chicken and 1 cup pineapple chunks to the skillet with the sauce. Toss gently to coat every piece evenly. Cook for 1-2 minutes just to heat through, ensuring the chicken stays crispy. The sauce should cling to the chicken with a glossy sheen.
Transfer to a serving platter and garnish with the sliced green onions. Serve immediately while the chicken is still crispy and the sauce is hot. The contrast of the tangy, slightly sweet glaze with the crunchy coating is what makes this dish irresistible. For best results, avoid letting the chicken sit in the sauce too long before serving.
Pro Tips For Making Sweet And Sour Chicken Recipe Uk
- Double-Coat the Chicken: Dip the chicken in egg first, then flour, back into egg, and finally cornstarch for that extra-crispy UK takeaway texture—I learned this the hard way after too many soggy batches.
- Hot Oil Only: Get the vegetable oil shimmering hot (around 180°C) before adding the chicken, or it’ll absorb oil and turn greasy instead of golden. Sounds obvious, but I ruined two dinners before I got this right.
- Cut Evenly: Slice the boneless chicken breast into uniform 1-inch pieces so they cook through at the same rate. Nothing worse than half raw, half burnt bits in your sweet and sour.
- Rest Before Sauce: Let the fried chicken drain on a rack for 2 minutes before tossing in the sauce—this keeps it crisp instead of turning into a sad, soggy mess. I skip this when I’m in a rush, but always regret it.
Wine and Beer Pairings for These Flavors
Crisp Beer Pairings
A cold lager like Peroni or Stella Artois cuts through the richness with its clean, crisp profile. The carbonation refreshes your palate between bites, balancing the tangy-sweet glaze. I always keep a few bottles chilled for this exact purpose. 🍺
Light Ales
Try a pale ale such as Sierra Nevada for a slightly hoppy contrast. The citrus notes complement the dish without overpowering it. Avoid heavy IPAs—their bitterness can clash with the sweetness of the sauce.
White Wine Options
An off-dry Riesling from Germany or Alsace pairs beautifully, as its subtle sweetness mirrors the sauce while its acidity cleanses the palate. I recommend Dr. Loosen Blue Slate for an affordable, reliable option.
Rosé for Balance
A chilled Provençal rosé offers a dry, fruity contrast to the dish’s bold flavors. Look for options like Whispering Angel—light enough to complement without competing with the tangy notes.
Sparkling Alternatives
For a celebratory touch, Prosecco works wonderfully. Its effervescence lifts the richness, while its light fruitiness harmonizes with the pineapple in the dish. Serve well-chilled for the best experience. ✨
Nutrition Facts
Frequently Asked Questions
Can I use chicken thighs instead of breast?
Yes, but boneless thighs work best. They stay juicier than breast but may need 1-2 minutes extra frying time. Trim excess fat first for crispier results.
How do I keep the coating crispy?
Drain on a wire rack, not paper towels. Toss in sauce just before serving. For leftovers, reheat in an air fryer at 375°F for 3-4 minutes.
What if my sauce is too thin?
Simmer uncovered for 2-3 minutes longer. Or mix 1 tsp cornstarch with 1 tbsp water, stir into sauce, and cook until thickened.
Can I make this ahead?
Fry chicken and prep sauce separately. Store chicken in fridge for up to 1 day. Re-crisp in oven at 400°F for 5 minutes before combining.

- Jollof Rice Sauce Recipe: West African Tomato and Spice Infusion - September 25, 2026
- Japanese Rice Soup Recipe: Umami-Rich Comfort in a Bowl - September 25, 2026
- Homemade Cream Of Rice Recipe: Silk-Smooth Breakfast in Minutes - September 25, 2026