
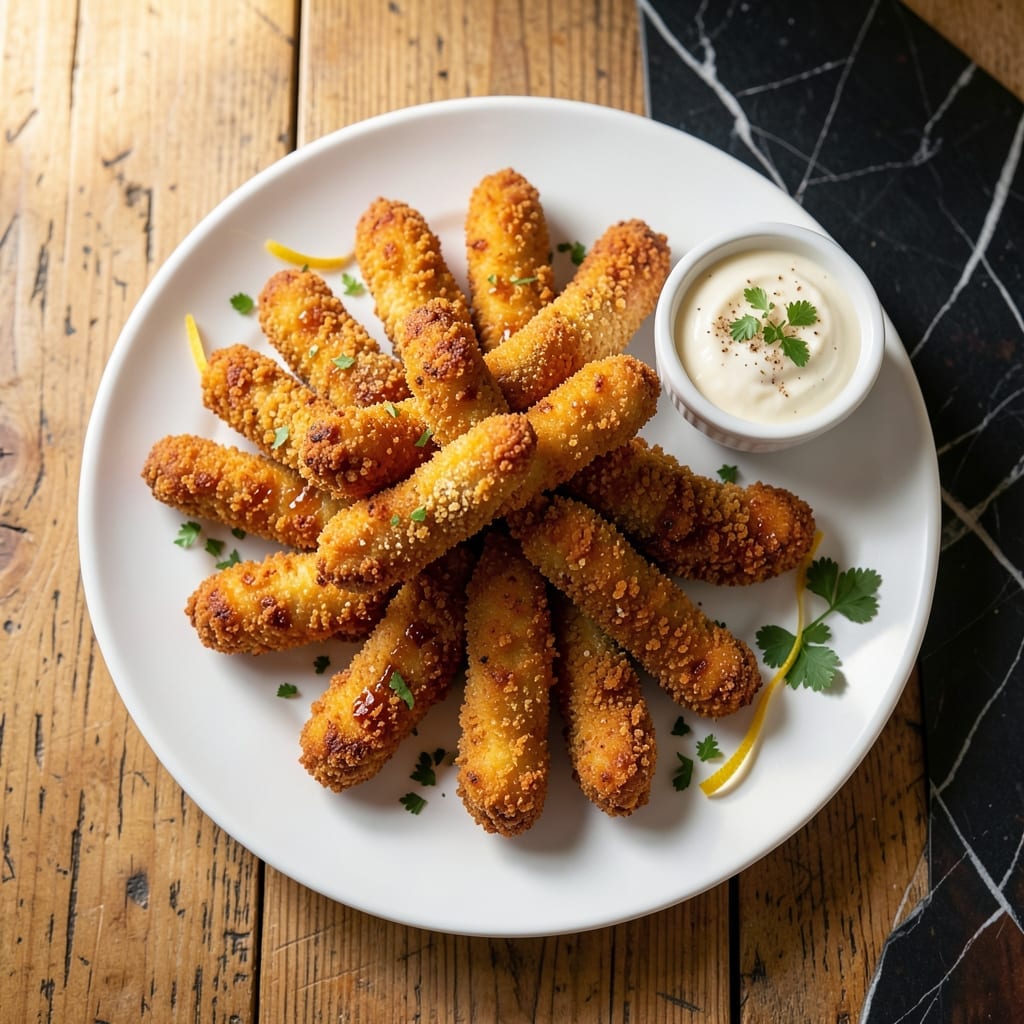
This recipe delivers the crispy coating and juicy interior that makes chicken fingers irresistible. I perfected the technique after too many soggy attempts.
The secret is double-dredging in flour and buttermilk, then coating in seasoned breadcrumbs. This creates a shatteringly crispy crust that locks in moisture.
Each bite offers tender meat inside with a golden, crunchy exterior. The method ensures consistent results every time, with no dry or greasy pieces.
Serve with your favorite dipping sauces for a meal that satisfies both kids and adults. The texture contrast is what makes these truly special.
Ingredients for Tasty Chicken Fingers
A few pantry staples plus chicken tenders create that perfect crispy-juicy contrast everyone loves.
| Ingredient | Amount | Notes |
|---|---|---|
| Chicken Tenders 🍗 | 1 ½ lb | Boneless, skinless, uniform size |
| All-Purpose Flour 🌾 | 1 cup | For initial dredging |
| Buttermilk 🥛 | 1 cup | Full-fat for best adhesion |
| Panko Breadcrumbs 🍞 | 2 cups | Japanese-style for extra crunch |
| Large Egg 🥚 | 1 whole | Beaten, binds coating |
| Garlic Powder 🧄 | 1 tsp | Enhances savory depth |
| Onion Powder 🧅 | 1 tsp | Balances seasoning blend |
| Paprika 🌶️ | 1 tsp | Sweet or smoked variety |
| Salt 🧂 | 1 tsp | Diamond Crystal kosher preferred |
| Black Pepper 🌶️ | ½ tsp | Freshly ground for potency |
| Vegetable Oil 🫒 | 2 cups | High smoke point for frying |
| Cornstarch 🌾 | 2 tbsp | Mixed into flour for crispiness |
The chicken tenders are non-negotiable here—uniform size ensures even cooking. Look for air-chilled tenders at Whole Foods or Costco for superior texture. Buttermilk is the magic binder (the full-fat version clings better). Panko breadcrumbs from the Asian aisle deliver that restaurant-quality crunch. If you’re grinding spices fresh, toast them lightly first to wake up the flavors.
No buttermilk? Stir 1 tbsp lemon juice or vinegar into 1 cup whole milk and let sit 5 minutes. Out of panko? Regular breadcrumbs work, but pulse them in a food processor for finer texture. Swap garlic and onion powders for fresh minced at double the amount—just be sure they’re finely minced. The cornstarch can be omitted, but the crust won’t be as shatteringly crisp.
Fry in batches to avoid crowding—lowers the oil temp and makes soggy coating. Drain on a wire rack (not paper towels) to keep the crust crisp. Leftovers? Reheat in a 400°F oven for 10-12 minutes to revive the crunch. Best eaten fresh, but stores 2 days in the fridge.
Why You’ll Love This Recipe
- One Bowl Wonder: I just toss the chicken in buttermilk, then flour, then panko—no fancy setup, no mess.
- Crispy Perfection: That panko crust gets golden and crunchy while the inside stays juicy. Honestly, it’s the texture that hooks everyone.
- Kid-Approved Classic: My picky nephew devours these, and they’re just as good cold in lunchboxes the next day.
- Budget Stretcher: Chicken tenders are cheap, and a little panko goes a long way. I’ll be real: it’s my go-to when I need to feed a crowd for less.
Step-by-Step Instructions for Chicken Fingers
Master the technique for achieving maximum crunch while preserving juicy tenderness in every bite.
Step 1: Prepare the Coating Stations
Set up three shallow bowls in a row. In the first, whisk together the 1 cup All-Purpose Flour, 2 tbsp Cornstarch, 1 tsp Salt, 1 tsp Garlic Powder, 1 tsp Onion Powder, 1 tsp Paprika, and 0.5 tsp Black Pepper. The cornstarch is essential—it creates micro-crispiness in the coating.
In the second bowl, beat the 1 whole Large Egg with the 1 cup Buttermilk until fully combined. The buttermilk’s acidity tenderizes the meat while helping the coating adhere. Place the 2 cups Panko Breadcrumbs in the third bowl, keeping them untouched until ready to use.
Step 2: Dredge and Coat the Chicken Tenders
Pat the 1.5 lb Chicken Tenders completely dry with paper towels—any moisture will prevent proper adhesion. Working one piece at a time, dredge each tender in the flour mixture, pressing firmly to ensure full coverage. Shake off any excess; you want an even, thin layer.
Dip the floured tender into the buttermilk-egg mixture, allowing any excess to drip off for 5 seconds. Then press it into the panko breadcrumbs, turning to coat all sides completely. The panko’s larger flakes will create that signature crunch. Place on a wire rack set over a baking sheet.
Step 3: Heat the Oil to Optimal Temperature
Pour the 2 cups Vegetable Oil into a deep, heavy-bottomed skillet or Dutch oven—you need at least 1.5 inches of depth for proper frying. Heat over medium-high heat until the oil reaches 350°F on a deep-fry thermometer. This temperature ensures the exterior crisps quickly while the interior cooks gently.
To test without a thermometer, drop in a pinch of panko—it should sizzle immediately and turn golden brown within 30 seconds. If it browns too fast, the oil is too hot; if it sinks, the oil isn’t ready. Maintaining consistent temperature is crucial for even cooking.
Step 4: Fry to Golden Perfection
Carefully lower 3-4 coated tenders into the hot oil, being careful not to overcrowd the pan—this would drop the oil temperature and result in soggy coating. Fry for 3-4 minutes per side until deep golden brown and the internal temperature reaches 165°F.
Use tongs to turn the tenders once during cooking. The coating should be rigid and crisp when done. Transfer to a wire rack or paper towel-lined plate to drain. The residual heat will continue cooking the chicken slightly, so remove them just as they reach temperature.
Step 5: Rest and Serve Immediately
Let the tenders rest for 2-3 minutes before serving. This brief pause allows the juices to redistribute throughout the meat, ensuring each bite remains moist. The coating should stay audibly crisp when you bite into it.
Serve while still hot—the contrast between the crispy exterior and juicy interior is most pronounced immediately after frying. For best results, keep finished batches warm in a 200°F oven while frying subsequent batches, but no longer than 10 minutes to preserve texture.
Pro Tips For Making Tasty Chicken Fingers
- Double-Dredge for Crisp: Dip the tenders in flour, then buttermilk, then back in flour before the egg and panko. I learned this the hard way—it adds that extra crunch that plain panko alone can’t deliver.
- Drain the Buttermilk: Let the buttermilk-coated tenders drip for 10 seconds on a rack before breading. Sounds fussy, but it keeps the coating from sliding off in the pan.
- Skip the Cold Oil: Heat your oil to 350°F before adding chicken—after burning two batches, I finally got a thermometer and realized my “hot” oil was barely warm.
- Press the Panko: Press the panko into the chicken with your fingers instead of just sprinkling. It sticks better and gives you those craggy, crispy bits everyone fights over.
Best Sauces and Condiments for These Flavors
Classic Dipping Sauces
You can’t go wrong with honey mustard—I mix 3 tbsp yellow mustard with 2 tbsp honey and 1 tsp apple cider vinegar for that perfect sweet-tangy balance. Ranch dressing is another crowd-pleaser; use Hidden Valley or make your own with buttermilk and fresh dill. 💛
Bold and Spicy
For heat lovers, Buffalo sauce delivers that signature kick. Combine ½ cup Frank’s RedHot with 2 tbsp melted butter. Sriracha mayo is another favorite—I blend ¼ cup mayo with 2 tbsp Sriracha and a splash of lime juice.
Fresh and Zesty
Brighten up the meal with lemon aioli—whisk ½ cup mayo with 2 minced garlic cloves, 1 tbsp lemon zest, and 2 tbsp lemon juice. Tzatziki adds a cooling contrast with cucumber and dill in creamy yogurt.
Sweet and Savory
BBQ sauce offers a smoky depth that pairs beautifully with the crispy coating. I prefer Sweet Baby Ray’s for its balanced sweetness. Teriyaki glaze adds an Asian-inspired twist—simmer ¼ cup soy sauce with 2 tbsp brown sugar and 1 tsp ginger.
Gourmet Touches
Elevate your meal with truffle aioli by stirring 1 tsp truffle oil into mayo. Chipotle ranch combines ranch with 1 tbsp adobo sauce from canned chipotles. Both add restaurant-quality flair to your crispy creation. ✨
Nutrition Facts
Frequently Asked Questions
Can I bake these instead of frying?
Yes! Bake at 400°F for 15-20 minutes, flipping halfway. Use a wire rack on a baking sheet for even crisping. The texture won’t be as shatteringly crisp as frying but still delicious.
How do I keep them crispy after cooking?
Drain on a wire rack, not paper towels, to prevent steaming. Keep warm in a 200°F oven for up to 10 minutes. Reheat leftovers in the oven to revive the crunch.
What if my coating keeps falling off?
Pat the chicken completely dry first—moisture is the enemy. Ensure each dredge step is thorough and let excess drip off between coatings. Chill coated tenders for 10 minutes before frying to help adhesion.
Can I use chicken breasts instead of tenders?
Yes, cut breasts into 1-inch strips for even cooking. Pound thicker pieces to an even ½-inch thickness so they cook through without burning the coating.

- Jollof Rice Sauce Recipe: West African Tomato and Spice Infusion - September 25, 2026
- Japanese Rice Soup Recipe: Umami-Rich Comfort in a Bowl - September 25, 2026
- Homemade Cream Of Rice Recipe: Silk-Smooth Breakfast in Minutes - September 25, 2026