
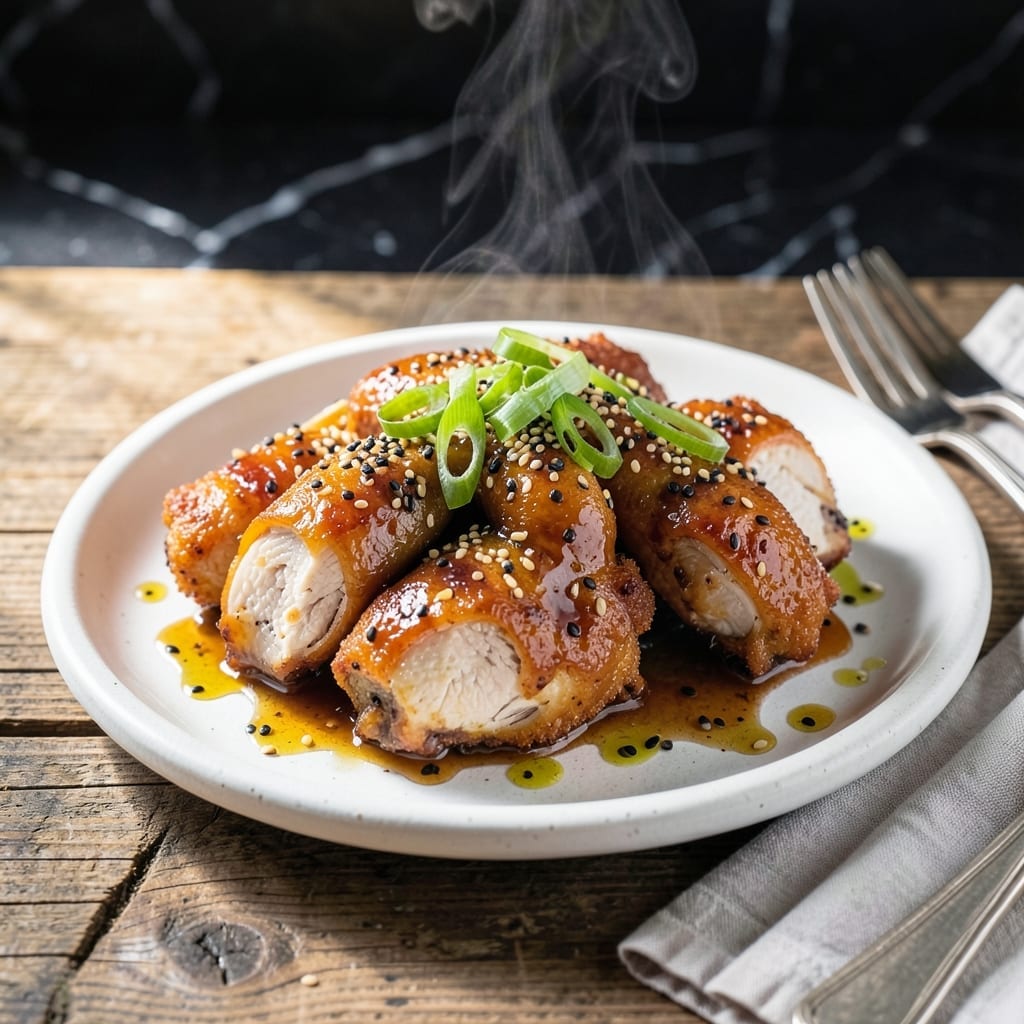
I fell in love with this dish at a tiny street-side wok in Taipei, where the chef worked magic with just a handful of ingredients.
This version stays true to those roots—tender chicken pieces coated in a sticky, sweet-savory glaze, finished with toasted sesame seeds. The key is that perfect balance of soy, honey, and rice vinegar that makes it irresistibly traditional.
You’ll get crispy edges on the chicken while keeping the inside juicy, all tossed in a sauce that clings to every bite. The sesame seeds add that final crunch and nutty aroma.
Serve it over steamed rice with a side of steamed broccoli for the full experience.
Ingredients for Traditional Sesame Chicken
Pantry staples meet takeout vibes with this crowd-pleasing classic.
| Ingredient | Amount | Notes |
|---|---|---|
| Boneless Chicken Thighs 🍗 | 1 ½ lb | Cut into bite-sized pieces |
| Soy Sauce 🫒 | ½ cup | Low-sodium preferred |
| Honey 🍯 | ⅓ cup | For sticky glaze |
| Rice Vinegar 💧 | 3 tbsp | Balances sweetness |
| Sesame Oil 🫒 | 1 tbsp | Toasted variety preferred |
| Garlic Cloves 🧄 | 4 cloves | Minced for sauce |
| Fresh Ginger 🌿 | 1 tbsp | Grated or minced |
| Cornstarch 🌾 | 3 tbsp | For coating chicken |
| Sesame Seeds 🌰 | 3 tbsp | Toasted for garnish |
| Vegetable Oil 🫒 | ½ cup | For frying chicken |
| Green Onions 🧅 | 4 whole | Thinly sliced for garnish |
| Red Pepper Flakes 🌶️ | ½ tsp | Optional for heat |
| Salt 🧂 | ½ tsp | Adjust to taste |
| Black Pepper 🌶️ | ¼ tsp | Freshly ground preferred |
The chicken matters most here. Thighs stay juicier than breasts—look for skinless, boneless at Whole Foods or your butcher. I grab mine from Costco for bulk savings (freeze extras for later). The soy sauce should be fresh; if it’s been in your cabinet for years, grab a new bottle. For the sesame oil, Kadoya brand has the best toasted flavor without bitterness.
No honey? Maple syrup or agave works in a pinch (use same amount). Swap rice vinegar for apple cider vinegar if that’s what you’ve got. Out of sesame seeds? Crushed peanuts add a similar crunch. The ginger can be jarred (in a pinch), but fresh is brighter. If you’re avoiding gluten, tamari instead of soy sauce keeps it traditional-flavored.
Leftovers keep 4-5 days in the fridge—reheat in a skillet to crisp the chicken again. Freeze without garnishes for up to 3 months. The sesame seeds toast in seconds, so do it fresh each time (worth the extra minute).
Why You’ll Love This Recipe
- One Pan Meal: I just toss the chicken thighs with soy sauce, honey and rice vinegar in a single skillet—minimal cleanup.
- Sweet-Savory Magic: That honey and sesame oil combo hits the perfect balance, sticky and rich with every bite.
- Leftovers for Days: Honestly, it tastes even better the next day—packed for lunch or reheated for a quick dinner.
- Budget Stretcher: Boneless thighs stay juicy and cost way less than breasts, so I can feed the whole family without breaking the bank.
Step-by-Step Instructions for Traditional Sesame Chicken
Here’s the method. Straightforward, tested, works every time.
Step 1: Coat the Chicken for Maximum Crispiness
Cut the 1.5 lb boneless chicken thighs into bite-sized pieces and pat them dry with paper towels. I like to trim off any excess fat first—it prevents greasy results. Season the pieces with 0.5 tsp salt and 0.25 tsp black pepper.
Place the 3 tbsp cornstarch in a bowl and toss the chicken pieces in it until fully coated. The cornstarch creates that signature crispy texture that holds up to the sauce. Shake off any excess—you want a thin, even layer, not clumps.
Step 2: Fry Chicken Until Golden and Crisp
Heat the 0.5 cup vegetable oil in a large skillet over medium-high heat until shimmering. Add the coated chicken in a single layer, working in batches if needed to avoid overcrowding. Cook for 3-4 minutes per side until golden brown and crispy.
Don’t stir too often—let each piece develop a deep golden crust before flipping. Transfer the cooked chicken to a paper towel-lined plate to drain excess oil. The chicken should be fully cooked through with no pink in the center.
Step 3: Create the Sticky Glaze Sauce
In the same skillet, reduce heat to medium and add the 4 cloves minced garlic cloves and 1 tbsp grated fresh ginger. Sauté for 30 seconds until fragrant. Be careful not to burn the garlic—it turns bitter quickly.
Add the 0.5 cup soy sauce, 0.33 cup honey, 3 tbsp rice vinegar, and 1 tbsp sesame oil. Stir well and bring to a gentle simmer. Let it cook for 2-3 minutes until slightly thickened. If using, add the 0.5 tsp red pepper flakes for a touch of heat.
Step 4: Toss and Garnish for Serving
Return the crispy chicken to the skillet and toss to coat evenly in the sauce. Cook for an additional 1-2 minutes to allow the flavors to meld and the chicken to absorb the glaze. The sauce should cling to each piece with a glossy, sticky finish.
Transfer to a serving dish and garnish with the 3 tbsp toasted sesame seeds and 4 whole thinly sliced green onions. The sesame seeds add a nutty crunch that contrasts perfectly with the tender chicken and sweet-savory sauce. Serve immediately while hot.
Pro Tips For Making Traditional Sesame Chicken
- Velvet the Chicken: Cut the boneless thighs into 1-inch pieces, then marinate with 1 tsp soy sauce and 1 tsp cornstarch for 15 minutes—this keeps them stupidly tender, even if you overcook them a little.
- Bloom the Sesame: Toast the sesame oil in the pan for 10 seconds before adding the chicken; I learned this the hard way—raw sesame oil tastes harsh, but bloomed oil adds that deep, nutty aroma the dish needs.
- Skip the Overcrowding: Cook the chicken in two batches if needed—crowding the pan steams the pieces instead of searing them, and you’ll end up with rubbery meat and a weak sauce.
- Balance the Glaze: After mixing honey and soy sauce, add a splash of rice vinegar—about 1 tablespoon—to cut the sweetness; sounds weird, but it works and makes the flavor pop.
Common Mistakes When Making This Dish
Overcrowding the Pan
This is the number one mistake I see home cooks make. When you add too many chicken pieces at once, they steam instead of frying. Cook the 1.5 lb chicken in batches, leaving space between pieces. You’ll get that perfect crispy exterior every time.
Skipping the Cornstarch
The 3 tbsp cornstarch coating is essential for that signature texture. Don’t substitute flour—it won’t give you the same light, crispy crust that holds up to the sauce. Trust me, it’s worth the extra step.
High Heat for Garlic
Burnt garlic ruins the sauce with a bitter taste. Always reduce to medium heat before adding the 4 minced garlic cloves and 1 tbsp ginger. Sauté just until fragrant—about 30 seconds max. 🌡️
Sauce Too Thin
If your glaze is runny, it won’t cling to the chicken. Let the 0.5 cup soy sauce and 0.33 cup honey mixture simmer for 2-3 minutes until it thickens slightly. The sauce should coat the back of a spoon.
Soggy Garnishes
Toast the 3 tbsp sesame seeds fresh before serving—they lose their crunch quickly. Add the green onions right at the end so they stay crisp. This keeps every bite full of texture.
Rushing the Rest
Let the chicken rest for 2 minutes after tossing in the sauce. This lets the coating set and the flavors meld. Serving immediately can make the sauce slide right off the chicken. 💡
Nutrition Facts
Frequently Asked Questions
What’s the best way to keep the chicken crispy after saucing?
Fry until deep golden first, then toss in sauce just before serving. The cornstarch coating creates a barrier that keeps the chicken crispy under the glaze for 5-10 minutes.
Can I make this with chicken breast?
Yes, but it’s less forgiving. Use boneless breasts and reduce cooking time to 2-3 minutes per side to prevent dryness. Thighs are preferred for juiciness.
How do I thicken the sauce if it’s too thin?
Mix 1 tsp cornstarch with 1 tbsp water and stir into simmering sauce. Cook for 1-2 minutes until it reaches a glossy, coat-the-spoon consistency.
What’s a good substitute for honey?
Use maple syrup or agave in the same amount. Brown sugar dissolved in 2 tbsp water works too, though it may darken the sauce slightly.

- Jollof Rice Sauce Recipe: West African Tomato and Spice Infusion - September 25, 2026
- Japanese Rice Soup Recipe: Umami-Rich Comfort in a Bowl - September 25, 2026
- Homemade Cream Of Rice Recipe: Silk-Smooth Breakfast in Minutes - September 25, 2026