
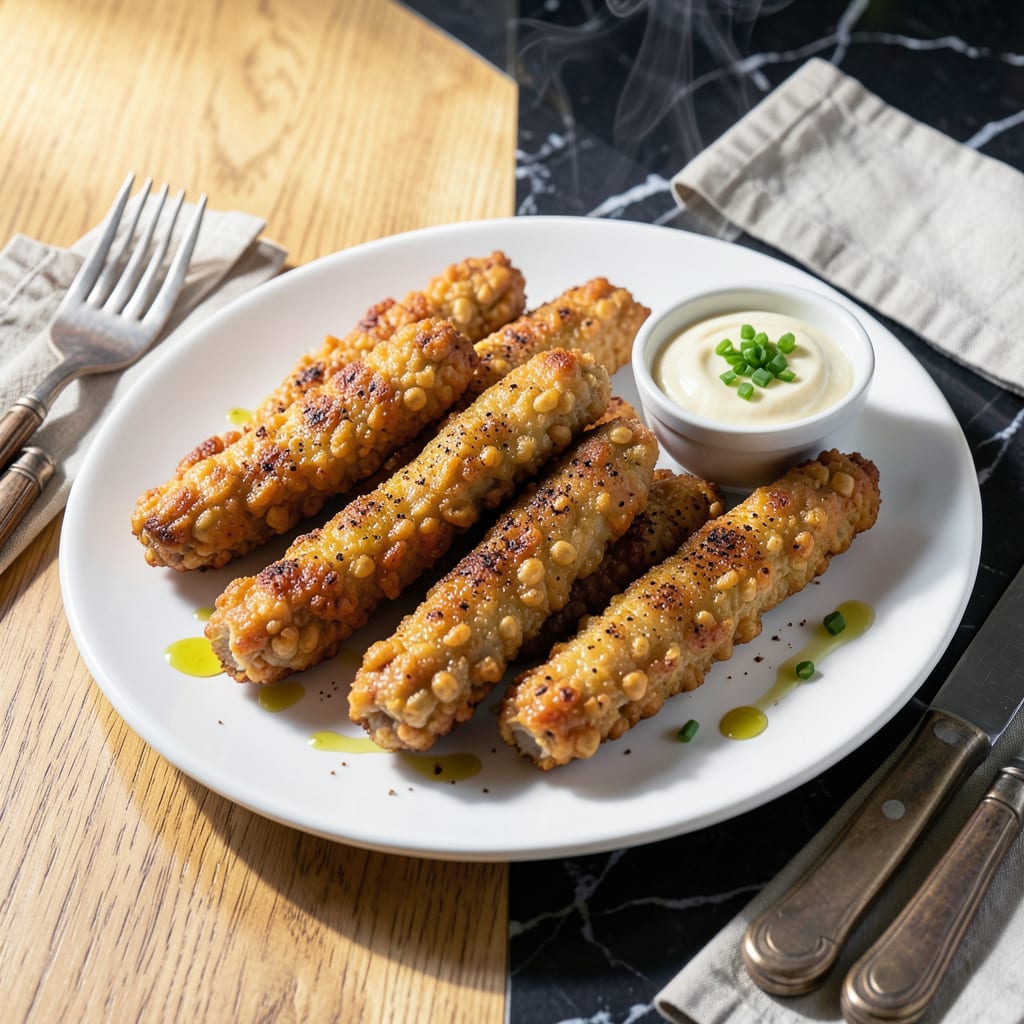
This plant-based version delivers the crispy texture and satisfying crunch you expect, without any animal products. A proven method ensures perfect results every time.
Simple ingredients come together to create tender centers with golden-brown coatings. The baking technique guarantees even cooking and that signature crispy finish we all love.
Ingredients for Vegan Chicken Fingers
Every element here builds that perfect crispy texture without compromise or animal products.
| Ingredient | Amount | Notes |
|---|---|---|
| Chickpeas, Canned 🥘 | 2 cans | Drained, rinsed, patted dry |
| Vital Wheat Gluten 🌾 | ¾ cup | Essential for chewy texture |
| Nutritional Yeast 🧀 | ¼ cup | Adds umami depth |
| Vegetable Broth 🥕 | ½ cup | Low-sodium preferred |
| Olive Oil 🫒 | 2 tbsp | For sauteing chickpeas |
| Garlic Powder 🧄 | 1 tsp | Enhances savory notes |
| Onion Powder 🧅 | 1 tsp | Balances seasoning blend |
| Smoked Paprika 🌶️ | 1 tsp | Adds smoky complexity |
| All-Purpose Flour 🌾 | 1 cup | For dredging mixture |
| Unsweetened Plant-Based Milk 🥛 | 1 cup | Almond or soy recommended |
| Panko Breadcrumbs 🍞 | 2 cups | Ensures crispy coating |
| Cornstarch 🌽 | 2 tbsp | Thickens batter consistency |
| Salt 🧂 | 1 tsp | Adjust to taste preference |
| Black Pepper 🌶️ | ½ tsp | Freshly ground preferred |
[recipeingredientscaler]
The vital wheat gluten is non-negotiable for achieving that signature chew. Bob’s Red Mill offers consistent quality, though Anthony’s works equally well (both available at Whole Foods or natural grocers). Chickpeas should be thoroughly drained and patted completely dry—residual moisture prevents proper crisping. For the panko, Kikkoman brand provides superior crunch compared to standard breadcrumbs.
No vital wheat gluten? Seitan powder works at a 1:1 ratio, but texture may vary slightly. Swap panko for crushed cornflakes or seasoned breadcrumbs in a pinch. Garlic and onion powders can be replaced with fresh minced at half the quantity. For the plant-based milk, any unsweetened variety works—oat milk adds a subtle sweetness that complements the savory notes.
Prepared fingers keep in the fridge for up to 3 days or freeze for 2 months. Reheat in a 400°F oven for 10-12 minutes to restore crispiness. The chickpea mixture can be made a day ahead—store covered in the refrigerator before shaping and breading.
Why You’ll Love This Recipe
- One Bowl Wonder: I just dump chickpeas, nutritional yeast, and broth in a bowl with the dry ingredients—no fancy prep.
- Crispy Perfection: The vital wheat gluten gives that chewy, meaty bite while the olive oil fries up a golden crust.
- Lunchbox Hero: My kids pack these cold for school and they still taste spot-on at room temperature.
- Pantry Staples: Between us, I always have these canned chickpeas and broth on hand for last-minute dinners.
Step-by-Step Instructions for Vegan Chicken Fingers
Master the technique for achieving a crispy exterior and tender interior with plant-based precision.
Step 1: Prepare the Chickpea Base Mixture
In a food processor, combine the 2 cans Chickpeas, Canned (drained, rinsed, and patted dry) with 0.75 cup Vital Wheat Gluten, 0.25 cup Nutritional Yeast, 0.5 cup Vegetable Broth, 2 tbsp Olive Oil, 1 tsp Garlic Powder, 1 tsp Onion Powder, and 1 tsp Smoked Paprika. Pulse until the mixture resembles a coarse, dough-like consistency.
The chickpeas should be broken down but not pureed—visible texture ensures the final product has a satisfying bite. Scrape down the sides as needed to ensure even processing.
Step 2: Form and Season the Fingers
Transfer the mixture to a bowl and knead briefly by hand for 1-2 minutes to develop the gluten, which gives the fingers their signature chewy texture. Divide the mixture into 12 equal portions and shape each into a finger about 3 inches long and ½ inch thick.
Season the shaped fingers lightly with 1 tsp Salt and 0.5 tsp Black Pepper. This step enhances the savory profile, ensuring every bite is flavorful. Arrange them on a plate and refrigerate for 15 minutes to firm up before breading.
Step 3: Set Up the Breading Stations
Create three shallow bowls for breading. In the first, combine 1 cup All-Purpose Flour and 2 tbsp Cornstarch. In the second, pour 1 cup Unsweetened Plant-Based Milk. In the third, place 2 cups Panko Breadcrumbs.
The cornstarch in the flour mixture adds extra crispiness, while the plant-based milk acts as the perfect binder for the panko. This three-step breading process is essential for achieving a thick, crunchy coating that adheres well during frying.
Step 4: Bread and Fry to Golden Perfection
Dredge each chilled finger first in the flour mixture, shaking off any excess. Next, dip it into the plant-based milk, allowing any excess to drip off. Finally, roll it in the panko, pressing gently to ensure full coverage. Place the breaded fingers on a plate and let them rest for 5 minutes to set the coating.
Heat 1 inch of oil in a deep skillet to 350°F. Fry the fingers in batches for 3-4 minutes per side until they are golden brown and crispy. Use a slotted spoon to transfer them to a paper towel-lined plate to drain excess oil.
Serve immediately while hot and crispy for the best texture. The contrast between the crunchy exterior and tender interior makes these fingers irresistibly satisfying.
Pro Tips For Making Vegan Chicken Fingers
- Rest the Dough: After mixing the vital wheat gluten with chickpea mash, let the dough rest for 10 minutes—it relaxes the gluten and makes shaping the fingers way easier.
- Drain Chickpeas Well: I learned this the hard way: if your canned chickpeas are too wet, the dough won’t hold together. Press them in a towel to remove every last drop.
- Preheat the Oil: Sounds obvious, but cold oil makes vegan chicken fingers greasy. Get it shimmering hot before frying to guarantee a crispy exterior.
- Boost Flavor Early: Stir the nutritional yeast and a pinch of salt into the vegetable broth before mixing—it seasons the gluten more evenly than sprinkling it on top.
Pro Cooking Tips for Perfect Results
Gluten Development
Kneading the chickpea mixture for 1-2 minutes activates the vital wheat gluten, creating that signature chewy texture. I find using my hands works best—you’ll feel it transform from crumbly to elastic. Don’t overwork it, or the fingers may become tough.
Perfect Breading Technique
Press the panko firmly onto each finger to ensure maximum adhesion. I use one hand for wet ingredients and one for dry to avoid clumping. Let the breaded fingers rest for 5 minutes before frying—this prevents the coating from sliding off.
Oil Temperature Control
Maintain 350°F oil temperature for even cooking and that perfect golden-brown finish. Use a deep-fry thermometer—I recommend Taylor Precision. If the oil smokes, it’s too hot; if the fingers absorb oil, it’s too cool. 🌡️
Batch Frying
Don’t overcrowd the skillet—fry in batches with 1 inch of space between each finger. Overcrowding lowers the oil temperature, resulting in soggy rather than crispy results. I typically cook 4-5 fingers at a time in my 12-inch skillet.
Draining and Serving
Place fried fingers on a wire rack set over a baking sheet instead of paper towels. This allows air circulation, keeping them crispier longer. Serve immediately—they lose their crunch after 10-15 minutes. A quick sprinkle of flaky salt right after frying enhances flavor. 💡
Alternative Baking Method
For a lighter version, bake at 400°F for 20-25 minutes, flipping halfway. Brush with 1 tbsp olive oil before baking for extra crispiness. The texture won’t be identical to frying, but it’s still delicious with less oil.
Nutrition Facts
Frequently Asked Questions
Can I bake instead of fry these?
Yes! Bake at 400°F for 20-25 minutes, flipping halfway. Brush with 1 tbsp olive oil first for extra crispiness. The texture differs slightly but stays delicious.
What can I use instead of vital wheat gluten?
Try seitan powder at a 1:1 ratio, though texture may vary. Without gluten, the fingers won’t have the same chewy bite, but will still taste great.
How do I keep them crispy after cooking?
Place on a wire rack, not paper towels, to allow air circulation. Serve immediately—they lose crunch after 10-15 minutes.
Can I make these ahead of time?
Shape and bread the fingers, then refrigerate for up to 24 hours before cooking. Or freeze unbreaded mixture for up to 2 months.

- Jollof Rice Sauce Recipe: West African Tomato and Spice Infusion - September 25, 2026
- Japanese Rice Soup Recipe: Umami-Rich Comfort in a Bowl - September 25, 2026
- Homemade Cream Of Rice Recipe: Silk-Smooth Breakfast in Minutes - September 25, 2026