
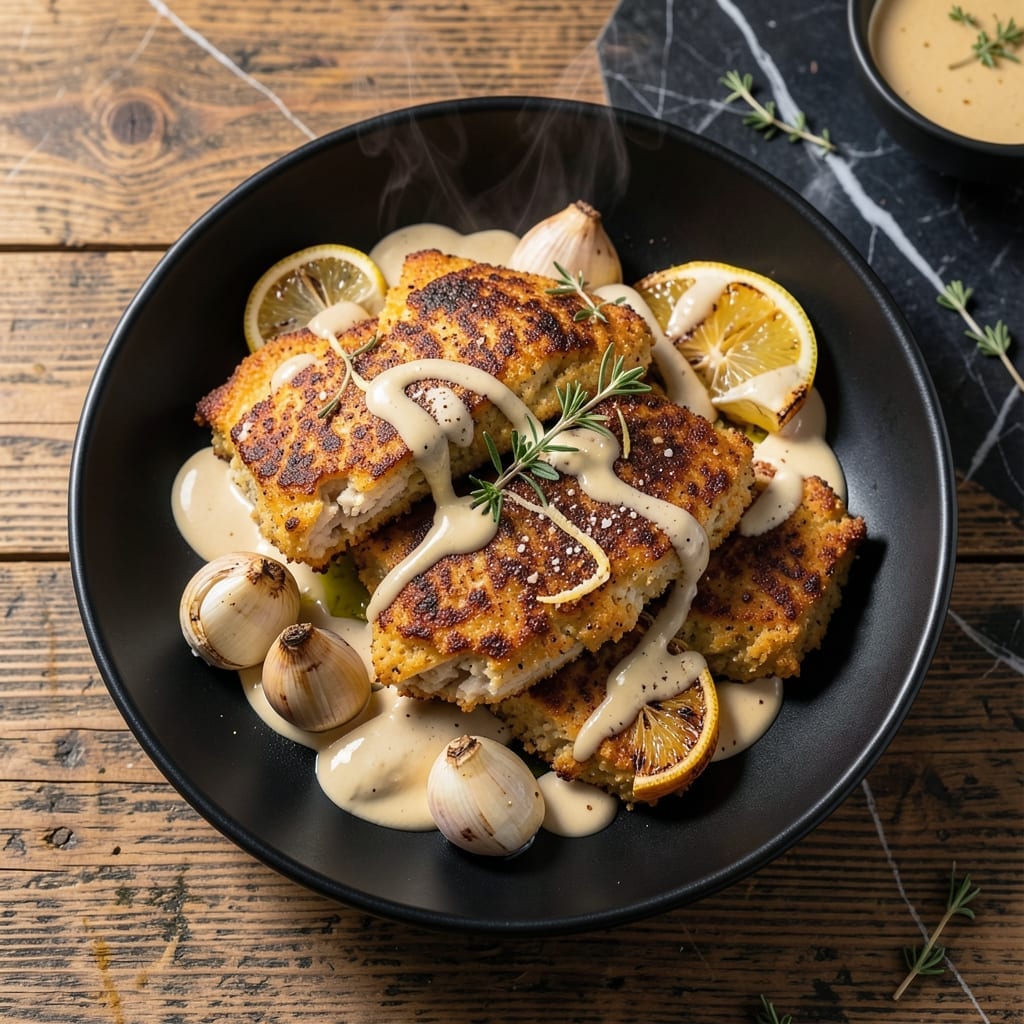
Plant-based cooking reaches new heights with this recipe for crispy cutlets that rival traditional chicken in both texture and flavor. The secret lies in a precise combination of vital wheat gluten and seasonings that create a meaty, satisfying bite.
I developed this method after years of experimenting with plant-based proteins, focusing on achieving that perfect crispy exterior while maintaining a tender interior. The breading process ensures each piece emerges golden and shatteringly crispy from the pan.
What you get is a vegan dish that holds its own as the centerpiece of any meal. The savory seasoning blend and crisp coating make these cutlets irresistibly flavorful and satisfying.
Serve with your favorite sides for a complete, protein-packed dinner that even meat lovers will appreciate.
Ingredients for Vegan Chicken
Vital wheat gluten and savory spices create these plant-based cutlets with irresistible crispy coating.
| Ingredient | Amount | Notes |
|---|---|---|
| Vital Wheat Gluten 🌾 | 1 ½ cups | The binding base for chewy texture |
| Chickpea Flour 🌾 | ½ cup | Adds structure and protein |
| Nutritional Yeast 🧀 | ¼ cup | For cheesy, savory depth |
| Garlic Powder 🧄 | 1 tbsp | Essential for seasoning blend |
| Onion Powder 🧅 | 1 tbsp | Balances the savory profile |
| Smoked Paprika 🌶️ | 1 tsp | Adds subtle smoky depth |
| Dried Thyme 🍃 | 1 tsp | Earthy herbal note |
| Salt 🧂 | 1 tsp | Diamond Crystal preferred |
| Black Pepper 🌶️ | ½ tsp | Freshly ground for best flavor |
| Unsweetened Plant Milk 🥛 | ¾ cup | Soy or oat works best |
| All-Purpose Flour 🌾 | ½ cup | For initial dredging |
| Panko Breadcrumbs 🍞 | 1 ½ cups | For maximum crispiness |
| Neutral Oil 🫒 | 1 cup | For frying, like avocado or vegetable oil |
The vital wheat gluten is non-negotiable here—Bob’s Red Mill is the most reliable brand (the good stuff, not the cheap knockoffs). Chickpea flour adds body; find it in the bulk bins at Whole Foods or any Indian grocery. Nutritional yeast is your umami bomb—Bragg or Sari Foods make great versions. For the panko, Kikkoman is my go-to for that perfect crunch.
No vital wheat gluten? Try a blend of seitan powder and chickpea flour, but texture won’t be the same. Out of panko? Crushed cornflakes or stale bread work in a pinch (toast them first for extra crisp). Plant milk swap is easy—any unsweetened variety at 1:1 ratio. If you’re gluten-free, this one’s not for you—wheat gluten is the star here.
Store dry ingredients in airtight containers for up to 6 months. The cutlets themselves keep 3-4 days in the fridge or freeze uncooked for 1 month. Reheat in air fryer to revive that crispy magic (don’t skip this part).
Why You’ll Love This Recipe
- One Bowl Mix: I just dump the vital wheat gluten, chickpea flour, and spices in a bowl—no fancy prep, no mess.
- Savory Depth: That nutritional yeast and garlic powder combo gives it a rich, umami-packed flavor that fool even meat lovers.
- Meal Prep Hero: I make a big batch on Sunday and use it in wraps, salads, or stir-fries all week.
- Budget Stretcher: Honestly, it costs pennies per serving compared to store-bought vegan chicken.
Step-by-Step Instructions for Plant-Based Crispy Cutlets
Here’s the method that guarantees perfectly crispy, savory vegan cutlets every time.
Step 1: Create the Savory Wheat Gluten Dough
In a large mixing bowl, whisk together the 1.5 cups Vital Wheat Gluten, 0.5 cup Chickpea Flour, 0.25 cup Nutritional Yeast, 1 tbsp Garlic Powder, 1 tbsp Onion Powder, 1 tsp Smoked Paprika, 1 tsp Dried Thyme, 1 tsp Salt, and 0.5 tsp Black Pepper. This blend forms the flavor foundation of your cutlets.
Pour in the 0.75 cup Unsweetened Plant Milk and stir with a wooden spoon until the mixture forms a shaggy dough. Then knead for 2-3 minutes until it becomes smooth and elastic. You’ll notice the dough transforms from crumbly to cohesive as the gluten develops.
Step 2: Shape and Steam the Cutlets
Divide the dough into 4 equal portions and shape each into a cutlet about ½-inch thick. I find that slightly flattened ovals work best for even cooking. The dough should be firm but pliable—if it’s too sticky, add a teaspoon more of the Chickpea Flour.
Place the shaped cutlets in a steamer basket lined with parchment paper. Steam over boiling water for 20 minutes, covered tightly. This step firms up the cutlets so they’ll hold their shape during the frying process. You’ll see the cutlets expand slightly and become more solid.
Step 3: Bread the Steamed Cutlets
Set up a breading station with three shallow bowls. Place the 0.5 cup All-Purpose Flour in the first, beat a bit of additional Unsweetened Plant Milk in the second (just enough to coat), and put the 1.5 cups Panko Breadcrumbs in the third. The flour helps the coating adhere.
Dredge each cooled cutlet in the flour, shaking off excess, then dip in the milk mixture, and finally coat thoroughly with the panko. Press the breadcrumbs gently into the surface to ensure full coverage. The panko’s coarse texture is what creates that extra-crispy exterior we’re after.
Step 4: Pan-Fry to Golden Perfection
Heat ½ cup of the Neutral Oil in a large skillet over medium-high heat until it shimmers but doesn’t smoke. Carefully add the breaded cutlets, being mindful not to overcrowd the pan—this would lower the oil temperature and result in soggy cutlets.
Fry for 3-4 minutes per side until they’re deep golden brown and crispy. You’ll hear a satisfying sizzle when they first hit the oil. Transfer to a paper towel-lined plate to drain any excess oil. Serve immediately while hot and crispy.
Pro Tips For Making Vegan Chicken
- Knead Thoroughly: Vital wheat gluten needs a good 5-7 minutes of kneading to develop that chewy, chicken-like texture—I learned this the hard way after ending up with dense, rubbery pieces.
- Chill Before Cooking: Let the dough rest in the fridge for at least 30 minutes before shaping; it firms up the structure and makes it easier to handle, especially with chickpea flour in the mix.
- Skip Over-Mixing Flours: Stir the chickpea flour and nutritional yeast into the liquid first, then fold in the vital wheat gluten—this prevents clumpy bits and guarantees even flavor distribution.
- Simmer, Don’t Boil: When poaching or steaming, keep the water at a gentle simmer; boiling toughens the gluten and turns your vegan chicken into a sad, spongy mess.
Best Sauces and Condiments for These Flavors
Classic BBQ Sauce
My go-to pairing is Sweet Baby Ray’s Original—its smoky, tangy profile complements the crispy cutlets perfectly. Brush on during the last 2 minutes of frying for a sticky, caramelized coating. I also love Annie’s Organic Smoky Maple for a slightly sweeter twist. 🔥
Creamy Dipping Options
Vegan ranch is a must-try. Mix ½ cup vegan mayo with 2 tbsp almond milk, 1 tsp apple cider vinegar, and 1 tbsp dried dill. For something richer, Follow Your Heart makes an excellent store-bought version.
Spicy Kick
Sriracha mayo adds heat and creaminess. Combine ¼ cup vegan mayo with 1 tbsp sriracha and a squeeze of lime. For extra depth, add ½ tsp smoked paprika. This pairs especially well with the smoky notes in the cutlets.
Fresh and Zesty
A bright lemon-garlic aioli cuts through the richness. Whisk ⅓ cup vegan mayo with 1 minced garlic clove, 1 tbsp lemon juice, and ½ tsp lemon zest. The acidity balances the savory, crispy bite beautifully.
Asian-Inspired
For an umami boost, try peanut sauce. Blend ¼ cup peanut butter, 2 tbsp soy sauce, 1 tbsp maple syrup, and 1 tsp sriracha. Thin with water as needed. This adds a nutty contrast to the cutlets’ texture. 💫
Simple Mustard
Sometimes classic is best. Dijon mustard or whole-grain mustard adds a sharp tang that enhances the savory seasoning. I love Maille Old Style for its bold flavor. Spread thinly on sandwiches or use as a dipping sauce.
Nutrition Facts
Frequently Asked Questions
What can I use instead of vital wheat gluten?
For a gluten-free version, try a mix of chickpea flour and tapioca starch in equal parts. Note that the texture will be denser and less chewy. Vital wheat gluten is key for that classic chicken-like bite.
Can I bake instead of frying?
Yes! Bake breaded cutlets at 400°F for 20-25 minutes, flipping halfway. For extra crispiness, spray with oil before baking. The texture won’t be identical to frying but still delicious.
How do I keep them crispy after cooking?
Place finished cutlets on a wire rack in a 200°F oven while frying the rest. This prevents steam from making them soggy. Serve immediately for maximum crispiness.
Can I make these ahead of time?
Shape and steam cutlets up to 2 days ahead; store in the fridge. Bread and fry just before serving. Freeze uncooked breaded cutlets for up to 1 month.

- Jollof Rice Sauce Recipe: West African Tomato and Spice Infusion - September 25, 2026
- Japanese Rice Soup Recipe: Umami-Rich Comfort in a Bowl - September 25, 2026
- Homemade Cream Of Rice Recipe: Silk-Smooth Breakfast in Minutes - September 25, 2026