
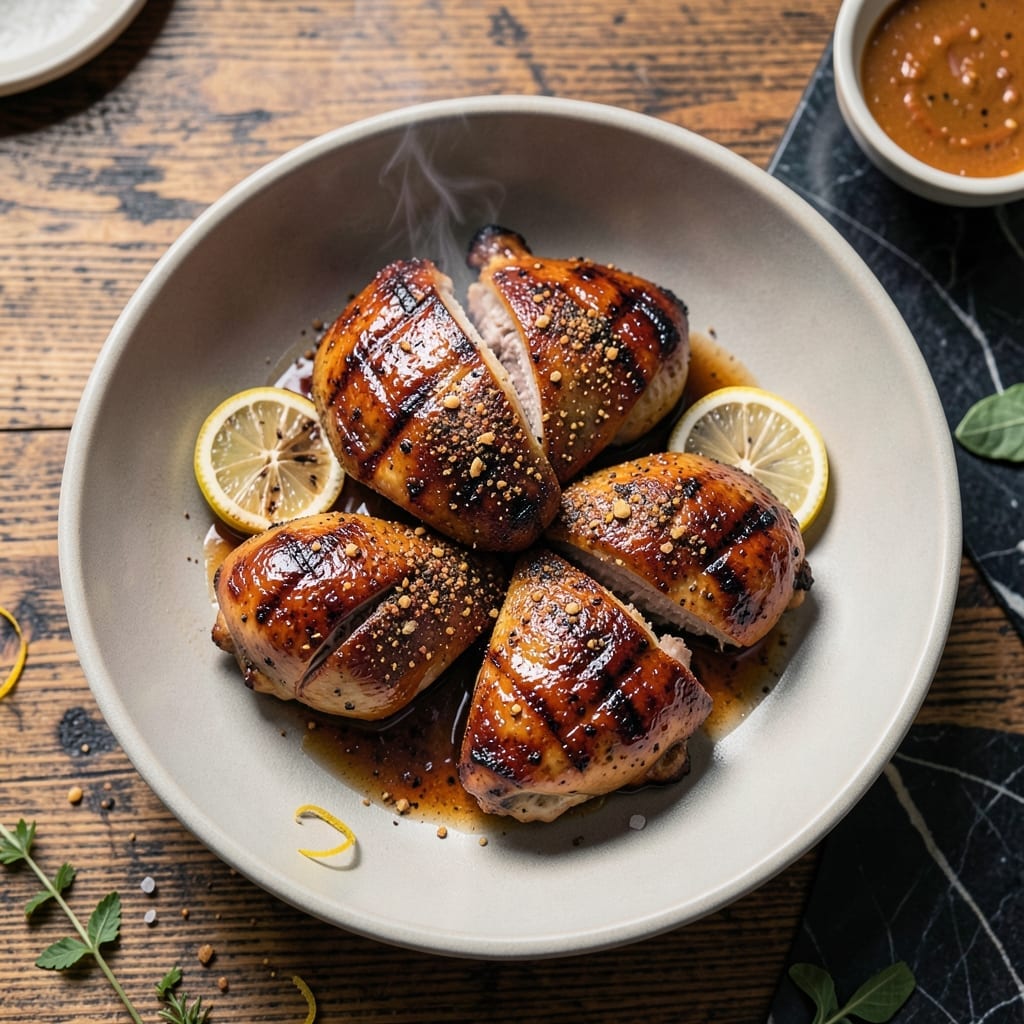
Mastering chicken on a Weber grill transforms ordinary meals into something extraordinary. The combination of smoky char and juicy meat is what sets this method apart from all others.
This technique relies on precise heat control and timing to achieve perfectly cooked chicken every time. The Weber grill’s design allows for even heat distribution, ensuring consistent results with each batch.
With a few simple steps and attention to detail, you’ll produce chicken that’s tender inside with a flavorful crust outside. The process is straightforward yet delivers professional-quality outcomes.
Whether you prefer classic seasoning or bold marinades, this method guarantees chicken that stands out. The results speak for themselves.
Ingredients for Weber Grill Chicken
Quality chicken and a few pantry spices deliver that perfect smoky, juicy result every time.
| Ingredient | Amount | Notes |
|---|---|---|
| Chicken Thighs 🍗 | 2 lb | Bone-in, skin-on preferred |
| Kosher Salt 🧂 | 1 ½ tbsp | Diamond Crystal preferred |
| Black Pepper 🌶️ | 1 tsp | Freshly cracked for best flavor |
| Garlic Powder 🧄 | 1 tbsp | Not garlic salt substitute |
| Smoked Paprika 🌶️ | 1 tbsp | Sweet or hot variety |
| Onion Powder 🧅 | 1 tbsp | Fine grind recommended |
| Dried Oregano 🍃 | 1 tsp | Mediterranean oregano preferred |
| Dried Thyme 🌿 | 1 tsp | Rubbed between fingers |
| Olive Oil 🫒 | ¼ cup | Extra-virgin for brushing |
| Apple Cider Vinegar 🍏 | 2 tbsp | Balances seasoning blend |
| Charcoal Briquettes ⚫ | 50 pieces | Lump charcoal for better heat |
| Hickory Wood Chips 🪵 | 1 cup | Soaked in water 30 minutes |
The chicken is non-negotiable here. Bone-in, skin-on thighs stay juicier than breasts on the grill. Source from Whole Foods or a trusted local butcher for consistent sizing and quality. The skin should be dry (pat it with paper towels) before seasoning—this ensures that crispy, charred crust that defines great grilled chicken. Lump charcoal from Kingsford burns hotter and cleaner than briquettes.
No smoked paprika? Regular paprika plus a pinch of cayenne works, but you’ll miss the depth. Out of fresh herbs? Dried at one-third the amount does the trick. For vinegar, white wine or rice vinegar can stand in, though cider vinegar’s fruitiness complements the smoke best. If using chicken breasts, brine them first (1/4 cup salt per quart of water for 30 minutes) to prevent drying out.
Prep the seasoning blend up to 1 week ahead—store in an airtight container. The wood chips can be soaked and kept in the fridge for 2 days. Cooked chicken keeps 3-4 days refrigerated or freezes beautifully for 3 months. Always let it rest 5 minutes before serving to preserve those juices.
Why You’ll Love This Recipe
- Minimal Effort: I toss the thighs with salt, pepper, and spices, then let the Weber do the rest.
- Smoky Depth: That smoked paprika gives it this rich, almost campfire-like flavor without overpowering.
- Feeds the Crew: I’ve served this at backyard BBQs and weeknight dinners—always a hit.
- Budget Friendly: Chicken thighs stay juicy and cheap, and the spices stretch across multiple meals. Honestly, it’s my go-to for saving without sacrificing taste.
Step-by-Step Instructions for Weber Grill Chicken
Achieve perfectly charred, juicy chicken with this professional method for the grill.
Step 1: Prepare the Seasoning Blend and Chicken
In a small bowl, combine the 1.5 tbsp Kosher Salt, 1 tsp Black Pepper, 1 tbsp Garlic Powder, 1 tbsp Smoked Paprika, 1 tbsp Onion Powder, 1 tsp Dried Oregano, and 1 tsp Dried Thyme. I rub the dried herbs between my fingers to release their oils and enhance their aroma.
Pat the 2 lb Chicken Thighs dry with paper towels, which is essential for achieving crispy skin. Coat all sides of the chicken generously with the seasoning blend, pressing it into the meat so it adheres well. This ensures every bite is packed with smoky, savory flavor.
Step 2: Marinate for Optimal Flavor
In a separate bowl, whisk together the 0.25 cup Olive Oil and 2 tbsp Apple Cider Vinegar. The acidity from the vinegar helps tenderize the meat while the olive oil carries the spices deep into the chicken.
Place the seasoned chicken in a resealable plastic bag and pour the olive oil mixture over it. Seal the bag and massage it gently to ensure the chicken is fully coated. Let it marinate at room temperature for 30 minutes while you prepare the grill. This short marinade enhances flavor without overpowering the meat.
Step 3: Set Up the Grill for Indirect Heat
Arrange the 50 pieces Charcoal Briquettes in a two-zone fire: pile half on one side of the grill and spread the other half thinly across the opposite side. This creates a hot zone for searing and a cooler zone for indirect cooking. Light the charcoal and let it burn until covered with white ash, which takes about 15-20 minutes.
Once the briquettes are ready, add the 1 cup Hickory Wood Chips directly onto the hot coals. The wood chips should have been soaked in water for 30 minutes prior to use. This ensures they smolder and produce smoke rather than burn up quickly. Close the grill lid to let the smoke build.
Step 4: Grill to Juicy Perfection
Place the chicken thighs skin-side down on the hot side of the grill. Sear them for 4-5 minutes until the skin is deep golden brown and crispy. Watch for flare-ups from the dripping fat, and move the chicken to the cooler side of the grill if the flames get too high.
Flip the chicken and move it to the cooler side of the grill. Cover the grill and cook for an additional 15-20 minutes, or until the internal temperature reaches 165°F. Use a meat thermometer to check the thickest part of the thigh, avoiding the bone. This indirect heat ensures the chicken cooks through without burning the exterior.
Transfer the chicken to a platter and let it rest for 5 minutes before serving. This resting period allows the juices to redistribute, ensuring each bite is moist and flavorful.
Pro Tips For Making Weber Grill Chicken
- Preheat the Grill: I learned this the hard way—always preheat your Weber for 10-15 minutes with the lid closed to hit 375-400°F before the chicken goes on. Raw chicken on a lukewarm grate sticks and tears.
- Dry the Thighs: Pat those thighs bone-dry with paper towels before seasoning—moisture steams instead of sears, and you’ll lose that crispy paprika crust.
- Skip the Overcrowding: After burning three batches, I finally figured out: leave at least an inch between pieces so the heat circulates and the skin crisps instead of steams.
- Rest Before Serving: Give it a solid 5-10 minutes under foil after grilling—yes, even if you’re impatient like me. The juices redistribute, and the smoked paprika flavor settles in.
Storing and Reheating This Dish
Refrigerator Storage
Let your grilled chicken cool to room temperature within 2 hours of cooking. Transfer to airtight containers or resealable bags—I prefer Glasslock for durability. Store in the fridge at 40°F or below for up to 3-4 days. The flavors deepen overnight, making leftovers even more delicious. ❄️
Freezer Storage
For longer storage, wrap each piece individually in plastic wrap, then place in a freezer bag. Squeeze out excess air to prevent freezer burn. Grilled chicken freezes well for up to 3 months without significant texture changes. Label with the date for easy tracking.
Oven Reheating
Preheat your oven to 350°F and place chicken on a wire rack over a baking sheet. Brush with a little olive oil to prevent drying. Reheat for 10-15 minutes until the internal temperature reaches 165°F. This method preserves the crispy skin best. 🔥
Microwave Reheating
For quick meals, place chicken on a microwave-safe plate and cover with a damp paper towel. Heat on 70% power for 1-2 minutes, checking and turning halfway. Add a splash of water if it appears dry. This works well for shredded chicken in tacos or salads.
Nutrition Facts
Frequently Asked Questions
What’s the best way to prevent flare-ups?
Trim excess fat from the chicken and keep a spray bottle of water nearby. Move chicken to the cooler side when flames get too high. This prevents burning while keeping the smoky flavor.
Can I use boneless thighs instead?
Yes, but reduce cooking time to 12-15 minutes total. Boneless thighs cook faster and can dry out if overcooked. Use a thermometer to check for 165°F.
How do I know when the charcoal is ready?
Wait until briquettes are covered with white ash, about 15-20 minutes. The coals should glow red beneath the ash. This ensures even, consistent heat for grilling.
What if I don’t have hickory wood chips?
Apple, cherry, or pecan wood chips work well as substitutes. Soak them for 30 minutes before use. Each wood type adds a unique flavor profile to the chicken.

- Jollof Rice Sauce Recipe: West African Tomato and Spice Infusion - September 25, 2026
- Japanese Rice Soup Recipe: Umami-Rich Comfort in a Bowl - September 25, 2026
- Homemade Cream Of Rice Recipe: Silk-Smooth Breakfast in Minutes - September 25, 2026