
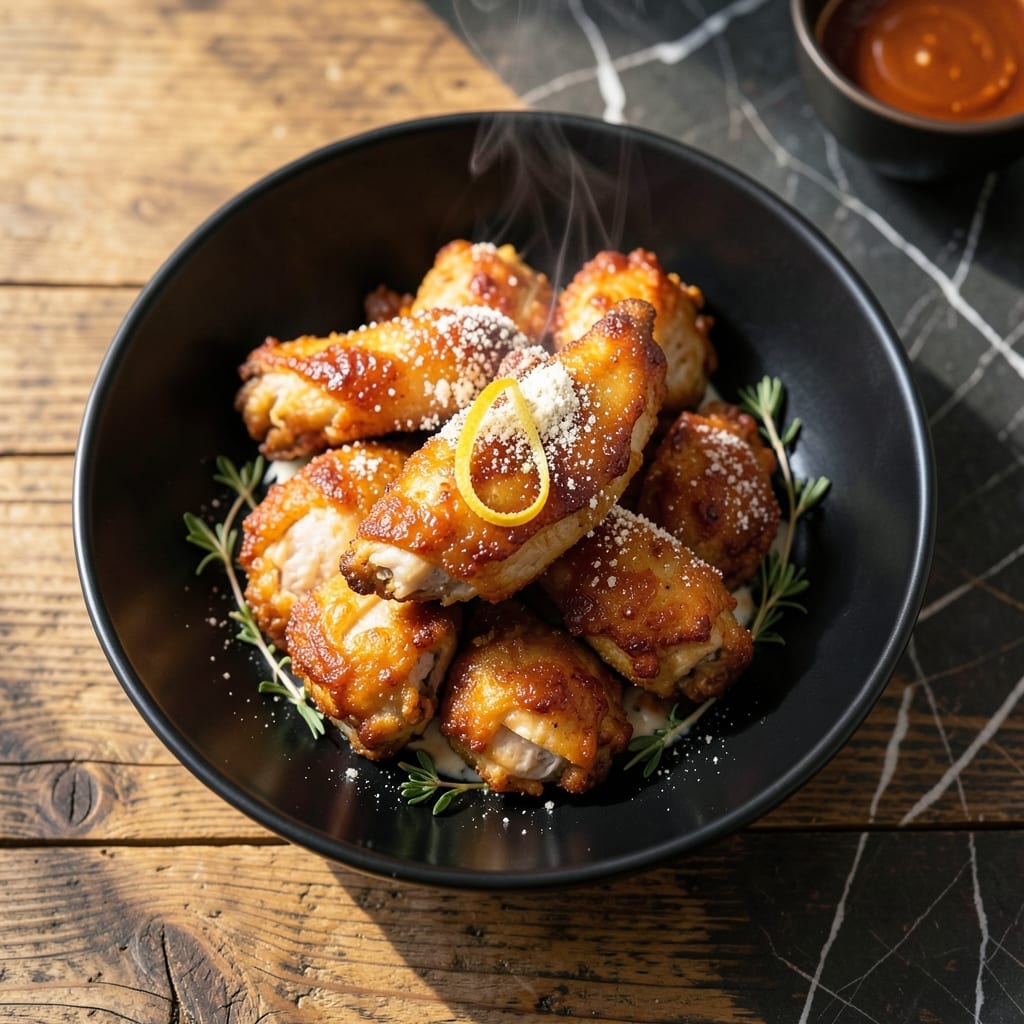
This copycat version delivers the crispy, spicy kick that made the original famous. The secret lies in a precise double-frying technique that guarantees shatteringly crispy skin with juicy meat inside.
I’ve tested this method repeatedly to replicate that signature crunch and heat. The marinade builds layers of flavor before frying, while the final coating ensures every bite packs a punch.
What you’ll get is golden-brown chicken with a spicy, aromatic crust that stays crispy long after cooking. The balance of heat and texture makes it impossible to resist.
Serve it hot with your favorite sides for a meal that tastes just like the original. Here’s how to make it at home.
Ingredients for Willies Chicken
Pantry staples plus chicken thighs create that signature crispy, spicy magic at home.
| Ingredient | Amount | Notes |
|---|---|---|
| Chicken Thighs 🍗 | 2 lb | Boneless, skin-on for crispiness |
| Buttermilk 🥛 | 2 cups | Full-fat for best marinade |
| Hot Sauce 🌶️ | ¼ cup | Like Crystal or Frank's |
| All-Purpose Flour 🌾 | 2 cups | For dredging coating |
| Cornstarch 🌾 | ½ cup | Extra crispy texture |
| Garlic Powder 🧄 | 1 tbsp | For aromatic depth |
| Onion Powder 🧅 | 1 tbsp | Savory base flavor |
| Paprika 🌶️ | 1 tbsp | Smoked or sweet variety |
| Cayenne Pepper 🔥 | 1 tsp | Adjust for heat preference |
| Salt 🧂 | 1 tbsp | Kosher or sea salt |
| Black Pepper 🌶️ | 1 tsp | Freshly ground preferred |
| Vegetable Oil 🫒 | 4 cups | For double-frying process |
| Large Eggs 🥚 | 2 whole | Beaten for coating adhesion |
The chicken thighs are non-negotiable here—skin-on, bone-in gives the best texture (though boneless works in a pinch). Costco or Sam’s Club have great bulk packs. Buttermilk makes all the difference in the marinade—full-fat is worth the extra calorie. I’ve had luck with Organic Valley or Kroger’s store brand for this. Don’t skip the hot sauce—it’s what gives that signature tang.
No buttermilk? Whole milk plus 1 tbsp vinegar or lemon juice per cup does the trick. Out of cornstarch? Instant mashed potato flakes work surprisingly well. Want less heat? Reduce the cayenne to half a teaspoon. Need more crunch? Add crushed cornflakes to the flour mixture. The oil must be peanut or vegetable for the high smoke point—no olive oil here.
Marinated chicken keeps 2 days in the fridge—perfect for prepping ahead. Leftovers stay crispy if reheated in the oven at 375°F for 10-15 minutes. Freeze uncooked marinated chicken for up to 3 months (thaw before frying).
Why You’ll Love This Recipe
- I’ll be real: it’s my go-to for weekend gatherings since everyone always asks for seconds.
- One Pan Magic: I soak the thighs in buttermilk and hot sauce, then dredge in flour and cornstarch—all in the same bowl.
- Crispy & Juicy: That buttermilk brine keeps the chicken tender inside while the cornstarch gives it a ridiculously good crunch.
- Feed a Crowd: I’ll be real: it’s my go-to for weekend gatherings since everyone always asks for seconds.
Step-by-Step Instructions for Crispy and Spicy Chicken
Here’s the method. Straightforward, tested, works every time.
Step 1: Marinade the Chicken Thighs for Maximum Flavor
In a large bowl, whisk together the 2 cups Buttermilk and 0.25 cup Hot Sauce until fully combined. The acidity in the buttermilk tenderizes the meat while the hot sauce infuses it with a subtle heat that builds as it marinates.
Add the 2 lb Chicken Thighs, ensuring each piece is fully submerged in the marinade. Cover the bowl and refrigerate for at least 4 hours, or preferably overnight. This extended marinade time is non-negotiable for achieving that signature tenderness and depth of flavor.
Step 2: Prepare the Seasoned Dredging Mixture
In a shallow dish, combine the 2 cups All-Purpose Flour, 0.5 cup Cornstarch, 1 tbsp Garlic Powder, 1 tbsp Onion Powder, 1 tbsp Paprika, 1 tsp Cayenne Pepper, 1 tbsp Salt, and 1 tsp Black Pepper. Whisk until all the spices are evenly distributed throughout the dry mixture.
The cornstarch is the secret to that ultra-crispy coating, while the blend of spices ensures every bite is packed with savory, slightly smoky heat. Don’t skip sifting if your flour is lumpy—this ensures a smooth, even coating that fries up perfectly.
Step 3: Dredge and Double-Coat for Extra Crunch
Remove the chicken thighs from the marinade, letting any excess drip off. Dip each piece into the 2 whole Large Eggs (beaten lightly in a separate bowl) to help the dredging mixture adhere. Then, press each thigh firmly into the seasoned flour mixture, turning to coat all sides completely.
For an extra-crispy finish, repeat the dredging process: dip back into the beaten eggs, then back into the flour mixture. Press the coating onto the meat so it clings tightly. Place the dredged thighs on a wire rack set over a baking sheet and let them rest for 10 minutes to allow the coating to set.
Step 4: Double-Fry for Perfect Crispiness
In a large, heavy-bottomed pot or Dutch oven, heat the 4 cups Vegetable Oil to 325°F. Carefully lower a few chicken thighs into the oil (don’t overcrowd the pot) and fry for 12-14 minutes, turning occasionally, until the coating is set and lightly golden. This first fry cooks the meat through without browning the crust too quickly.
Remove the chicken from the oil and let it drain on the wire rack. Increase the oil temperature to 375°F, then return the chicken to the pot for a second fry. Cook for an additional 3-4 minutes until the coating is deep golden brown and super crispy. Drain once more on the rack and serve immediately while hot.
Pro Tips For Making Willies Chicken
- Marinate Overnight: Soak the chicken thighs in the buttermilk and hot sauce mix for at least 12 hours—I learned this the hard way after my first batch turned out dry and bland.
- Double Dredge: Dip the marinated thighs in the flour-cornstarch mix, then back in the buttermilk, then flour again. Sounds tedious, but it actually changes the outcome for that extra-crispy crust.
- Hot Oil Check: Toss a pinch of flour into the oil first—if it sizzles immediately, it’s ready. After burning three batches, I finally figured out that oil temp is the thing that matters most.
- Rest Before Serving: Give the fried chicken 5-10 minutes on a rack after frying—this keeps it crispy instead of soggy. My grandmother swore by this, and she was right.
Make-Ahead Tips for This Dish
Marinade Prep Ahead
Mix your 2 cups buttermilk and 0.25 cup hot sauce the night before. The flavors meld beautifully overnight, and the acidity starts tenderizing the meat immediately. I often prep this while cleaning up dinner dishes. 💡
Dredging Station Setup
Combine your dry ingredients (2 cups flour, 0.5 cup cornstarch, and all spices) in an airtight container up to 2 days ahead. Just whisk before using. This saves time on cooking day and ensures even distribution of spices.
Chicken Prep Timeline
Marinate the 2 lb chicken thighs for at least 4 hours, but overnight is ideal. Remove from fridge 30 minutes before cooking to bring to room temperature. This ensures even cooking and maximum crispiness.
Double-Coating Shortcut
After dredging, place coated thighs on a wire rack over a baking sheet. Cover loosely with plastic wrap and refrigerate for up to 8 hours. This lets the coating set, making it more durable for frying later. 🔥
Freezing for Later
Freeze uncooked marinated chicken for up to 3 months. Thaw completely in the fridge before proceeding with the dredging and frying steps. The texture remains excellent when prepared this way.
Reheating Leftovers
To maintain crispiness, reheat in a 375°F oven for 10-15 minutes. Avoid microwaving, as it will soften the coating. I always make extra knowing it reheats so well.
Nutrition Facts
Frequently Asked Questions
Can I use chicken breasts instead of thighs?
Thighs are ideal for their juiciness, but breasts work if pounded to even thickness. Reduce first fry time to 8-10 minutes to prevent dryness. The double-coating still delivers great crispiness.
Why does the recipe call for double-frying?
The first fry at 325°F cooks the meat through gently. The second at 375°F creates that signature shatteringly crisp crust without overcooking. It’s the secret to professional-level texture.
Can I bake this instead of frying?
For a lighter version, bake at 400°F for 25-30 minutes on a wire rack. The coating won’t be as crispy, but it’ll still be flavorful. Spray with oil first for better browning.

- Jollof Rice Sauce Recipe: West African Tomato and Spice Infusion - September 25, 2026
- Japanese Rice Soup Recipe: Umami-Rich Comfort in a Bowl - September 25, 2026
- Homemade Cream Of Rice Recipe: Silk-Smooth Breakfast in Minutes - September 25, 2026