
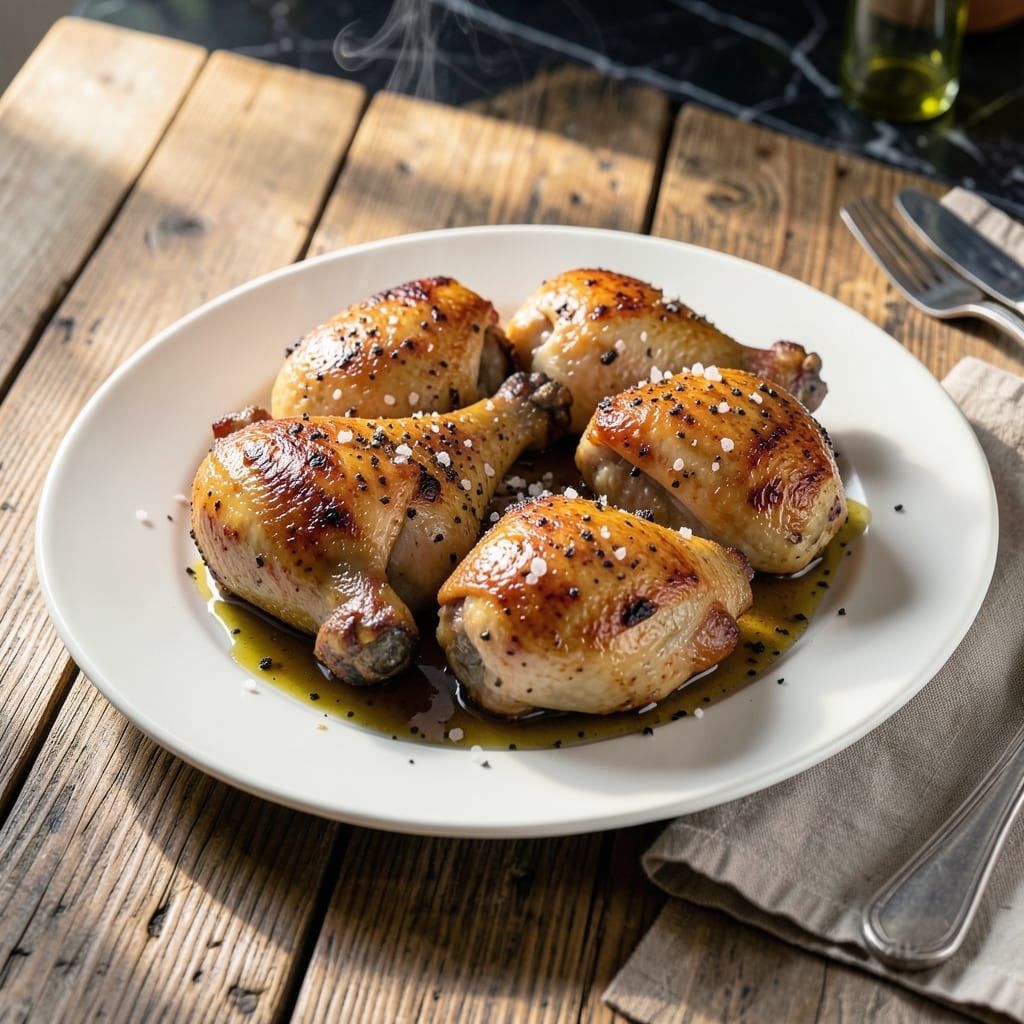
Sometimes the simplest dishes deliver the most impressive results. This recipe proves that 4 ingredients can create a meal worth serving to company.
I developed this method during a particularly busy week at The Smoky Pig, when I needed something flavorful but efficient. The technique relies on high heat and careful timing to transform basic ingredients into something extraordinary.
What emerges is juicy chicken with a golden, flavorful crust that belies its simplicity. The secret lies in letting the ingredients shine without overcomplicating the process.
Perfect for weeknight dinners or last-minute entertaining. Here’s how to make it.
Ingredients for 4 Ingredient Chicken
Four ingredients transform into a restaurant-worthy dish with perfect timing and technique.
| Ingredient | Amount | Notes |
|---|---|---|
| Chicken Thighs 🍗 | 2 lb | Boneless, skin-on preferred |
| Kosher Salt 🧂 | 1 ½ tbsp | Diamond Crystal preferred |
| Black Pepper 🌶️ | 1 tsp | Freshly ground coarse |
| Extra-Virgin Olive Oil 🫒 | 3 tbsp | High quality for searing |
The chicken thighs are non-negotiable here. Skin-on, bone-in yields the crispiest result, though boneless works if that’s what’s available. Source from Whole Foods or a trusted butcher for consistent sizing—aim for pieces around 6-8 oz each. Diamond Crystal kosher salt is ideal for even seasoning distribution, as its coarse texture adheres better to the skin.
Need to swap? Chicken breasts can work but require precise timing to avoid dryness (pound to even thickness). Out of olive oil? Avocado oil has a high smoke point, but lacks the flavor depth. For salt, Morton kosher works in a pinch—just use 25% less due to its finer grain. Black pepper must be freshly ground for maximum aroma.
Prep the chicken just before cooking—salted thighs can sit at room temperature for 30 minutes for better seasoning penetration. Leftovers keep in the fridge for 3-4 days. Reheat in a skillet to revive the crispy skin.
Why You’ll Love This Recipe
- One Pan Wonder: I toss the thighs with olive oil, salt, and pepper, then let the oven do the rest—no fuss, no mess.
- Crispy & Juicy: The skin gets golden and crackly while the meat stays tender inside. Honestly, it’s the simplest way to get that perfect bite.
- Weeknight Hero: Between us, this is my go-to for busy evenings. It’s ready before the kids finish their homework.
- Budget Stretcher: Chicken thighs are cheap, and this recipe makes them taste like a million bucks. Leftovers? Even better the next day.
Step-by-Step Instructions for 4 Ingredient Chicken
Here’s the method. Straightforward, tested, works every time.
Step 1: Season the Chicken Thighs Generously
Pat the 2 lb Chicken Thighs completely dry with paper towels. Any moisture will prevent proper browning and crisping. I press down firmly with the towels, especially on the skin side, to absorb all liquid.
Season both sides evenly with the 1.5 tbsp Kosher Salt and 1 tsp Black Pepper. I use my fingers to work the seasoning into the meat, ensuring every surface is coated. The salt should look almost excessive—this is what creates that flavorful crust. Let the seasoned thighs sit at room temperature for 10-15 minutes while you preheat your pan.
Step 2: Heat the Olive Oil to the Right Temperature
Place a large, heavy-bottomed skillet over medium-high heat. Add the 3 tbsp Extra-Virgin Olive Oil and allow it to heat until it shimmers but doesn’t smoke. This is the sweet spot for searing—hot enough to create a crispy exterior without burning the oil.
I test the oil by flicking a tiny piece of chicken into the pan. If it sizzles immediately, the oil is ready. If it just sits there, give it another 30 seconds. The right temperature ensures the skin renders its fat gradually, creating that perfect golden-brown crust.
Step 3: Sear the Chicken Skin-Side Down First
Carefully place the chicken thighs in the pan skin-side down. Work in batches if necessary to avoid crowding—this drops the oil temperature and steams the chicken instead of searing it. You should hear a loud sizzle as soon as each piece hits the pan.
Let the thighs cook undisturbed for 6-8 minutes until the skin is deep golden brown and crispy. I press down gently with tongs during the first minute to ensure full contact with the pan. Resist the urge to move them—this is when the magic happens. The skin will release naturally when it’s ready to flip.
Step 4: Finish Cooking and Rest
Flip the thighs and cook for another 5-7 minutes on the flesh side. The chicken is done when an instant-read thermometer inserted into the thickest part reads 165°F. You’ll also notice the juices running clear when pierced with a knife.
Transfer the cooked thighs to a plate and let them rest for 5 minutes before serving. This resting period allows the juices to redistribute throughout the meat. If you cut into them immediately, all those flavorful juices will end up on your cutting board instead of in the chicken. Serve immediately while still warm.
Pro Tips For Making 4 Ingredient Chicken
- Pat Thighs Dry: I learned this the hard way—wet chicken steams instead of sears. Use paper towels and press hard to get every bit of moisture off the skin.
- Salt 40 Minutes Early: Sprinkle the kosher salt on the thighs and let them sit uncovered in the fridge. Sounds weird, but it works: the salt penetrates deep and guarantees crispy skin.
- Start Skin-Side Down: High heat, skin-side down first, and don’t touch it for at least 5 minutes. Resist the urge to peek—this is how you get that golden crust.
- Rest Before Serving: After cooking, give it a solid 5-10 minutes under foil. I skip this when I’m lazy, but the juices stay put and the meat is way more tender when I don’t.
Essential Equipment for Perfect Results
Skillet Selection
For this dish, I always reach for my 12-inch Lodge cast iron skillet. Its even heat distribution and retention are perfect for getting that crispy skin without hot spots. The weight also helps keep the chicken flat for consistent browning. 🔥
Tongs for Control
Invest in a good pair of 12-inch locking tongs—I prefer OXO Good Grips for their comfortable handle and precise control. You need to flip the chicken confidently without piercing the skin, and these won’t let you down.
Instant-Read Thermometer
A ThermoWorks ThermoPop is my go-to for checking doneness. It gives accurate readings in 3-4 seconds, which is crucial for preventing overcooking. I check the thickest piece in the batch to ensure it hits 165°F.
Paper Towels Matter
Don’t underestimate the importance of good paper towels. I use Brawny for patting the chicken dry—they’re strong enough to handle the job without falling apart. Dry skin is essential for that perfect crisp.
Oil Dispenser
An olive oil dispenser with a pour spout helps control the 3 tbsp precisely. I like the OXO Steel Oil Pourer for its dripless design. It keeps my stovetop clean while ensuring I use just the right amount.
These tools make this simple recipe foolproof every time. ✨
Nutrition Facts
Frequently Asked Questions
Can I use chicken breasts instead of thighs?
Yes, but they require careful timing. Pound to even thickness and cook for 5-6 minutes per side to prevent dryness. Thighs are more forgiving and stay juicier.
Why is the skin not crispy?
Pat the thighs completely dry before seasoning and avoid crowding the pan. Cook skin-side down undisturbed for 6-8 minutes on medium-high heat.
How do I know when it’s done?
Use an instant-read thermometer—it’s done at 165°F in the thickest part. Juices should run clear when pierced with a knife. Never guess!
Can I make this ahead of time?
Cook just before serving for best texture. Reheat in a skillet for 2-3 minutes to revive crispiness. Leftovers keep 3-4 days in the fridge.

- Jollof Rice Sauce Recipe: West African Tomato and Spice Infusion - September 25, 2026
- Japanese Rice Soup Recipe: Umami-Rich Comfort in a Bowl - September 25, 2026
- Homemade Cream Of Rice Recipe: Silk-Smooth Breakfast in Minutes - September 25, 2026