
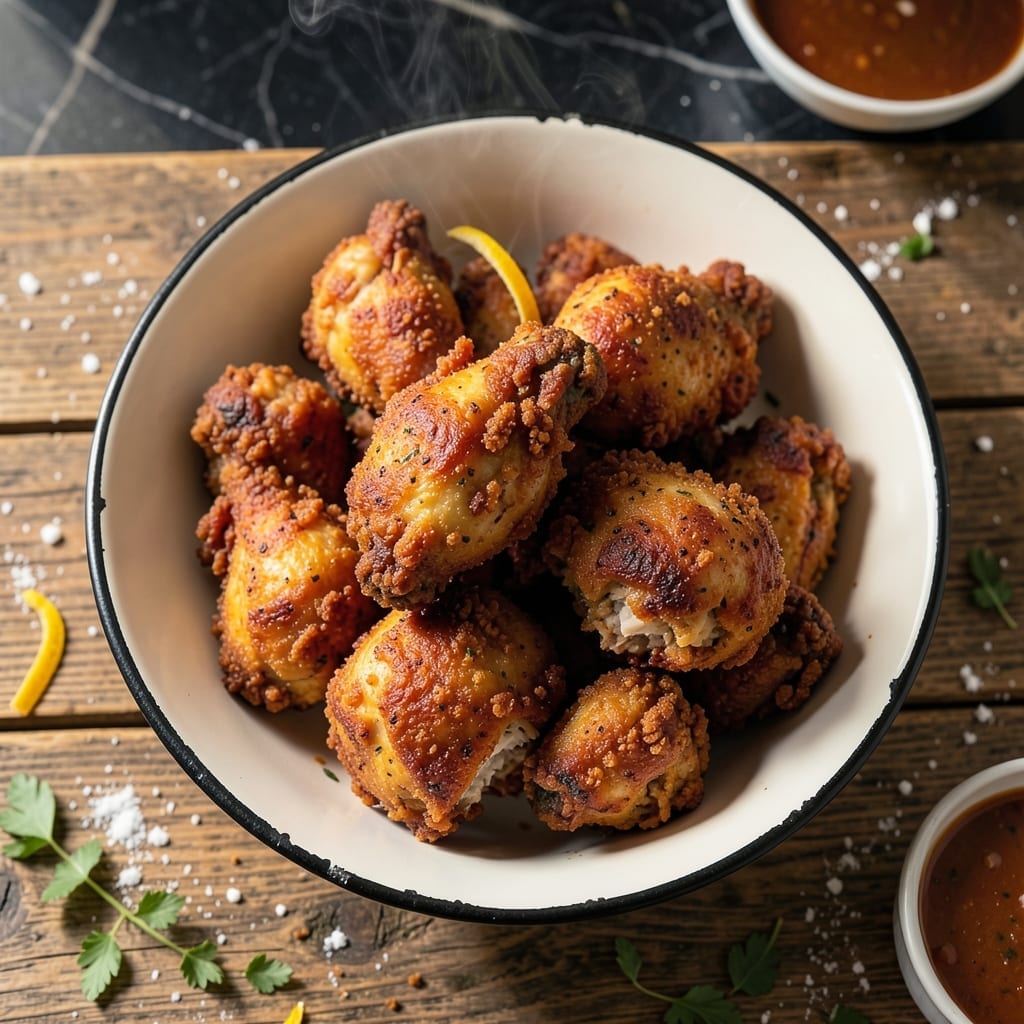
There’s a reason American fried chicken remains a timeless favorite—the crispy, golden-brown coating and juicy meat are hard to resist. This recipe relies on a buttermilk marinade and a carefully balanced spice blend to deliver that signature crunch and flavor.
The key to success lies in the double-dipping method: first in seasoned flour, then in buttermilk, and back into the flour for maximum coverage. Frying at the right temperature ensures the outside cooks to perfect crispness without drying out the meat.
What you’ll get is fried chicken that’s tender on the inside, shatteringly crisp on the outside, and packed with savory, slightly spicy notes. It’s a dish that feels like a celebration with every bite.
Serve it hot with classic sides for a meal that’s sure to impress. Here’s how to make it right.
Ingredients for American Fried Chicken
These classic ingredients create that iconic crispy, juicy American favorite everyone loves.
| Ingredient | Amount | Notes |
|---|---|---|
| Chicken Thighs 🍗 | 4 lb | Bone-in, skin-on for best texture |
| Buttermilk 🥛 | 2 cups | Full-fat for maximum tenderness |
| All-Purpose Flour 🌾 | 3 cups | Plus extra for dredging |
| Paprika 🌶️ | 2 tbsp | Sweet or smoked variety |
| Garlic Powder 🧄 | 2 tsp | Not garlic salt |
| Onion Powder 🧅 | 2 tsp | Fresh ground preferred |
| Dried Thyme 🌿 | 1 tsp | Rubbed between fingers |
| Dried Oregano 🍃 | 1 tsp | Mediterranean variety |
| Cayenne Pepper 🔥 | ½ tsp | Adjust to taste |
| Salt 🧂 | 1 tbsp | Diamond Crystal preferred |
| Black Pepper 🌶️ | 1 tbsp | Freshly ground |
| Vegetable Oil 🫒 | 4 cups | For deep frying, high smoke point |
The chicken matters most here. Bone-in, skin-on thighs give you the juiciest, most flavorful result—breasts dry out too easily. Most supermarkets carry them pre-packaged, but butcher counter lets you pick the plumpest pieces. Look for skin that’s smooth and unbroken (no tears or discoloration). For the buttermilk, full-fat is non-negotiable—low-fat versions won’t tenderize properly.
No buttermilk? Whole milk plus 1 tbsp vinegar or lemon juice per cup works in a pinch. Swap paprika for smoked paprika if you like a deeper flavor. Out of fresh spices? Dried herbs at half the amount get the job done. The cayenne can be omitted if heat isn’t your thing, but don’t skip the salt—it’s what makes the crust so addictive.
Marinate the chicken in buttermilk for 4-12 hours (overnight is ideal). Leftovers keep 3-4 days in the fridge—reheat in the oven to maintain crispiness. The flour mixture can be prepped ahead and stored in an airtight container for 1 week.
Why You’ll Love This Recipe
- One Pan Magic: I just toss the thighs in buttermilk and flour, fry them up, and boom—minimal mess, maximum flavor.
- That Crunch Though: The paprika and garlic powder in the coating give it this warm, smoky bite that’s downright addictive.
- Weeknight Hero: Honestly, it’s my go-to for busy evenings when I need something hearty without the fuss.
- Leftovers? Yes Please: The crispiness holds up surprisingly well, so I can pack it for lunch the next day and still feel like I’m winning.
Step-by-Step Instructions for American Fried Chicken
Here’s the method. Straightforward, tested, works every time.
Step 1: Marinate Chicken Thighs in Buttermilk
Place the 4 lb chicken thighs in a large bowl and pour the 2 cups buttermilk over them. Make sure all pieces are fully submerged, turning to coat. The buttermilk’s acidity tenderizes the meat while its thickness helps the coating adhere.
Cover the bowl and refrigerate for at least 4 hours, or preferably overnight. This marination period is non-negotiable for achieving maximum juiciness. You’ll notice the buttermilk start to thicken slightly as it works its magic on the chicken.
Step 2: Prepare the Secret Spice Blend
In a large shallow dish, combine the 3 cups all-purpose flour, 2 tbsp paprika, 2 tsp garlic powder, 2 tsp onion powder, 1 tsp dried thyme, 1 tsp dried oregano, 0.5 tsp cayenne pepper, 1 tbsp salt, and 1 tbsp black pepper.
Whisk thoroughly until the mixture is uniform in color and texture. I rub the dried thyme and oregano between my fingers as I add them to release their full aroma. This blend creates that signature crunchy, flavorful crust we’re after.
Step 3: Coat and Rest the Chicken
Remove chicken thighs from the buttermilk, letting excess drip off. Dredge each piece thoroughly in the seasoned flour mixture, pressing firmly to ensure a thick, even coating. For extra crunch, I like to repeat the process—dip back in buttermilk then flour again.
Place the coated pieces on a wire rack set over a baking sheet. Let them rest for 15-20 minutes at room temperature. This resting period allows the coating to set, preventing it from falling off during frying. You should see the coating transform from wet and floury to slightly tacky and firm.
Step 4: Deep Fry to Golden Perfection
In a large, heavy-bottomed pot, heat the 4 cups vegetable oil to 350°F over medium-high heat. Use a deep-fry thermometer for accuracy—this temperature is crucial for even cooking without burning the exterior. The oil is ready when a pinch of flour dropped in sizzles vigorously.
Carefully lower the chicken into the hot oil, working in batches to avoid overcrowding. Fry for 12-15 minutes, turning occasionally, until the coating is deep golden brown and the internal temperature reaches 165°F. The chicken should float freely when done.
Step 5: Drain and Serve Immediately
Transfer fried chicken to a paper towel-lined plate or wire rack to drain. The paper towels absorb excess oil while maintaining crispness. I prefer a wire rack as it allows air circulation on all sides, preventing the coating from getting soggy.
Let the chicken rest for 5 minutes before serving. This brief rest allows the juices to redistribute while keeping the coating crisp. Serve immediately while hot—the difference between just-fried and cooled fried chicken is dramatic in both texture and flavor.
Pro Tips For Making American Fried Chicken
- Double Fry for Crisp: I learned this the hard way—fry once at 325°F until golden, rest 5 minutes, then fry again at 375°F for that shatteringly crisp crust that stays put.
- Marinate Overnight: Sounds obvious, but buttermilk needs at least 12 hours in the fridge with those thighs to tenderize properly. Skip this and you’ll taste the difference.
- Dry the Chicken: After the buttermilk soak, pat those thighs bone-dry with paper towels before dredging—excess moisture is the enemy of a good crust.
- Season the Flour: Mix 1 tablespoon each of paprika and garlic powder into your flour dredge. The flavor sticks better than sprinkling it on after, and it’s the thing that matters most for that classic taste.
Dietary Considerations for These Flavors
Gluten-Free Adaptation
For a gluten-free version, swap the all-purpose flour for a 1:1 gluten-free baking blend like King Arthur Measure for Measure. Add 1 tsp xanthan gum to improve coating adhesion. The texture will be slightly different but still delicious.
Dairy-Free Option
Replace buttermilk with unsweetened almond milk mixed with 1 tbsp lemon juice per cup. Let it sit for 5 minutes to curdle. I’ve tested this with Silk brand and the results are surprisingly authentic.
Lower Sodium
Reduce the salt by half and use low-sodium paprika and garlic powder. Boost flavor with 1 tsp lemon zest and 1 tbsp fresh herbs like thyme or rosemary. The citrus brightens the dish naturally. 💡
Keto-Friendly Version
Use almond flour and crushed pork rinds (about 1 cup each) instead of all-purpose flour. Fry in avocado oil for a higher smoke point. The coating won’t be as crispy but still packs great flavor.
Air Fryer Method
For a lighter take, cook at 375°F for 12-15 minutes, flipping halfway. Spray the basket with avocado oil and mist the chicken lightly before cooking. It won’t be identical to deep-frying but still satisfying.
Allergen Notes
This recipe contains dairy (buttermilk) and gluten (flour). For nut allergies, ensure your frying oil hasn’t been cross-contaminated. Always check spice blend labels for hidden allergens. 💪
Nutrition Facts
Frequently Asked Questions
What’s the best oil for frying?
Use oils with a high smoke point like vegetable, peanut, or canola. Vegetable oil is most common due to its neutral flavor and affordability. Avoid olive oil as it burns at frying temperatures.
How do I keep the coating crispy?
Drain on a wire rack instead of paper towels to prevent steam from making the coating soggy. Serve immediately for maximum crunch. Resting for 5 minutes helps the juices settle without losing crispness.
Can I make this ahead of time?
Marinate the chicken up to 24 hours ahead. Coat just before frying for best texture. Leftovers keep 3-4 days in the fridge—reheat in the oven at 375°F for 10-12 minutes.
Why did my coating fall off?
This usually happens if the chicken wasn’t dry before dredging or didn’t rest after coating. Ensure pieces are patted dry and rest for 15-20 minutes before frying. Overcrowding the fryer can also cause this issue.

- Jollof Rice Sauce Recipe: West African Tomato and Spice Infusion - September 25, 2026
- Japanese Rice Soup Recipe: Umami-Rich Comfort in a Bowl - September 25, 2026
- Homemade Cream Of Rice Recipe: Silk-Smooth Breakfast in Minutes - September 25, 2026