
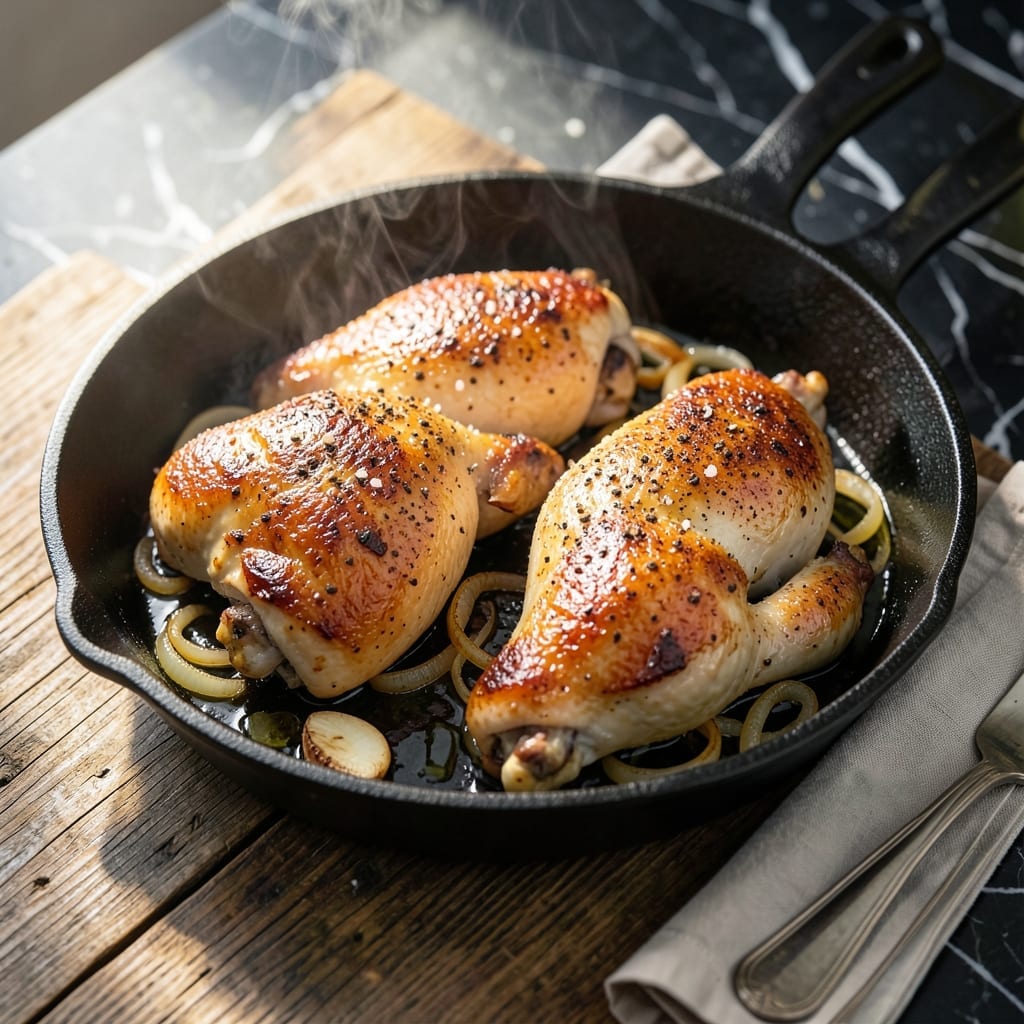
Achieving crispy skin and moist meat in pan-fried chicken requires precision, not luck. This method delivers consistent results by controlling heat and timing carefully.
The key is starting with dry chicken and a hot pan. This ensures the skin renders properly without steaming the meat, which would make it tough instead of moist.
You’ll end up with golden, shatteringly crispy skin and juicy meat that stays tender. The technique works for bone-in or boneless pieces with the same reliable outcome.
No special equipment needed—just a good pan and attention to detail. Here’s how to master this essential cooking skill.
Ingredients for Chicken in Frying Pan
Precision starts with quality ingredients for perfect pan-fried chicken every time.
| Ingredient | Amount | Notes |
|---|---|---|
| Chicken Thighs 🍗 | 2 lb | Bone-in, skin-on for crispiness |
| Kosher Salt 🧂 | 1 ½ tsp | Diamond Crystal preferred for even seasoning |
| Freshly Ground Black Pepper 🌶️ | 1 tsp | Coarse grind for texture |
| Garlic Powder 🧄 | 1 tsp | Not garlic salt for pure flavor |
| Smoked Paprika 🌶️ | 1 tsp | Adds depth to crust |
| Onion Powder 🧅 | 1 tsp | Balances savory notes |
| Extra-Virgin Olive Oil 🫒 | ¼ cup | High smoke point variety |
| Unsalted Butter 🧈 | 2 tbsp | For basting and richness |
| Fresh Thyme Sprigs 🌿 | 4 sprigs | Optional for aromatic finish |
| Fresh Rosemary Sprigs 🌿 | 2 sprigs | Optional for aromatic finish |
| Lemon 🍋 | 1 whole | Zest and juice for brightness |
The chicken is everything here. Bone-in, skin-on thighs deliver the crispiest skin and most moist meat—breasts dry out too fast. Source from Whole Foods or a trusted butcher for consistent sizing. Pat the skin bone-dry before seasoning (this isn’t optional). Diamond Crystal kosher salt is my go-to for even distribution without over-salting.
No smoked paprika? Regular paprika plus a pinch of cayenne works. Out of fresh herbs? Dried thyme and rosemary at one-third the amount will do—just add them to the seasoning mix. The butter can be swapped for ghee if you want higher smoke point. For extra flavor, try adding a dash of cayenne or garlic powder to the skin before cooking.
Seasoned chicken keeps 2 days in the fridge (uncooked). Leftovers? They’ll last 4 days but reheat in a dry pan to revive the skin. Freeze uncooked portions for up to 3 months—thaw before cooking.
Why You’ll Love This Recipe
- One Pan Magic: I love that everything cooks in a single frying pan—just season, sear, and serve.
- Smoky Depth: That smoked paprika gives the chicken thighs a rich, almost barbecue-like flavor without any sauce.
- Weeknight Hero: Honestly, it’s my go-to for busy evenings when I need dinner fast but still crave restaurant-quality taste.
- Budget Friendly: Chicken thighs are cheap, and a little garlic powder plus smoked paprika makes them taste like a million bucks.
Step-by-Step Instructions for Chicken in Frying Pan
Here’s the method. Straightforward, tested, works every time.
Step 1: Season the Chicken Thighs Thoroughly
Pat the 2 lb Chicken Thighs completely dry with paper towels. Moisture is the enemy of crispy skin, so be meticulous, especially around the bone and under the skin. I press down firmly to absorb every drop.
In a small bowl, combine the 1.5 tsp Kosher Salt, 1 tsp Freshly Ground Black Pepper, 1 tsp Garlic Powder, 1 tsp Smoked Paprika, and 1 tsp Onion Powder. Rub this mixture evenly over all surfaces of the chicken, including under the skin. This ensures every bite is seasoned perfectly.
Step 2: Sear the Chicken for Maximum Crispiness
Heat a large skillet over medium-high heat and add the 0.25 cup Extra-Virgin Olive Oil. When the oil shimmers (but isn’t smoking), carefully place the chicken in the pan skin-side down. Don’t crowd the pan—cook in batches if necessary to avoid steaming.
Let the chicken cook undisturbed for 7-8 minutes until the skin is deep golden brown and crisp. Resist the urge to move it; this builds the crust. You’ll know it’s ready to flip when it releases easily from the pan.
Step 3: Finish Cooking and Baste with Aromatics
Flip the chicken and reduce heat to medium. Add the 2 tbsp Unsalted Butter, 4 sprigs Fresh Thyme Sprigs, and 2 sprigs Fresh Rosemary Sprigs to the pan. Tilt the skillet slightly and use a spoon to baste the chicken with the hot butter and herbs.
Cook for another 6-7 minutes until the chicken reaches an internal temperature of 165°F and the juices run clear. The basting adds layers of flavor and ensures the skin stays crisp while the meat remains juicy.
Step 4: Rest and Finish with Lemon
Transfer the chicken to a plate and let it rest for 5-10 minutes. This allows the juices to redistribute, keeping the meat moist. While the chicken rests, squeeze the 1 whole Lemon over the pan to deglaze, scraping up any browned bits.
Pour the pan juices over the chicken before serving. The lemon brightens the rich flavors, and the aromatic herbs infuse the final dish. Each piece should have a crisp, golden exterior with tender, flavorful meat underneath.
Pro Tips For Making Chicken In Frying Pan
- Pat the Thighs Dry: Use paper towels to thoroughly dry the chicken thighs before seasoning—I learned this the hard way after my first few batches steamed instead of seared.
- Start Hot, Finish Medium: Crank the pan to high for the first 2 minutes to get that crust, then drop to medium so the garlic powder and smoked paprika don’t burn.
- Skip the Overcrowding: Resist the urge to fit all the thighs in one pan; they’ll steam instead of brown, and nobody wants sad, pale chicken.
- Rest Under Foil: Give the chicken a solid 5 minutes under foil after cooking—it keeps the juices from running all over your cutting board.
Pro Cooking Tips for Perfect Results
Pan Selection Matters
Use a heavy-bottomed pan like cast iron or stainless steel for even heat distribution. I avoid nonstick because it doesn’t get hot enough for proper browning. A 12-inch skillet gives you enough room to cook 4-6 thighs without crowding. 🔥
Heat Control is Key
Start with medium-high heat for the initial sear, then reduce to medium when flipping. Too high heat burns the butter and herbs. I use a thermometer to monitor oil temperature—350-375°F is the sweet spot for crispy skin.
Don’t Skip the Rest
Resting the chicken for 5-10 minutes isn’t optional. The juices need time to redistribute. I tent it loosely with foil to keep it warm. Skipping this step means dry meat, no matter how perfect your sear was.
Basting Technique
Tilt your pan and use a spoon to pour the hot butter-herb mixture over the chicken continuously. This bastes the meat while cooking. I focus on the skin side to keep it crisp and flavorful. 2 tbsp butter is perfect for 2 lb chicken thighs.
Internal Temperature Check
Always use a meat thermometer. Chicken is safe at 165°F, but I pull it at 160°F since it’ll rise 5°F while resting. Insert the probe into the thickest part, avoiding the bone for accurate reading.
Herb Placement
Add herbs during the last 6-7 minutes of cooking to prevent burning. I use thyme and rosemary sprigs whole—no chopping needed. They infuse the butter beautifully without overpowering the dish. Remove them before serving. 💡
Nutrition Facts
Frequently Asked Questions
What’s the best pan for this method?
Use a heavy-bottomed pan like cast iron or stainless steel for even heat. Avoid nonstick as it doesn’t get hot enough for proper browning. A 12-inch skillet prevents crowding.
Can I use chicken breasts instead?
You can, but they dry out faster. Reduce cooking time to 5-6 minutes per side and monitor internal temperature closely. Thighs are more forgiving and consistently juicier.
How do I know when it’s done?
Use a meat thermometer: 165°F is safe, but pull at 160°F since it rises while resting. The skin should be deep golden brown and crisp.
Why does my skin turn out soggy?
Moisture is the culprit. Pat the chicken completely dry before cooking and avoid crowding the pan. High heat and undisturbed cooking create crispiness.

- Chuy’s Green Chili Rice Copycat Recipe: Spicy Southwest Flavor in Every Bite - September 25, 2026
- Beaten Rice Recipe: Fluffy Grains With Nutty Depth - September 25, 2026
- Machboos Rice Recipe: Bahraini Spiced One-Pot Tradition - September 25, 2026