
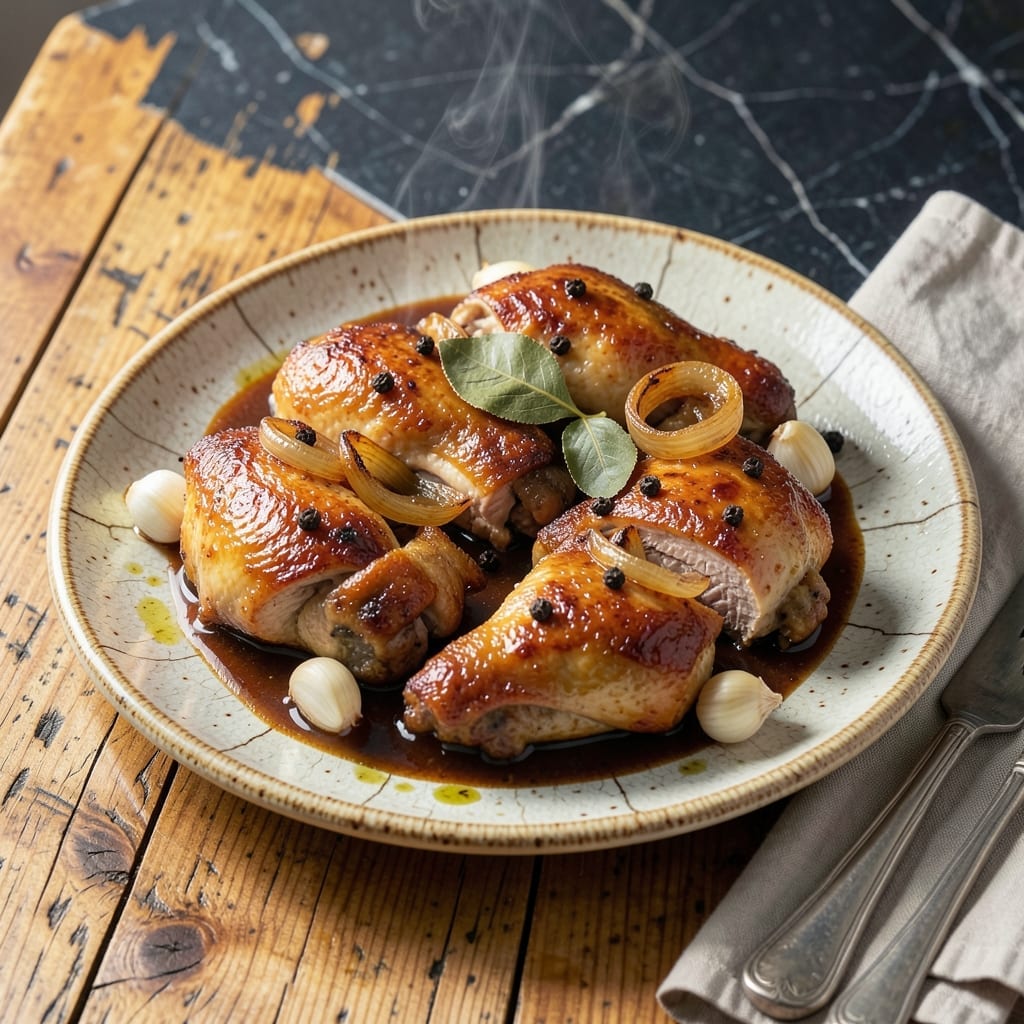
This baked chicken adobo delivers the perfect balance of tangy vinegar and rich garlic flavor with minimal effort.
I developed this method to capture traditional adobo taste while using the oven for hands-off cooking. The chicken emerges tender and infused with the classic vinegar-soy-garlic marinade.
The sauce reduces into a glossy glaze that coats each piece, creating that signature adobo stickiness without constant stovetop attention.
Serve with steamed rice to soak up every drop of the savory sauce. This technique ensures consistent results every time.
Ingredients for Baked Chicken Adobo
Classic Filipino flavors come together with pantry staples and a few fresh additions.
| Ingredient | Amount | Notes |
|---|---|---|
| Chicken Thighs 🍗 | 2 ½ lb | Bone-in, skin-on preferred |
| Soy Sauce 🫒 | ½ cup | Low-sodium recommended |
| White Vinegar 💧 | ½ cup | Cane or distilled white |
| Garlic Cloves 🧄 | 8 cloves | Peeled, smashed |
| Black Peppercorns 🌶️ | 1 tbsp | Whole, lightly crushed |
| Bay Leaves 🍃 | 3 pieces | Dried, whole |
| Brown Sugar 🫙 | 2 tbsp | Light or dark variety |
| Olive Oil 🫒 | 2 tbsp | For searing chicken |
| Onion 🧅 | 1 whole | Medium, sliced into rings |
| Water 💧 | ½ cup | To thin the sauce |
| Green Onions 🧅 | 4 pieces | Thinly sliced for garnish |
The chicken thighs are non-negotiable here—bone-in, skin-on gives you that melt-in-your-mouth texture. Whole Foods or Costco have great organic options if you’re avoiding antibiotics. Look for pieces that are similar in size so they cook evenly. The soy sauce should be low-sodium so you can control the saltiness. Kikkoman is a reliable brand, but any quality soy sauce works.
No white vinegar? Apple cider vinegar works in a pinch (slightly fruity note). Out of brown sugar? Coconut sugar at equal amounts. If you don’t have bay leaves, a pinch of dried thyme adds depth. The garlic can be pre-minced if you’re short on time, but fresh cloves (smashed, not chopped) release more flavor into the sauce.
This tastes even better the next day—3-4 days in the fridge. Freeze for up to 3 months (the sauce thickens slightly when reheated). Portion leftovers with rice for easy lunches.
Why You’ll Love This Recipe
- One Pan Wonder: I toss everything together in a baking dish—chicken, soy sauce, vinegar, garlic—and let the oven do the work.
- Tangy umami punch: That first bite of soy-vinegar-garlic sauce with juicy chicken thighs? I make extra just to drizzle over rice.
- Meal Prep Hero: It reheats beautifully, so I double the batch for lunches all week. Honestly, it tastes even better the next day.
- Budget Stretcher: Chicken thighs stay affordable, and the pantry staples mean I’m never scrambling for special ingredients.
Step-by-Step Instructions for Baked Chicken Adobo
Here’s the method. Straightforward, tested, works every time.
Step 1: Sear the Chicken Thighs for Depth of Flavor
Pat the 2.5 lb chicken thighs dry with paper towels, ensuring the skin is completely free of moisture. Heat the 2 tbsp olive oil in a large oven-safe skillet or Dutch oven over medium-high heat until shimmering.
Place the chicken thighs skin-side down in the hot oil. Sear undisturbed for 6-7 minutes until the skin is deep golden brown and crisp. Flip and sear the other side for 3-4 minutes. The skin should release easily when properly browned. Remove the chicken and set aside.
Step 2: Build the Aromatic Adobo Base
In the same skillet, add the sliced 1 whole onion and cook for 3 minutes until softened and slightly caramelized. Add the 8 cloves garlic cloves, 1 tbsp black peppercorns, and 3 pieces bay leaves, stirring for 1 minute until the garlic is fragrant.
Pour in the 0.5 cup soy sauce, 0.5 cup white vinegar, and 2 tbsp brown sugar. Stir well to combine, scraping up any browned bits from the bottom of the pan. These bits add depth to the sauce, so don’t skip this step. Simmer for 2 minutes to meld the flavors.
Step 3: Braise in the Oven Until Tender
Return the chicken thighs to the skillet, skin-side up, nestling them into the sauce. Pour in the 0.5 cup water to thin the sauce slightly. The liquid should come about halfway up the chicken. Cover the skillet with a lid or foil.
Transfer the skillet to a preheated 375°F oven. Braise for 45-50 minutes until the chicken is fork-tender and the internal temperature reaches 165°F. The sauce should be slightly reduced and glossy, coating the back of a spoon.
Step 4: Reduce and Garnish for Serving
Remove the skillet from the oven and transfer the chicken to a serving platter. Place the skillet back on the stovetop over medium heat. Simmer the sauce for 3-5 minutes until it thickens slightly and intensifies in flavor.
Spoon the reduced sauce over the chicken thighs. Garnish with the 4 pieces green onions, thinly sliced, for a fresh finish. The green onions add a pop of color and a mild oniony bite that complements the tangy adobo sauce perfectly.
Pro Tips For Making Baked Chicken Adobo
- Marinate Overnight: Soak the chicken thighs in soy sauce, vinegar, and crushed garlic for at least 4 hours—I learned this the hard way when my first batch tasted flat. The longer it sits, the deeper the flavor.
- Pat Dry First: Blot the chicken thighs dry before baking, even if they’ve been marinated. Skip this and you’ll steam them instead of getting that sticky, caramelized crust.
- Baste Halfway: After 20 minutes in the oven, brush the chicken with the pan juices. This keeps the meat moist and builds layers of flavor—my grandmother swore by this, and she was right.
- Use Bone-In Thighs: Resist the urge to use boneless cuts. Bone-in thighs stay juicier and stand up to the long bake time without drying out—sounds weird, but it works.
Make-Ahead Tips for This Recipe
Marinate Overnight
For maximum flavor, combine the chicken with soy sauce, vinegar, garlic, and spices in a bowl and refrigerate for 8-12 hours. This step lets the acid in the vinegar tenderize the meat while the garlic infuses every bite. I always prep this the night before for stress-free cooking. ⏰
Partial Prep Option
Short on time? Sear the chicken and build the aromatic base, then refrigerate the mixture for up to 24 hours. The next day, just add the water and braise as directed. The flavors will still develop beautifully during the oven time.
Freeze for Later
This dish freezes wonderfully for up to 3 months. Cool completely, then transfer to airtight containers or heavy-duty freezer bags. I portion mine with rice for easy grab-and-go meals. Label with the date for best tracking. ❄️
Reheating from Frozen
Thaw overnight in the fridge, then reheat in a covered skillet over medium-low heat for 15-20 minutes. Add a splash of water if the sauce seems too thick. The chicken will taste just as tender as the day you made it.
Sauce Consistency Tip
If making ahead, under-reduce the sauce slightly before storing. When reheating, the sauce will thicken further as it simmers. This prevents it from becoming too salty or syrupy. I learned this the hard way after my first batch turned into a gluey mess!
Garnish Last
Always add fresh green onions right before serving. Their crisp texture and bright flavor are best when added fresh. This small step makes a big difference in both presentation and taste. 💡
Nutrition Facts
Frequently Asked Questions
Can I use chicken breasts instead of thighs?
You can, but bone-in thighs stay juicier. Breasts dry out faster, so reduce baking time to 30-35 minutes. For best results, brine breasts in saltwater for 30 minutes first to retain moisture.
What if my sauce is too salty?
Balance it by adding 1-2 tbsp brown sugar or a splash of water. Simmer for 5 minutes to blend flavors. Next time, use low-sodium soy sauce to prevent this.
How do I prevent the chicken skin from getting soggy?
Pat skin very dry before searing and avoid crowding the pan. For extra crispiness, broil on high for 2-3 minutes at the end.
Can I make this in a slow cooker?
Yes! Sear chicken first, then transfer to slow cooker with all ingredients. Cook on low for 4-5 hours or high for 2-3 hours. Finish sauce on stovetop.

- Jollof Rice Sauce Recipe: West African Tomato and Spice Infusion - September 25, 2026
- Japanese Rice Soup Recipe: Umami-Rich Comfort in a Bowl - September 25, 2026
- Homemade Cream Of Rice Recipe: Silk-Smooth Breakfast in Minutes - September 25, 2026