
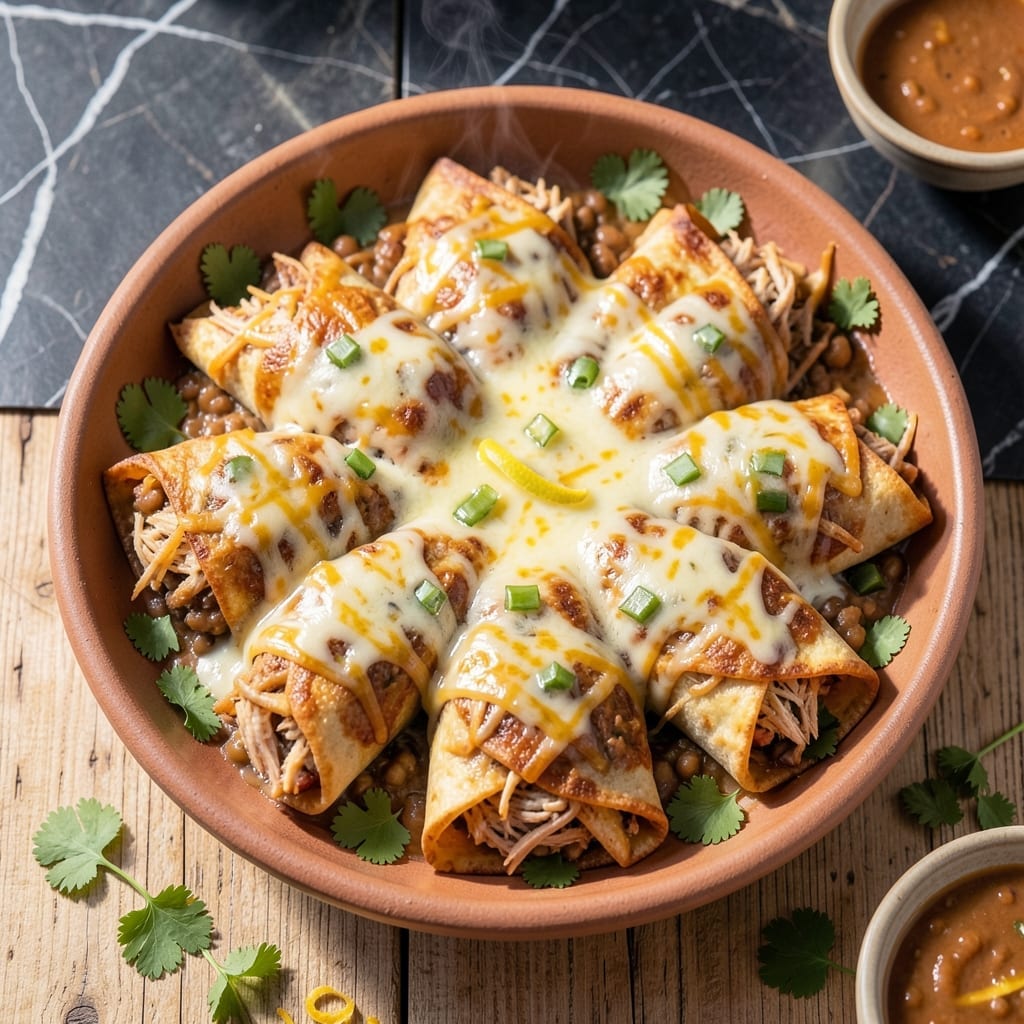
This baked approach delivers the crispy texture you love without the fuss of deep frying. After years of testing, I’ve perfected a method that turns simple ingredients into a satisfying, family-friendly meal.
The secret lies in brushing the tortillas with oil before baking, creating a golden, flaky exterior that holds its shape. Each bite reveals tender chicken, melted cheese, and a hint of zesty seasoning.
What sets this version apart is the ease—just assemble, bake, and enjoy. The result is a dish that’s just as delicious as traditional chimichangas, with far less mess.
Perfect for weeknight dinners or casual gatherings, these bake up beautifully in under 30 minutes. Here’s how to make them right.
Ingredients for Baked Chicken Chimichangas
Simple ingredients transform into crispy, cheesy, family-friendly chimichangas in under 30 minutes.
| Ingredient | Amount | Notes |
|---|---|---|
| Boneless Skinless Chicken Breasts 🍗 | 1 ½ lb | Cooked and shredded |
| Flour Tortillas 🌯 | 8 pieces | Large, burrito-sized (10-inch) |
| Shredded Monterey Jack Cheese 🧀 | 2 cups | Or substitute cheddar blend |
| Shredded Cheddar Cheese 🧀 | 1 cup | Sharp for extra flavor |
| Refried Beans 🫘 | 1 can | Traditional or vegetarian |
| Diced Green Chiles 🌶️ | 1 can | 4 oz, mild or hot |
| Chimichanga Seasoning 🌿 | 2 tbsp | Or taco seasoning blend |
| Olive Oil 🫒 | ¼ cup | For brushing tortillas |
| Sour Cream 🥣 | ½ cup | For topping (optional) |
| Fresh Cilantro 🌿 | ¼ cup | Chopped, for garnish |
| Green Onions 🧅 | 4 pieces | Thinly sliced for topping |
| Salsa 🍅 | 1 cup | For topping (optional) |
| Salt 🧂 | ½ tsp | To taste |
| Black Pepper 🌶️ | ¼ tsp | Freshly ground preferred |
The tortillas are key—Mission or Old El Paso burrito-sized hold up best to baking. I grab mine from Walmart or Target (the fridge section, not shelf-stable). For the chicken, rotisserie chicken from the grocery store saves time and adds moisture. Look for tortillas with minimal ingredients—just flour, water, oil. The shredded cheese? Pre-shredded blends work but melt better if you shred your own from a block.
No Monterey Jack? Pepper Jack at half the amount adds a nice kick. Fresh chicken works too—poach and shred it yourself. Swap refried beans for black beans (drained and mashed) if you prefer. The green chiles can be fresh roasted (peeled and diced) or canned at one-third the amount. Out of sour cream? Greek yogurt (plain, full-fat) is a perfect stand-in.
Assemble these right before baking—they’ll soften if they sit. Leftovers keep 3-4 days in the fridge. Reheat in a dry skillet to recapture crispiness, or pop under the broiler for 2-3 minutes. They freeze beautifully for up to 2 months.
Why You’ll Love This Recipe
- One Pan Wonder: I just roll, fill, and bake—no frying, no mess, and the oven does all the work.
- Cheesy Heaven: That gooey Monterey Jack and cheddar melt into the shredded chicken and refried beans like a flavor party in every bite.
- Weeknight Hero: Honestly, it’s my go-to for busy evenings when I need something hearty that the whole family will actually eat.
- Leftovers Win: Between us, they taste even better the next day—crispy edges stay intact, and the filling holds up perfectly for lunch.
Step-by-Step Instructions for Baked Chicken Chimichangas
Here’s the method. Straightforward, tested, works every time.
Step 1: Prepare the Chicken and Bean Filling
In a large bowl, combine the 1.5 lb Boneless Skinless Chicken Breasts (cooked and shredded) with the 1 can Refried Beans, 1 can Diced Green Chiles, and 2 tbsp Chimichanga Seasoning. Mix thoroughly until all ingredients are evenly incorporated and the chicken is well coated.
This step ensures every bite is packed with flavor. I always taste the filling at this point and adjust the seasoning with a pinch of salt and black pepper if needed—it should taste bold and well-seasoned before baking.
Next, stir in 2 cups Shredded Monterey Jack Cheese and 1 cup Shredded Cheddar Cheese. The cheeses will melt beautifully during baking, creating that irresistible gooey texture we all love in a chimichanga.
Step 2: Fill and Roll the Tortillas
Lay out the 8 pieces Flour Tortillas on a clean work surface. Divide the chicken and cheese filling evenly among them, placing about ½ cup of the mixture onto the center of each tortilla. Be careful not to overfill—this can cause the chimichangas to burst open while baking.
Fold the sides of each tortilla inward, then roll tightly from the bottom up, tucking in the sides as you go to create a secure, burrito-style package. Place each rolled chimichanga seam-side down on a large baking sheet lined with parchment paper.
Real talk: if the tortillas are cracking as you roll, they might be too dry. Lightly dampen them with a bit of water or warm them briefly in the microwave to make them more pliable.
Step 3: Brush with Oil and Bake to Crispy Perfection
Preheat your oven to 425°F. Lightly brush the tops and sides of each chimichanga with 0.25 cup Olive Oil. This step is crucial for achieving that promised crispy texture—don’t skip it.
Bake on the center rack for 20-25 minutes, then flip each chimichanga carefully using a spatula. Brush the other side with the remaining olive oil and return to the oven for another 10-15 minutes until both sides are golden brown and crisp.
You’ll know they’re done when the tortillas are firm to the touch and have that beautiful crispy exterior. The filling should be hot and bubbly, with the cheese fully melted.
Step 4: Garnish and Serve Immediately
Let the chimichangas cool for 5 minutes after removing them from the oven. This brief rest helps them set and makes them easier to handle without falling apart.
Garnish with 0.25 cup Fresh Cilantro (chopped) and 4 pieces Green Onions (thinly sliced). Serve with 0.5 cup Sour Cream and 1 cup Salsa on the side for dipping. The contrast of the cool, creamy toppings with the hot, crispy chimichangas is what makes this dish truly special.
The crispy tortillas should hold their shape while still being easy to cut into. Each bite should deliver a perfect balance of tender chicken, creamy beans, melted cheese, and that satisfying crunch.
Pro Tips For Making Baked Chicken Chimichangas
- Sear the Chicken: Poach or simmer the chicken breasts first, then shred and pan-sear for 2-3 minutes—this adds a smoky depth the oven alone can’t deliver.
- Warm the Tortillas: Microwave the flour tortillas for 15-20 seconds wrapped in a damp towel to prevent cracking when you roll them tight around the filling.
- Seal the Edges: Use a tiny dab of refried beans as “glue” on the tortilla flap before folding; it sticks better than cheese and won’t ooze out during baking.
- Broil at the End: After 20 minutes at 375°F, hit them with 2-3 minutes under the broiler for that blistered, golden crust—watch closely, though, they burn fast.
Flavor Customization for These Flavors
Spicy Kick
For heat lovers, add 1-2 chopped jalapeños to the filling or use hot diced green chiles instead of mild. I also like mixing in ½ tsp cayenne pepper with the seasoning. The spice cuts through the richness beautifully. 🌶️
Vegetarian Twist
Swap the chicken for 1 can black beans (drained and mashed) and add 1 cup sautéed bell peppers for texture. The refried beans and cheese still create that creamy, satisfying filling everyone expects from this dish.
Extra Cheesy
For cheese fanatics, add an extra ½ cup pepper jack cheese to the filling and sprinkle ¼ cup shredded cheddar on top before baking. The result is a gooey, melty center that stretches with every bite.
Southwest Flavors
Stir 1 cup corn kernels and 1 tsp cumin into the filling for a Southwest-inspired version. I also add 1 tbsp lime juice to brighten the flavors. This variation pairs perfectly with avocado crema.
Breakfast Chimichangas
Transform leftovers into breakfast by adding 4 scrambled eggs and ½ cup cooked sausage crumbles to the filling. Serve with a side of hot sauce for a hearty morning meal. 💡
Kid-Friendly
For picky eaters, reduce the green chiles to ½ can and omit the seasoning. Add ½ cup mild salsa to the filling instead. The familiar flavors make this an easy sell for little ones.
Nutrition Facts
Frequently Asked Questions
Can I use corn tortillas instead?
Flour tortillas work best for baking as they hold together better. Corn tortillas tend to crack or dry out. If using corn, warm them first and keep filling to ⅓ cup per tortilla.
How do I keep them from getting soggy?
Bake on a wire rack set over a baking sheet for air circulation. Also, don’t skip brushing with oil—it creates a moisture barrier for crispiness.
Can I make these ahead of time?
Assemble and refrigerate unbaked chimichangas up to 24 hours ahead. Add 5 minutes to baking time if cold. Avoid freezing before baking as it affects texture.
Why did my chimichangas burst open?
Overfilling is the usual culprit. Stick to ½ cup filling max per tortilla and roll tightly. If tortillas are dry, warm them slightly before rolling.

- Jollof Rice Sauce Recipe: West African Tomato and Spice Infusion - September 25, 2026
- Japanese Rice Soup Recipe: Umami-Rich Comfort in a Bowl - September 25, 2026
- Homemade Cream Of Rice Recipe: Silk-Smooth Breakfast in Minutes - September 25, 2026